
Download Assets
Download Assets
This tutorial includes 1 sample image. Downloads are free with a PHLEARN account.
- Free sample files with every tutorial on PHLEARN
- New tutorials published every week
- Unlimited downloads with your free PHLEARN account
Watch the Full Series
description
Editing wedding photos has a specific job: warm and a little dreamlike, the couple unmistakably the subject, and several hundred more waiting behind the one you are editing.
On Day 17 of 30 Days of Lightroom Classic we separate the couple with Lens Blur, light them with feathered radial gradients, and add a color grade subtle enough to survive a whole gallery.
This is Day 17 of our 30 Days of Lightroom Classic series. Follow along with all 30 episodes as we explore the magic of Lightroom together!
Continue Watching 30 Days of Lightroom Classic
JOIN 30 DAYS OF LIGHTROOM (FOR FREE!)
Ready to jump in? Sign up and we’ll email you a printable calendar and daily class schedule so you can get started right away!
Image Source


Wedding Photos Need the Couple to Win the Frame
Wedding photographs have a specific job. They need to feel warm and a little dreamlike, they need the couple to be unmistakably the subject, and there are usually several hundred of them waiting behind the one you are working on.
Day 17 is a fast, repeatable treatment: separate the couple from the background, light them without it looking lit, and add a color grade subtle enough to survive being applied to a whole gallery.
Separating the Couple With Lens Blur
Even a shot taken at a wide aperture often has a background doing more than it should. Lens Blur, in the right-hand panel of the Develop module, deepens that separation convincingly.
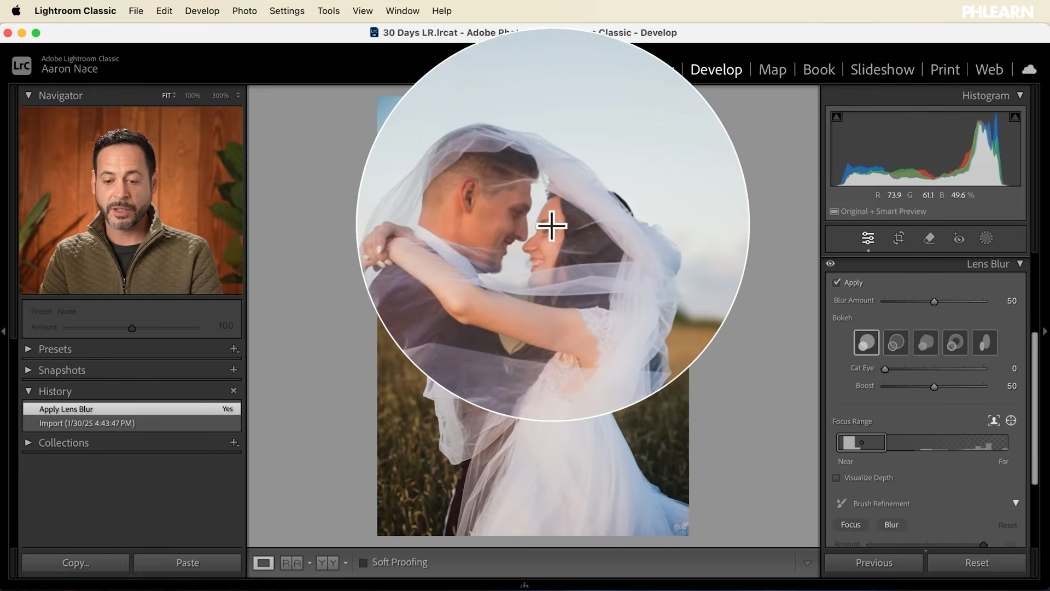
Click Apply and Lightroom detects the subject and blurs behind it automatically. The automatic depth map is decent, and there is one step that makes it considerably better:
Open Focus Range, click the small target icon, then drag a rectangle around your subjects on the image. You are telling Lightroom explicitly what should be sharp, and the separation becomes far more accurate than the automatic guess — particularly around two people standing at slightly different distances.
Then set the Blur Amount. Zero returns the original. The temptation is to push it hard; resist. Enough to quiet the background and no more, or it starts looking like a phone portrait mode.
There are bokeh shape options too. The standard one is usually the right answer — and Lens Blur gets a full treatment on Day 21. Apply, target the subject, set the amount: that is most of what you need.
Lighting the Couple — and Why Feather Matters
Next, a gentle lift on the couple themselves. Not Select People — a radial gradient, because the goal is light falling on an area rather than an adjustment stopping at their outline.

Drag one out over the couple, raise the exposure a little, and then spend a moment on Feather.
This is the part worth changing your habits over. Leaving Feather at 100 for everything is the default behaviour for most people, and it is lazy. Bringing it down and then dialling it back up while watching the image lets you find the exact falloff that reads as light rather than as a bright oval.
The test is simple: if someone can tell you brightened the middle of the photograph, it is too much. Toggle the mask off and on. The after should look like better light, not like an edit.
A Vignette That Does Not Look Like a Vignette
Now the inverse, to close the frame down around them.
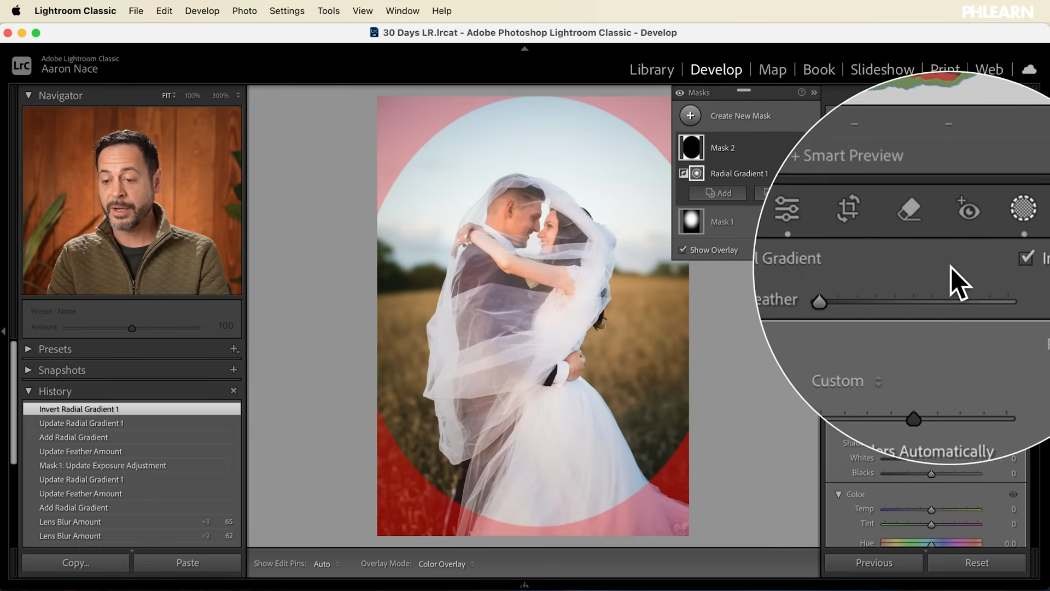
Another radial gradient over the couple, then Invert it — either from the three dots on the mask or the invert icon beside the Feather slider — so it affects everything outside. Lower the exposure slightly.
This beats the Effects panel vignette because it is not locked to the centre of the frame. If your couple sit off to one side, the darkening follows them.
Feather again at the end, after setting the exposure. Getting the falloff right is what separates this from the heavy-handed vignettes that date a photograph.
Two radial gradients — one brightening in, one darkening out — is the entire lighting treatment, and on a wedding image it does an enormous amount.
A Subtle Color Grade
Wedding photography suits color grading better than almost any other genre, because the goal is a mood rather than accuracy.
The method for each of the three wheels is the same, and the order matters:
-
Drag the centre point to the outer edge
Full saturation. It looks terrible, deliberately — you cannot judge a hue at 10% strength.
-
Rotate the outer hue ring all the way around
Go through the whole circle and stop where it looks right. On a wedding image a cool blue in the shadows is a reliable choice.
-
Pull the saturation back down hard
Back towards the centre until it is barely perceptible. This is where the actual decision lives.
Repeat for midtones, shadows and highlights. Use the eyeball at the top of the panel to check the whole grade against the original — it should read as a slight warmth or coolness, nothing you could name.
Subtlety matters more here than anywhere else, because this grade is going onto a few hundred images via Sync Settings. Anything strong enough to be striking on one frame will be wrong on half the gallery.
Where This Usually Goes Wrong
Too much Lens Blur. Past a certain point the edges give it away, especially around hair and veils.
Skipping the Focus Range target. The automatic detection is good; explicitly drawing a rectangle around the couple is better, and takes two seconds.
Leaving Feather at 100 by default. The single biggest tell of an amateur local adjustment. Dial it in every time.
Grading too strongly. It looks bold on one image and breaks across a gallery.
Editing every photo individually. Build this treatment once, then sync it and adjust per group. A wedding is not a set of single images.
Take It From Here
Three moves — blur the background, light the couple, grade gently — and a wedding image goes from good to romantic in a couple of minutes. Because none of it is heavy, the whole treatment survives being applied across an entire gallery, which is the only way wedding editing is ever finished.
Tomorrow, a genre with completely different rules: editing food photos in Lightroom Classic.
For photography and photo editing taught in order, our PRO Photography & Photo Editing Learning Path is where to go next.
Quick Reference: Keys, Menus and Settings
- Blur the backgroundDevelop > Lens Blur > Apply, then set Blur Amount
- Keep the couple sharpFocus Range > target icon, drag a rectangle around them
- Light the coupleMasking > Radial Gradient over them, Exposure up a little, then dial in Feather
- Darken the edgesSecond Radial Gradient, three dots > Invert (or the invert icon by Feather), Exposure down, Feather last
- Color gradeColor Grading: center point to the edge, rotate the hue, pull saturation back; repeat for each wheel
- CompareEye icon on the Color Grading panel; \ for the full before and after
Free Downloads
Follow Along on the Same Photo
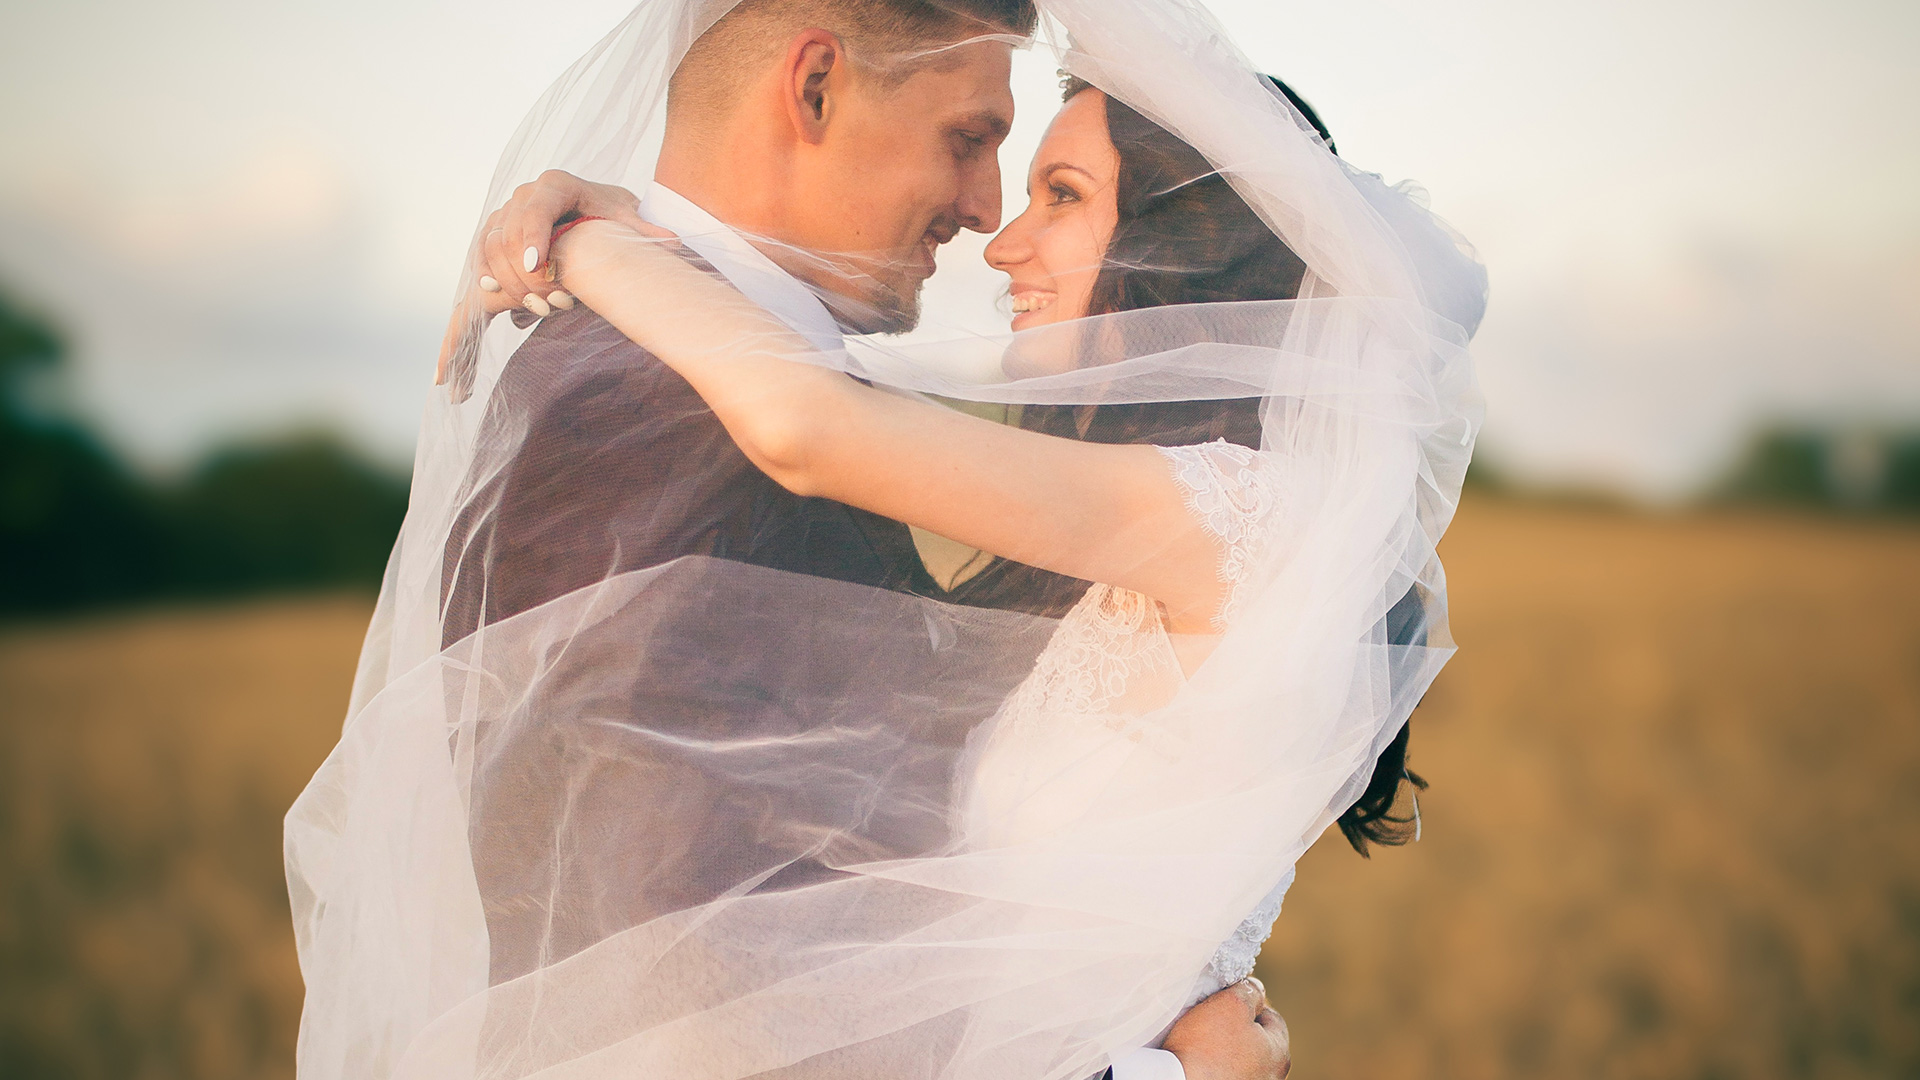
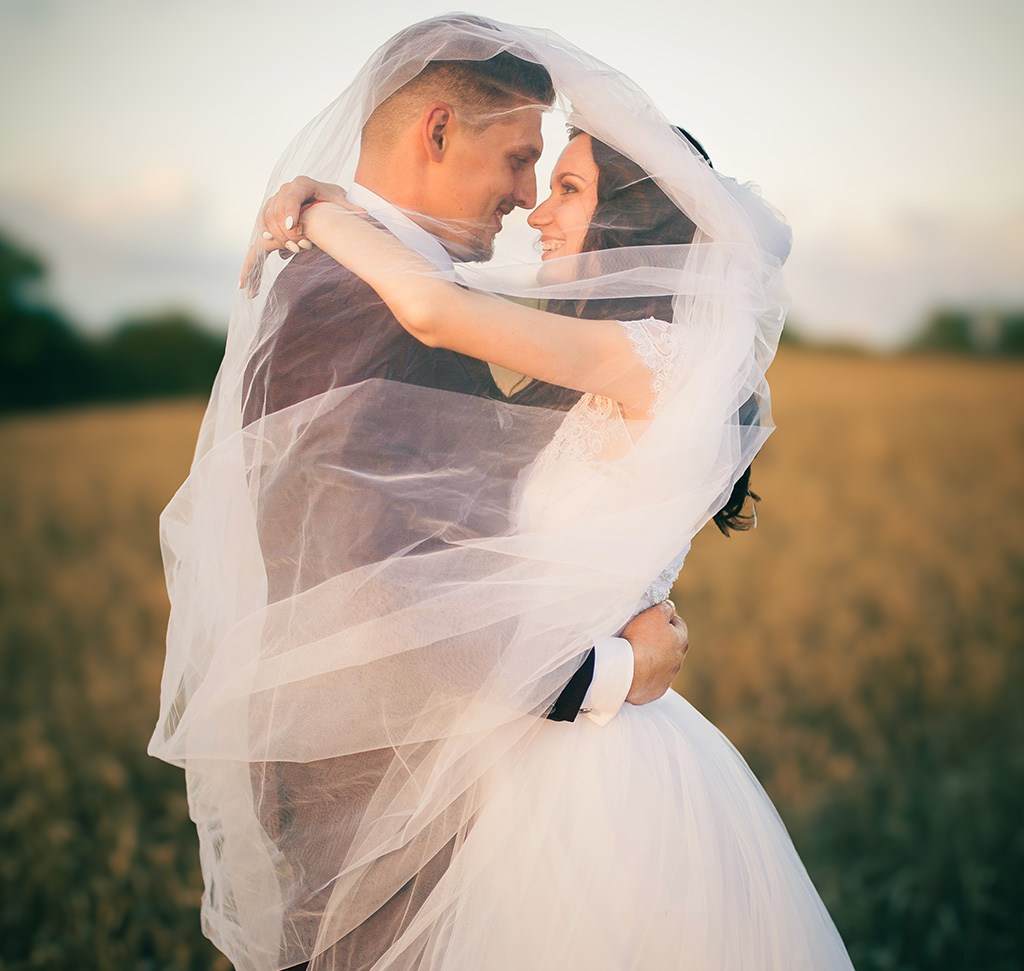
Get the wedding photo of the couple from the tutorial, ready for Lens Blur, two radial gradients and a soft color grade. Free with a PHLEARN account.
Wedding Photo Editing: Common Questions
How do I blur the background of a wedding photo in Lightroom?
Open Lens Blur in the right-hand panel of the Develop module and click Apply. Lightroom detects the subject and blurs the background behind them.
How do I keep the couple sharp with Lens Blur?
Under Focus Range, click the small target icon and drag a rectangle around the couple on the photo. That tells Lightroom exactly what should stay in focus.
How much Lens Blur should I use?
Just enough to quiet the background. Blur Amount at zero is the original photo; pushing it too far starts to look fake, especially around hair and veils.
How do I brighten the couple so it looks natural?
Drag a radial gradient over them and raise Exposure a little, then dial in the Feather. If someone can tell you brightened the middle of the photo, it is too much.
Should I leave Feather at 100?
No. Start low, then raise it while you watch the photo until the edge reads as light rather than a bright oval. Set it fresh every time you use a gradient.
How do I add a vignette that follows the couple?
Drag a second radial gradient over them and invert it, from the three dots on the mask or the invert icon beside the Feather slider. Lower Exposure a little, then adjust Feather last.
How do I color grade without overdoing it?
In Color Grading, drag the center point of a wheel out to the edge, rotate the hue ring until you like the color, then pull the saturation back down until it is barely there. Repeat for midtones, shadows and highlights.
How do I check the grade against the original?
Click the eye icon at the top of the Color Grading panel to switch the grade off and on. Press the backslash key for a before and after of the whole edit.
Can I use this edit on a whole wedding gallery?
Yes, with Sync Settings. That is why every move here is subtle: a grade strong enough to stand out on one photo will look wrong on half the gallery.
Is the sample file free?
Yes, with a free PHLEARN account. You get 1 sample image: a JPEG of the couple edited in the tutorial.
Master Photoshop, Lightroom and Photography
Join PHLEARN PRO for $12.99 a month or $99.99 a year. Cancel anytime, with a 100% money-back guarantee.





