

Download Assets
Download Assets
This tutorial includes 2 sample images and 1 sample PSD. Downloads are free with a PHLEARN account.
- Download the sample images and PSDs from every free tutorial on PHLEARN
- New free tutorials published every week
- One free account — sign up once, then download anything
Watch the Full Series
30 Days of Photoshop · 2025 EditionOur most-watched series, updated for 2025 — watch all 30 free
description
A mockup asks a flat graphic to pretend it lives inside a photograph, and there are only two ways it gives itself away: the perspective is wrong, or the lighting is.
Perspective is the easy half — a Smart Object and a corner-by-corner transform settle it. The lighting is the part most people paint by hand and get wrong. Instead, borrow it: Apply Image copies the photograph’s own highlights and shadows onto a layer clipped to your design, set to Soft Light.
This is Day 26 of 30 Days of Photoshop, 2025 Edition — our most-watched series, rebuilt from the ground up for today’s tools.
Continue Watching 30 Days of Photoshop
JOIN 30 DAYS OF PHOTOSHOP (FOR FREE!)
Ready to jump in? Sign up and we’ll email you a printable calendar and daily class schedule so you can get started right away!
Image Source
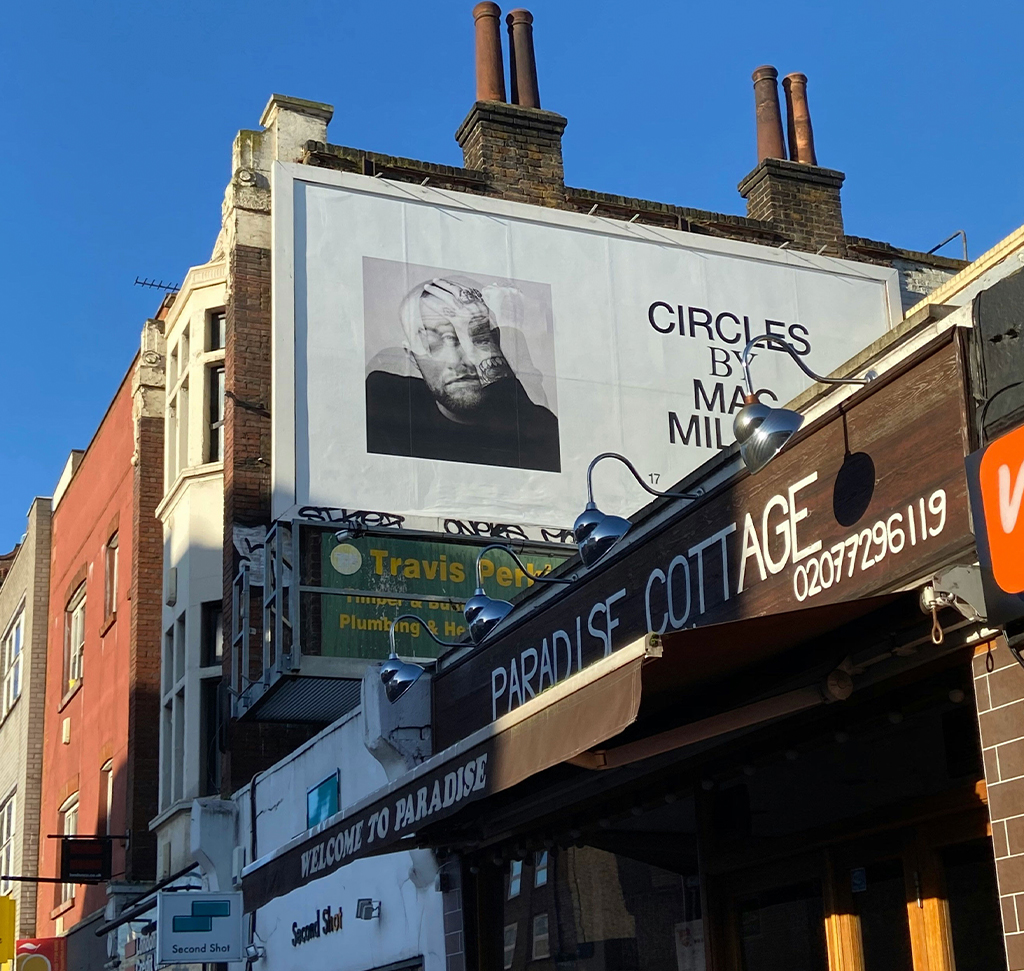
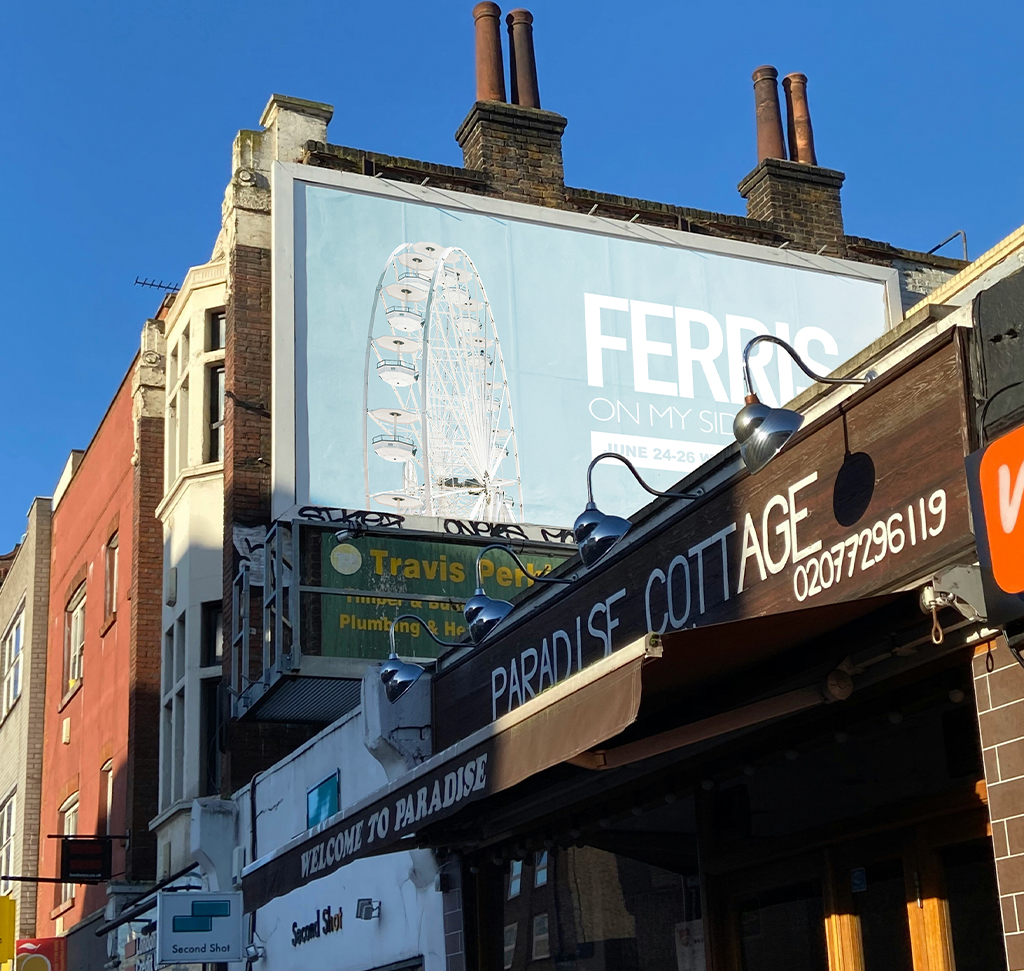
Create a Mockup That Inherits the Photograph’s Own Light
When you create a mockup you are asking a flat graphic to pretend it exists inside a photograph, and there are only two ways it gives itself away: the perspective is wrong, or the lighting is. Perspective is the easy half — a Smart Object and a free transform settle it in about a minute.
Lighting is where most mockups fail, and the fix is smarter than painting shadows by hand. The billboard, the poster, the shop sign already has highlights, shadows and grime in the original photograph. Rather than inventing that lighting, you borrow it back with Apply Image and let it fall onto your design.
The Three Phases
Clear the Existing Graphic
The Remove Tool with Generative AI wipes the surface you’re going to fill, so you’re placing your design on a clean plate rather than trying to cover something.
Place It as a Smart Object
Smart Objects are what make a mockup worth building: the design stays editable forever, and the perspective transform is non-destructive.
Borrow the Original Lighting Back
Apply Image copies the photograph’s own light onto a layer clipped to your design. This is the step that turns a flat rectangle into something that looks photographed.
Clear the Surface First
-
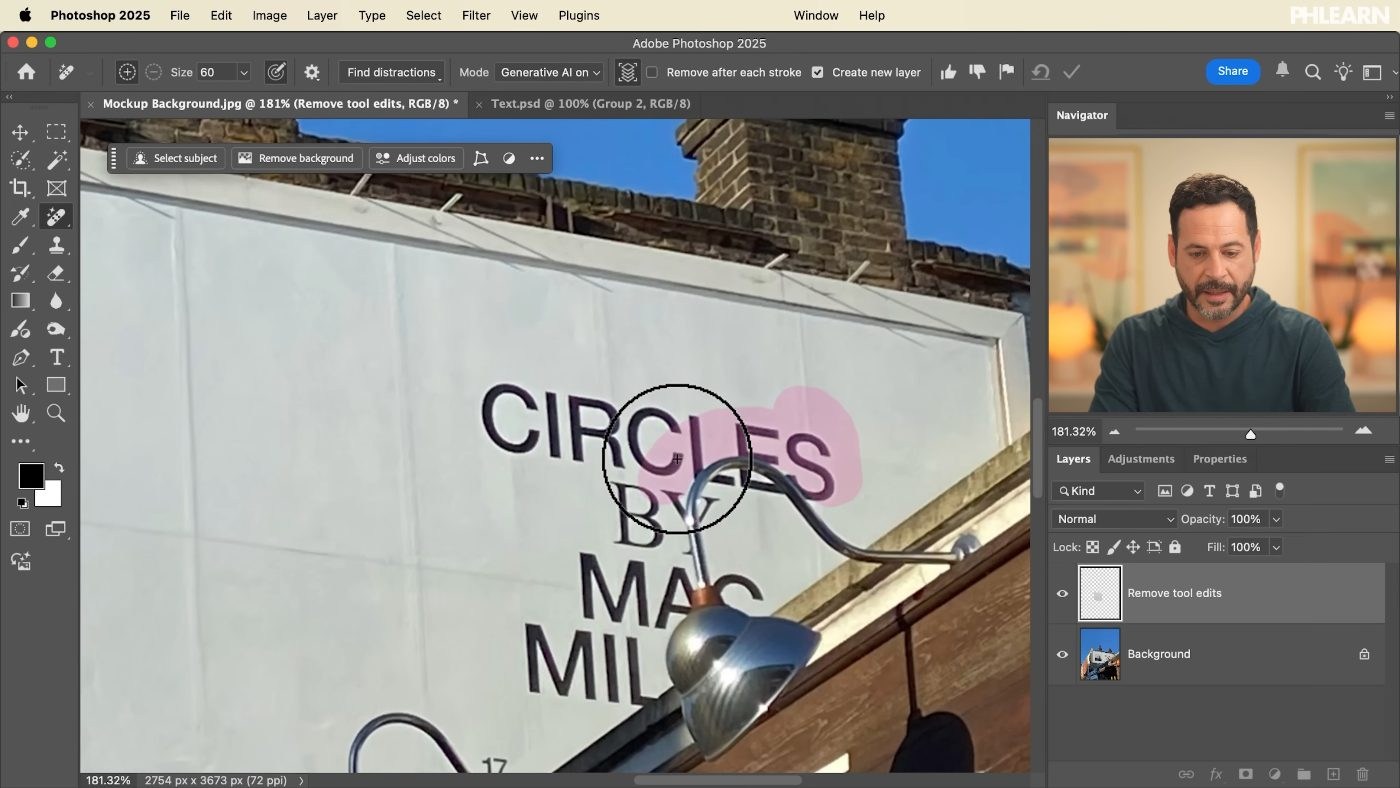
Select the Remove Tool and Check Your Settings
Generative AI on, “Remove after each stroke” unchecked, “Create new layer” checked. That last one keeps the removal off your background so you can undo it later without starting over.
-
Paint Over Whatever Is Already There
Existing text, a poster, a logo — brush across all of it, then click the checkmark and let it generate once. Doing it in a single pass rather than stroke by stroke gives the model the whole area to reason about.
Place the Design as a Smart Object
-
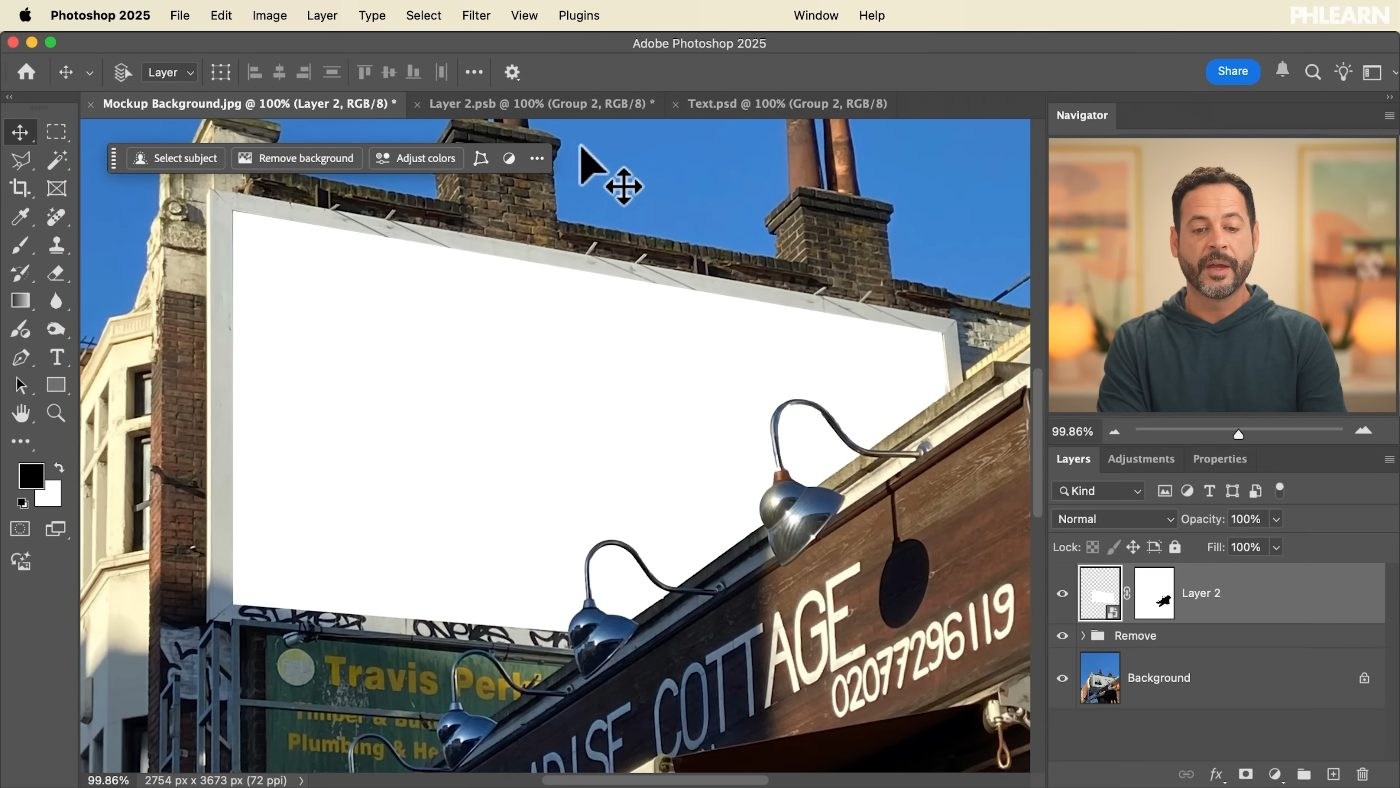
Rough Out the Shape With the Polygonal Lasso
Approximate the billboard or panel you’re filling. This is only a guide for size — it doesn’t need to be exact.

-
Fill a New Layer With White, Then Draw a True Rectangle Over It
Use the Rectangular Marquee. This matters: your design has to start as a perfect rectangle, because you’re going to distort it into perspective deliberately. Starting from an already-skewed shape means compounding two distortions.
-
Delete the Rough Layer and Convert the Rectangle to a Smart Object
Layer > Smart Objects > Convert to Smart Object.
-
Free Transform and Drag the Corners Independently
Cmd/Ctrl + T, then hold Cmd/Ctrl while dragging each corner. That modifier is what unlocks corner-by-corner distortion, and it’s how you match the perspective of the wall or sign in the photograph.
Borrow the Lighting Instead of Painting It
-
Hide the Smart Object for a Moment
You need to see the original surface underneath, because that’s what you’re about to copy.
-
Add a New Layer and Run Image > Apply Image
This bakes a flattened copy of the visible photograph — including every highlight, shadow and stain on that surface — onto the new layer.

-
Clip That Layer to Your Smart Object
Hold Alt/Option and click between the two layers. The borrowed lighting now applies only to your design and nowhere else.
-
Set the Clipped Layer to Soft Light
Make the Smart Object visible again. Soft Light keeps the tonal variation and drops the flat colour, so the photograph’s light lands on your graphic without repainting it.
-
Fine-Tune With Levels
Cmd/Ctrl + L on the clipped layer to push the borrowed shadows and highlights harder or pull them back. This is the dial that decides how weathered the surface looks.
Where Mockups Give Themselves Away
Five failures account for almost every mockup that doesn’t convince, and none of them are about the design itself.
The Graphic Is Perfectly Clean
Real surfaces are never evenly lit. If your design has no variation across it at all, the Apply Image step was skipped or the opacity is too low.
The Perspective Is Nearly Right
Nearly is worse than obviously wrong — it reads as uncanny. Match the corners to real lines in the photograph, not to your eye.
It Was Placed as a Flat Layer
No Smart Object means every revision starts over, and every transform degrades the pixels.
The Old Graphic Is Still Showing Through
Covering isn’t removing. Clear the surface properly first, or the ghost of the original text will sit under yours.
The Edges Are Too Sharp
A printed graphic on a real surface picks up the same slight softness as everything else in the frame.
Why the Smart Object Is the Whole Point
Double-click the Smart Object’s thumbnail and it opens in its own window as a flat, undistorted document. Edit the design there, save, and the mockup updates with the perspective and the borrowed lighting already applied.
That’s what separates a mockup from a one-off composite. A client asks for a different colour, a bigger logo, a new strapline — and you change it in the 2D file rather than rebuilding the perspective every time. Create a mockup properly once and it becomes a template you can point at any design for the rest of the project. Replacing a sign is the same technique on a smaller surface.
Build One Mockup Today
Find a photograph with a flat surface in it — a billboard, a shop window, a laptop screen. Clear it with the Remove Tool, draw a true rectangle, convert to a Smart Object and Cmd/Ctrl-drag the corners into perspective. Then hide it, Apply Image, clip, set to Soft Light and bring it back. Download the free sample images if you’d rather practise on ours. For everything Smart Objects can do beyond this, our PRO course The Ultimate Guide to Smart Objects goes considerably deeper.
Quick Reference: Keys, Menus and Settings
- Clear the surfaceRemove tool: Generative AI on, Remove After Each Stroke off, Create New Layer on; [ and ] for brush size
- Draw the shapeL Polygonal Lasso as a guide, then M Rectangular Marquee, fill with white; Cmd/Ctrl + D to deselect
- Make it editableLayer > Smart Objects > Convert to Smart Object
- Add perspectiveCmd/Ctrl + T, hold Cmd/Ctrl and drag each corner
- Edit the designDouble-click the smart object thumbnail, edit, Cmd/Ctrl + S
- Borrow the lightingNew layer, Image > Apply Image, Alt/Option-click between layers to clip, blend mode Soft Light
- Tune the lightingCmd/Ctrl + L on the clipped layer
Free Downloads
Follow Along on the Same Photos
Get the billboard photo, the design that goes on it, and a layered PSD with the smart object and borrowed lighting already set up. Free with a PHLEARN account.
Mockups in Photoshop: Common Questions
How do I remove the graphic that is already on the billboard?
Use the Remove tool with Generative AI on, Remove After Each Stroke unchecked and Create New Layer checked. Paint over the old text and logos, then click the check mark. If the result is off, undo and run it again.
Why start the design as a flat rectangle?
The billboard in the photo is already in perspective. Rough out its shape with the Polygonal Lasso as a size guide, then draw a true rectangle with the Rectangular Marquee and fill it with white. You add the perspective afterwards, on purpose.
Why does the mockup need to be a smart object?
Choose Layer > Smart Objects > Convert to Smart Object before you transform it. The perspective is never baked in, so you can design in a flat 2D file and every change shows up on the billboard.
How do I match the perspective of the billboard?
Press Cmd/Ctrl + T, then hold Cmd/Ctrl while you drag each corner onto the matching corner of the billboard. The modifier lets every corner move on its own.
How do I keep lamps and the building in front of my design?
Hide the mockup, select the original billboard with the Magic Wand (Shift-click to add, Tolerance about 35) and inverse the selection. Show the mockup again, add a layer mask and paint black with B to hide it there.
How do I change the design after it is in perspective?
Double-click the smart object’s thumbnail to open it as a flat document. Edit the design, press Cmd/Ctrl + S, and the mockup updates in perspective with the lighting still on top.
How do I add the photo’s real shadows and highlights to my mockup?
Hide the mockup, add a new layer and choose Image > Apply Image. Alt/Option-click between that layer and the mockup to clip it, show the mockup again and set the layer to Soft Light.
How do I make the borrowed lighting stronger or weaker?
Select the clipped Soft Light layer and press Cmd/Ctrl + L. Darken the darks, adjust the lights and the midtones until the surface looks as weathered as you want.
Why does my mockup still look fake?
Usually the graphic is perfectly clean with no lighting on it, the perspective is nearly but not quite right, or the old graphic is still showing through. Match the corners to real lines in the photo and clear the surface before you place anything.
Are the sample files free?
Yes, with a free PHLEARN account. You get 2 sample images and 1 sample PSD: the photo to build the mockup on, the design that goes into it, and the layered file with the smart object and borrowed light set up.
Master Photoshop, Lightroom and Photography
Join PHLEARN PRO for $12.99 a month or $99.99 a year. Cancel anytime, with a 100% money-back guarantee.





