
Download Assets
This tutorial includes 1 sample image, 1 sample PSD and 1 PDF guide. Downloads are free with a PHLEARN account.
- Download the sample images and PSDs from every free tutorial on PHLEARN
- New free tutorials published every week
- One free account — sign up once, then download anything
Free PDF Guide · 4 Pages
This Tutorial as a Step-by-Step PDF
Every step from the video in order: the two text layers, the Cylinder warp, Select Subject, the layer order, and the clipped, blurred cast shadow, with the shortcuts. Keep it next to your keyboard.
description
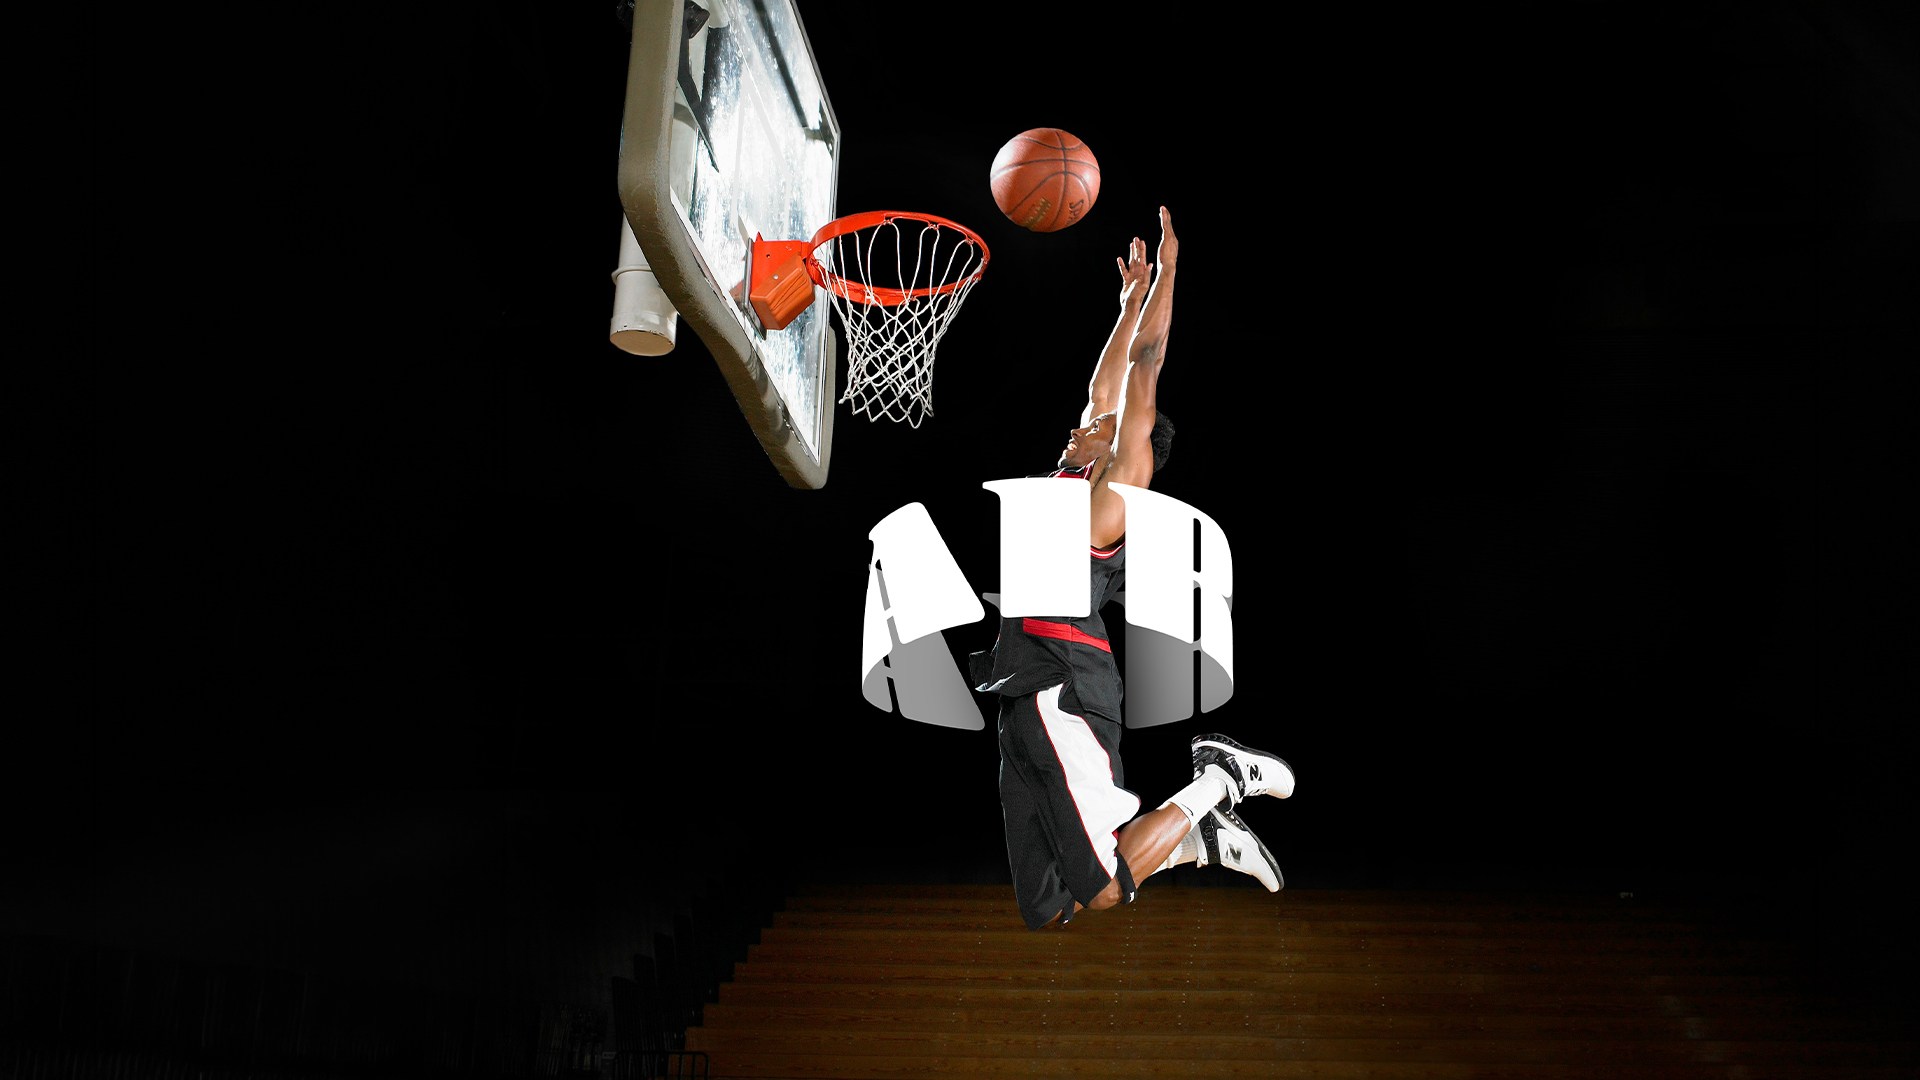
Learn how to build a 3D text effect that wraps around a subject in Photoshop without using AI! In this tutorial, you’ll discover how to build dynamic depth in your designs using non-destructive warping tools, smart layering techniques, and realistic shadow effects.
Enjoying This Free Tutorial?
We publish a new free tutorial every week, each one with sample images and PSDs you can download and follow along with. Sign up and they land straight in your inbox, along with early word on sales, events and subscriber-only offers.
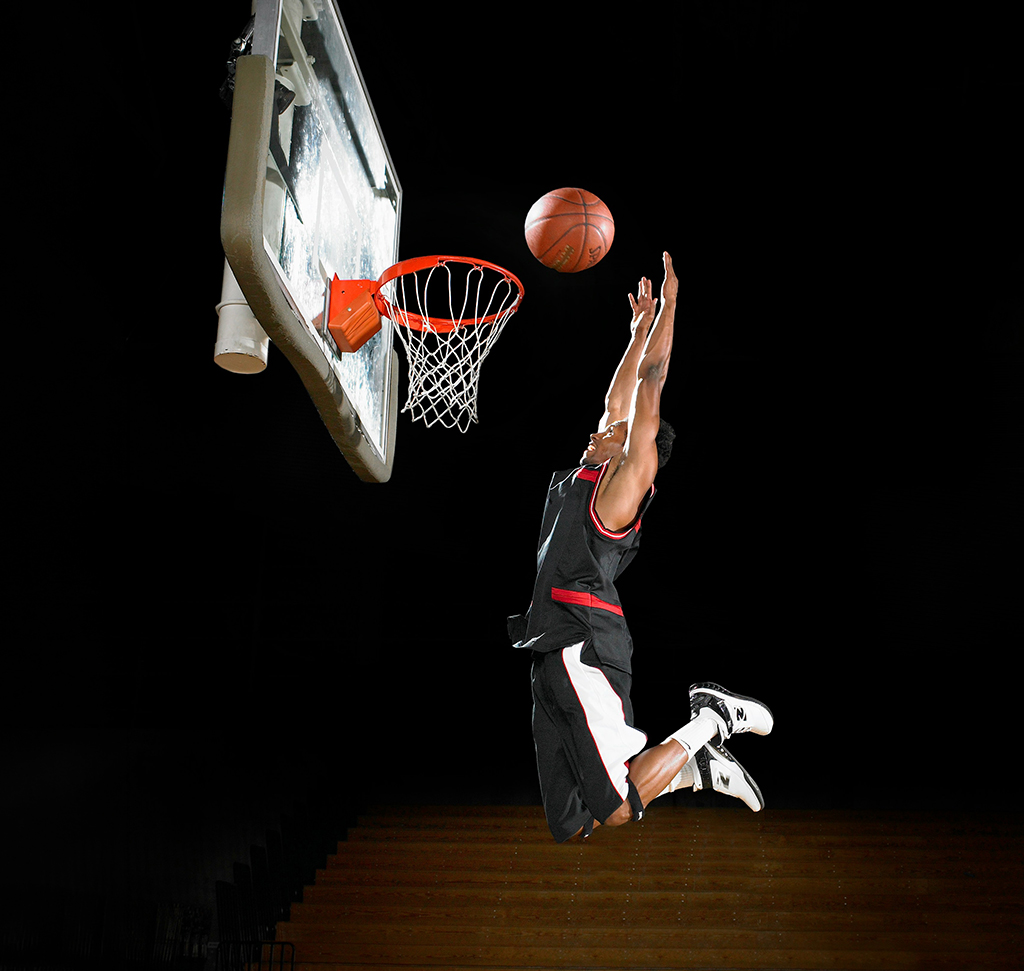
Image Source
The 3D Text Effect, Wrapped Around Your Subject in Photoshop
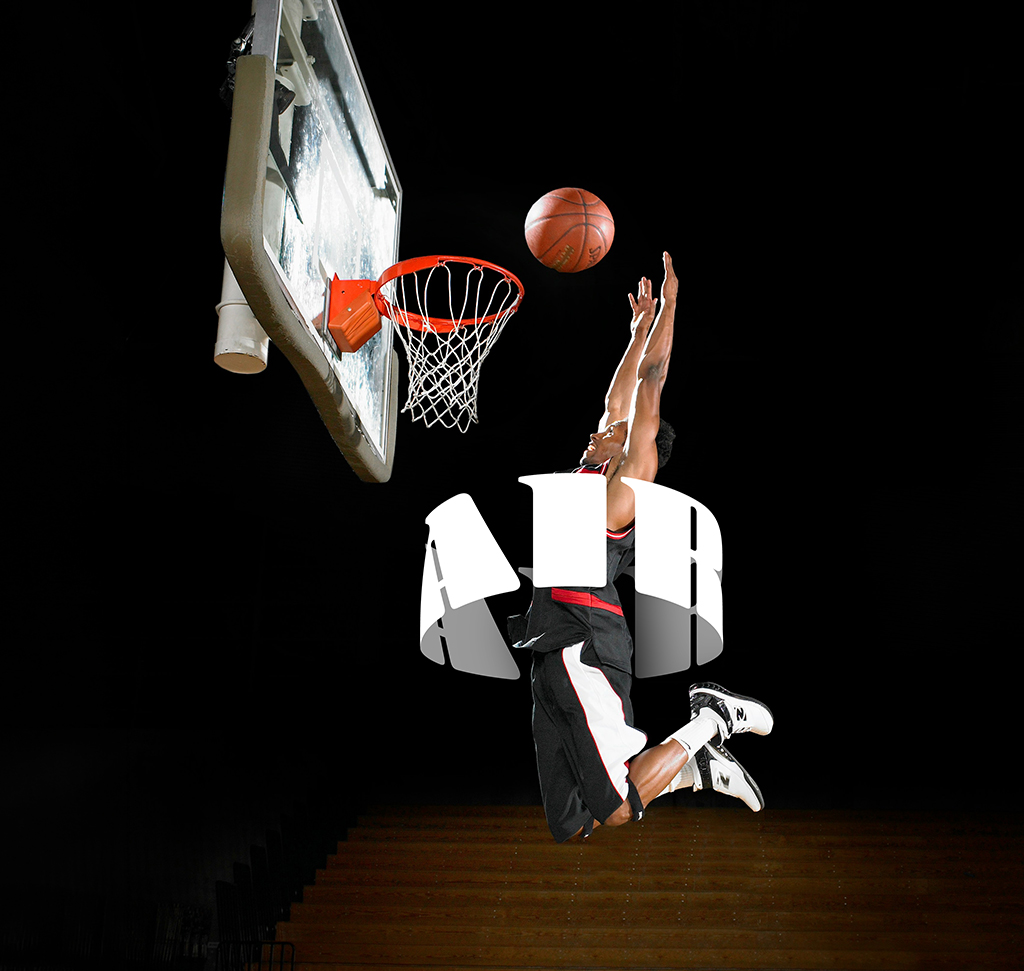
Wrapping flat 2D text around a subject in 3D space is one of the fastest ways to elevate a graphic, a portrait, or a poster design. It adds real depth and makes your typography feel like it genuinely shares space with your subject instead of sitting on top of the photo. Best of all, there’s no AI involved — the whole effect is built from Photoshop’s warp tools and smart layering, so you keep total creative control and every detail stays editable.
The technique comes down to three ideas: two copies of your text curved in opposite directions, your subject cut out and sandwiched between them, and a soft cast shadow to sell the illusion. Let’s build it.
What Makes This Worth Building Manually
No Generative Credits, No Plugins
Every step here uses tools that already ship with Photoshop — the Type Tool, Free Transform’s warp presets, Select Subject, and a Gaussian Blur. No generative fill, no third-party plugin, and nothing metered, so you can run this on as many designs as you like. If you want to go deeper on designing with type and imagery together, our PRO course on graphic photography builds on exactly these ideas.
Fully Non-Destructive
Your text stays live type, the subject lives on its own cutout layer, and the shadow becomes a Smart Object before it’s ever blurred. That means you can go back and change the word, adjust the curve, or soften the shadow at any point without rebuilding anything.
Set Up Your Text Layers
The whole effect depends on having two identical text layers stacked in exactly the same position — one that will curve up in front of your subject, and one that will curve down behind them.
-
Add Your Text
Grab the Type Tool (keyboard shortcut “T”) and set your text color to white so it reads clearly against your image. Click anywhere on the document, type your word, and click the checkmark in the options bar to commit it.
-
Pick a Bold Display Font
A thick, heavy typeface sells this effect far better than a thin one. You can pull one in without leaving Photoshop: go to Type > More from Adobe Fonts, search for the Blenny family, and click Add Family to sync it straight into your app.
-
Duplicate the Text Layer
With your text layer selected, press Cmd/Ctrl + J to duplicate it. Name the top copy Text Front and the bottom copy Text Back so you don’t lose track of which is which once they start overlapping.
-
Tint the Back Layer
Select the Text Back layer with the Type Tool and change its color to a slightly darker gray. This is partly a working aid so you can tell the two layers apart, and partly realism — the half of the ring travelling behind your subject would naturally catch less light.
-
Align Both Layers Perfectly
Select both text layers (Cmd/Ctrl-click each one), switch to the Move Tool (keyboard shortcut “V”), and use the alignment controls in the top options bar to align them vertically and horizontally. They need to sit in exactly the same spot — any offset here shows up as a broken, mismatched ring later.

Warp the Text Into the 3D Text Effect
This is where two flat words become a single ring travelling through space. The trick is that both layers get the same Cylinder warp — you just drag them in opposite directions.
-
Open Warp on the Front Layer
Click your Text Front layer and press Cmd/Ctrl + T for Free Transform. In the options bar at the top, click the “Switch between free transform and warp modes” icon to open the warp controls.
-
Apply a Cylinder Warp Curving Up
From the warp preset dropdown, choose Cylinder. Drag the top control handle upward to bow the text into the front curve of your ring, then hit the checkmark to confirm.
-
Warp the Back Layer the Opposite Way
Select the Text Back layer, press Cmd/Ctrl + T, open warp again, and choose Cylinder a second time. This time drag the handle downward to form the bottom half of the ring. Those two opposing curves are what create the illusion of the text rotating around an invisible center point.

Isolate Your Subject
For the text to actually wrap around your subject rather than float over them, your subject needs to physically sit between the two text layers in the stack.
-
Hide the Text Temporarily
Click the eye icons next to both text layers to turn them off. You want a clean view of the photo for the selection you’re about to make.
-
Run Select Subject
Click your original background layer, then go to Select > Subject. Photoshop analyzes the image and draws a selection around your subject automatically. If your subject has tricky edges — flyaway hair, fur, soft outlines — our guide to isolating subjects and cleaning up edges covers how to tighten that selection before you go further.
-
Copy the Subject to Its Own Layer
With the selection active and the background layer still selected, press Cmd/Ctrl + J to copy that cutout onto a brand-new layer. Rename it Subject.
-
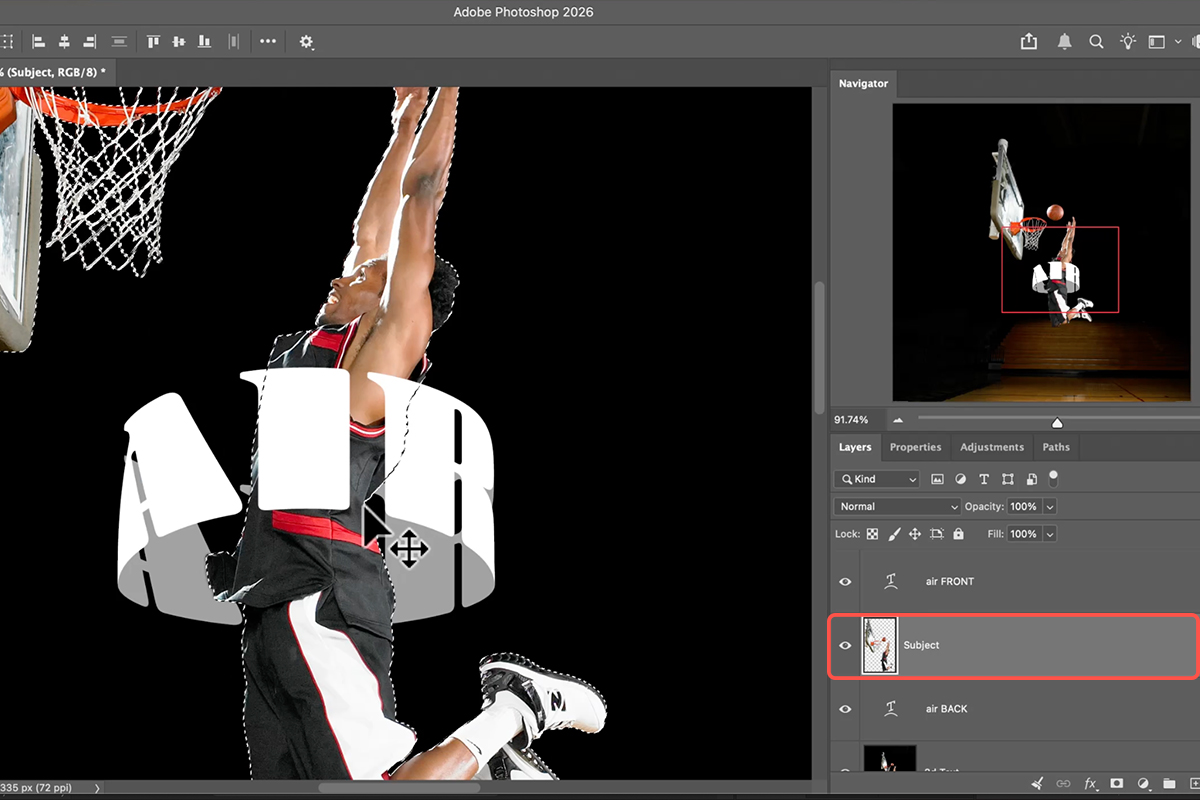
Sandwich the Subject Between the Text Layers
Turn both text layers back on, then drag your Subject layer so it sits between Text Front and Text Back in the stack. That single move is what makes the word pass in front of your subject on one side and disappear behind them on the other.
Add a Realistic Cast Shadow
The wrap already reads as 3D at this point, but a shadow falling from your subject onto the text behind them is what really grounds the two together.
-
Load Your Subject as a Selection
Hold Cmd/Ctrl and click directly on the thumbnail of your Subject layer. That loads its shape as an active selection without changing the layer itself.
-
Fill a New Layer with Black
Select your Text Back layer, click the Create a New Layer icon so the new layer sits directly above it, then go to Edit > Fill and fill the active selection with black. Press Cmd/Ctrl + D to deselect.
-
Offset the Shadow
Grab the Move Tool (keyboard shortcut “V”) and nudge the black shape slightly downward. How far you push it sets where your imaginary light source sits, so trust your eye here.
-
Clip the Shadow to the Text
Hold Alt/Option and hover between the shadow layer and the Text Back layer until the cursor turns into a down arrow, then click to create a clipping mask. Now the shadow only appears where the text is — which is exactly how a real cast shadow would behave, falling onto the letters rather than floating in mid-air.
-
Convert to a Smart Object and Blur
Go to Filter > Convert for Smart Filters to turn the shadow into a Smart Object, then apply Filter > Blur > Gaussian Blur. Converting first is what keeps the blur editable — you can reopen and re-dial the radius any time instead of being stuck with your first guess. Adjust the slider until the shadow reads as soft and natural rather than a hard black shape.
Where This Effect Usually Goes Wrong
Misaligning the Two Text Layers
If Text Front and Text Back aren’t sitting in identical positions before you warp them, the two halves of the ring won’t line up and the illusion falls apart immediately. Take the extra few seconds to use the alignment controls rather than eyeballing it.
Warping Both Layers the Same Direction
Applying Cylinder to both layers but dragging both handles up (or both down) gives you two curves stacked on top of each other instead of a ring. The front layer curves up, the back layer curves down — opposite directions are the whole point.
Skipping the Clipping Mask on the Shadow
Without the clipping mask, your black shape sits over everything behind it instead of only over the text, which reads as a smudge rather than a shadow. It’s a small step that does a lot of the realism work.
The Trick Behind the Illusion
What makes this effect convincing isn’t the warp itself — it’s the layer order. Your eye reads depth from occlusion before anything else, so the moment part of a word disappears behind a shoulder and reappears on the other side, the brain accepts that the text occupies real space. The Cylinder warp supplies the curve that makes that reading believable, and the cast shadow confirms it.
It’s also endlessly reusable. Because the type stays live and the warp lives on Free Transform rather than being flattened in, you can swap the word, change the font, or adjust the curve and everything else in the composition still holds together.
Wrapping Up
Two text layers, one Cylinder warp dragged in opposite directions, a Select Subject cutout in the middle, and a clipped, blurred shadow — that’s the entire effect. No AI, no plugins, and nothing baked in permanently. Download the free sample image to follow along, then try it with your own photos and typography; the technique works just as well on a bold single word as it does on a longer phrase curving through a portrait.
Quick Reference: Keys, Menus and Settings
- Type toolT; set the color in the options bar
- The fontType > More from Adobe Fonts, search Blenny, Add Family
- Front and back copiesCmd/Ctrl + J; select both, Move tool, align vertical and horizontal centers
- WarpCmd/Ctrl + T, click the warp icon, Warp: Cylinder, drag the point up (front) or down (back)
- Cut out the subjectSelect > Subject on the Background, then Cmd/Ctrl + J; drag the layer between the two text layers
- Move both text layers togetherSelect both, click the Link Layers chain at the bottom of the Layers panel
- The shadowCmd/Ctrl-click the subject layer, new layer above the back text, Edit > Fill > Black, Cmd/Ctrl + D
- Keep it on the textOption/Alt-click between the shadow and the back text (clipping mask)
- Soften itFilter > Convert for Smart Filters, then Filter > Blur > Gaussian Blur
Mac first, then Windows where they differ.

Free Downloads
Follow Along on the Same Photo
Get the sample image, the finished PSD and the PDF guide, and wrap the text around the same subject. Free with a PHLEARN account.
3D Text Effect: Common Questions
Does this 3D text effect use AI?
No. It’s two text layers, a Cylinder warp, a Select Subject cutout and a blurred shadow. No AI, no generative credits.
What font is that, and how do I get it?
Blenny, from Adobe Fonts, included with a Creative Cloud subscription. In Photoshop go to Type > More from Adobe Fonts, search Blenny and click Add Family; it syncs to Photoshop in about a minute.
Why two copies of the text?
One goes in front of the subject and one behind, which is what makes the text look like it wraps around. Duplicate the text layer, name them front and back, select both and align their centers so the warps start from the same place.
How do I warp the text into a cylinder?
Press Cmd/Ctrl+T, click the warp icon in the options bar and choose Cylinder. Drag the control point up for the front layer and down for the back layer. The warp is non-destructive, so you can reopen it and change the amount later, for example if it covers the face.
How does the subject get between the two text layers?
Hide the text layers, click the Background, go to Select > Subject and press Cmd/Ctrl+J to copy the subject to its own layer. Then drag that layer between the back and front text. It’s fine if the selection picks up the ball or the hoop.
Can I move or resize the text afterwards?
Yes. Select both text layers and click the Link Layers chain so they move together, then use the Move tool or Cmd/Ctrl+T to scale. You can also double-click a text layer and retype the word; the warp stays.
How is the shadow on the text made?
Cmd/Ctrl-click the subject layer to load it as a selection, add a new layer above the back text, fill the selection with black and deselect. Drag it down into place, then Option/Alt-click between it and the back text layer to clip it so it only shows on the letters.
Why convert the shadow to a Smart Object before blurring?
So the Gaussian Blur becomes a Smart Filter you can toggle or change at any time. Any time you use something from the Filter menu, convert for Smart Filters first.
Are the sample files free?
Yes, with a free PHLEARN account. You get the sample image, the finished PSD with the front, subject, shadow and back layers, and the PDF guide.
Master Photoshop, Lightroom and Photography
Join PHLEARN PRO for $12.99 a month or $99.99 a year. Cancel anytime, with a 100% money-back guarantee.





