
Download Assets
This tutorial includes sample images, 1 rtf file and 1 photoshop brush. Downloads are free with a PHLEARN account.
- Free sample files with every tutorial on PHLEARN
- New tutorials published every week
- Unlimited downloads with your free PHLEARN account
description
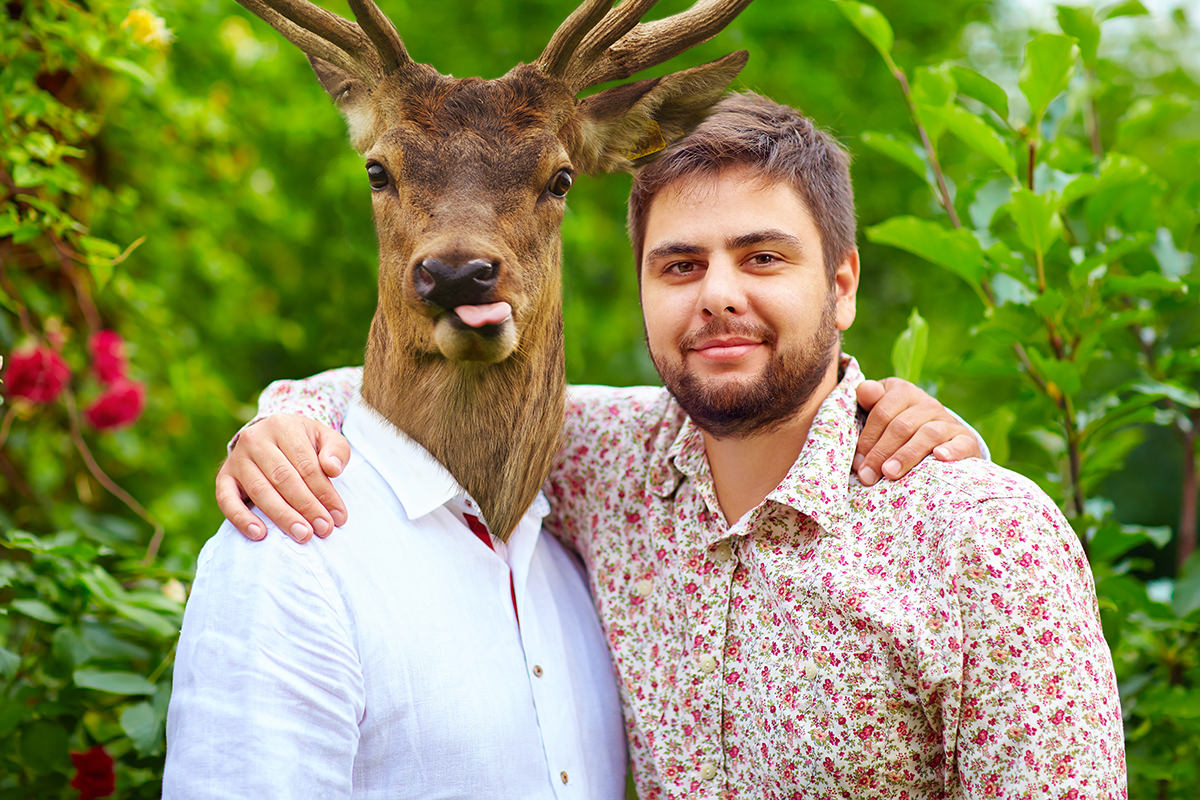
Swapping a person’s head for an animal’s is only half the job; the seam at the collar is what gives it away. Aaron scales a deer into place, warps its neck to the shirt with Liquefy, cuts it from the sky with the Magic Wand and refines the edge, then builds a custom deer-hair brush with size and angle jitter and clones real fur along the collar with it.
Enjoying This Free Tutorial?
We publish a new free tutorial every week, each one with sample images and PSDs you can download and follow along with. Sign up and they land straight in your inbox, along with early word on sales, events and subscriber-only offers.
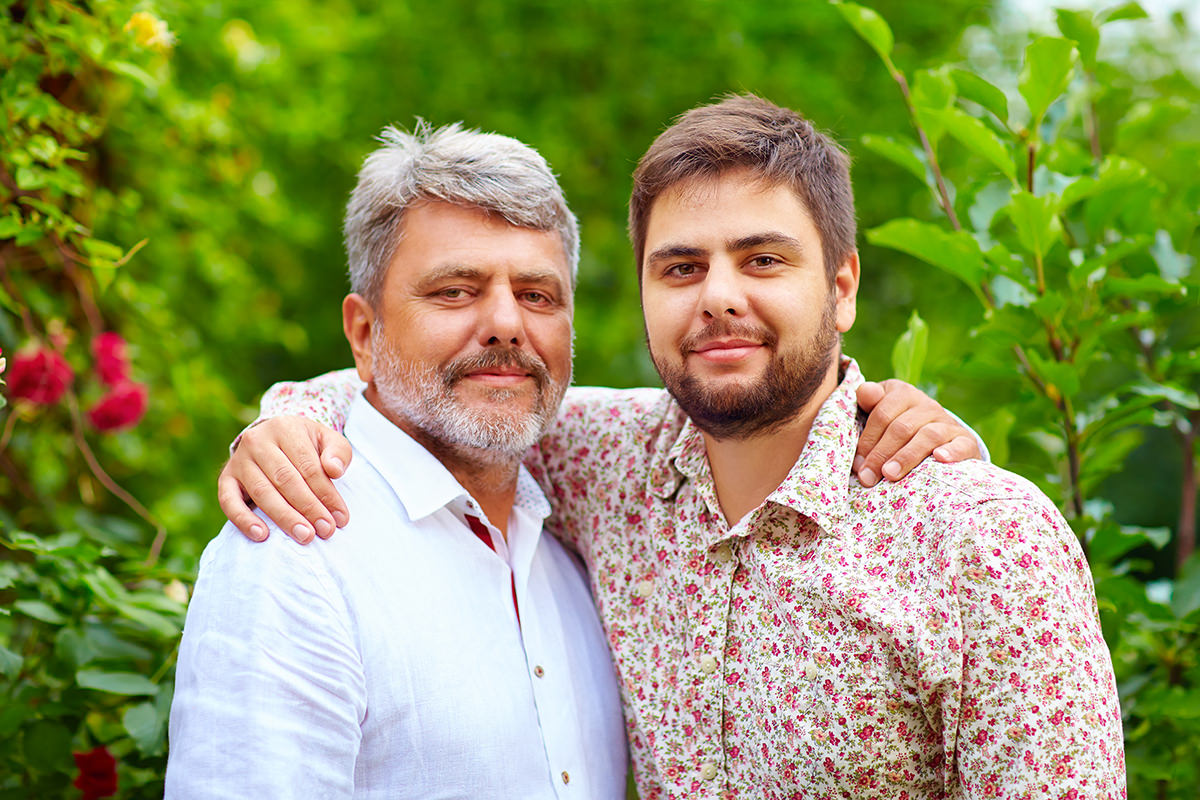
Compositing an animal’s head onto a person, and building a custom hair brush to blend the seam convincingly, works the same for a deer as it does for nearly any other animal. This tutorial places a deer over a subject’s head, cuts it out and refines its edge, then builds a custom deer-hair brush used with the Clone Stamp tool to make the hair look like it’s genuinely growing out of a shirt collar.
Placing and Sizing the Deer Over the Subject
Dragging the deer image onto the subject photo and scaling it down with reduced opacity makes it possible to line the deer up naturally before committing to its final size and angle.
-
Move the Deer Onto the Subject Photo
Use the Move tool to click and drag the deer image from its own document onto the subject photo.
-
Lower the Opacity to See Through It
Reduce the deer layer’s opacity so its position relative to the subject underneath is easier to judge while adjusting.
-
Scale, Flip, and Rotate Into Place
Press Cmd/Ctrl+T, hold Shift while dragging a corner to scale, right-click to flip horizontally if needed, and rotate until the deer sits naturally over the subject’s head.
-
Crop to Make Room for Antlers
Press C for the Crop tool and drag the top edge upward to leave enough room for the deer’s antlers above the frame.
-
Restore Full Opacity
Bring the deer layer’s opacity back to 100% once its position and size are set.
Aligning the Deer’s Neck With the Collar Using Liquefy
The Liquefy filter’s Forward Warp tool pushes and pulls the deer’s neck so it appears to emerge naturally from the same collar as the subject beneath it.
-
Open the Liquefy Filter
Go to Filter > Liquefy to open the Liquefy dialog.
-
Enable Show Backdrop
Check Show Backdrop and set it to use the background layer so the subject underneath remains visible for reference.
-
Warp the Neck Toward the Collar
Use the Forward Warp tool with a large brush size to push the deer’s neck inward so it lines up with the collar on both sides.
-
Undo and Adjust as Needed
Press Cmd/Ctrl+Z to undo any warp that doesn’t look right and try again until the neck lines up naturally.
Cutting the Deer Out of Its Background With the Magic Wand
The Magic Wand tool, set to Contiguous, quickly selects a simple background like a plain sky, which can then be inverted into a layer mask that isolates the deer.
-
Select the Background With the Magic Wand
Press W for the Magic Wand tool, lower the tolerance if too much gets selected, and make sure Contiguous is checked.
-
Add to the Selection as Needed
Hold Shift and click additional background areas, such as more of the sky, to add them to the selection.
-
Add and Invert a Layer Mask
Click the layer mask button, then press Cmd/Ctrl+I to invert it so the deer becomes visible instead of the background.
-
Refine Remaining Edges With the Lasso Tool
Press L for the Lasso tool to manually select any leftover background areas the Magic Wand missed, such as around antlers or fur, then go to Edit > Fill and fill those areas with black on the mask.
Removing the Subject’s Original Head With the Clone Stamp Tool
Sampling from Current and Below with the Clone Stamp tool removes the subject’s original head using only the layers beneath the deer, leaving the deer itself untouched.
-
Create a New Layer Above the Background
Add a new layer directly above the background layer to hold the clone stamp work.
-
Select Current and Below Sampling
Press S for the Clone Stamp tool and set its sample option to Current and Below so it ignores the deer layer above.
-
Sample and Paint Over the Head
Hold Alt/Option to sample a nearby area, then paint over the subject’s original head and any visible facial hair to remove it.
-
Add a White Background Layer
Add a Solid Color adjustment layer set to white and move it to the very bottom of the layer stack.
Refining the Deer’s Mask Edge
Select and Mask’s Feather and Shift Edge controls smooth a jagged cutout edge and adjust how tightly it hugs the deer’s actual silhouette.
-
Open Refine Mask
Select the layer mask and go to Select > Refine Mask to open the refinement options.
-
Reset Settings and Add Feathering
Reset all settings to zero, then increase Feather slightly to soften a jagged edge.
-
Adjust Shift Edge
Move the Shift Edge slider in or out to expand or contract the mask edge until it matches the deer’s actual outline.
-
Output to the Layer Mask
Set the output to Layer Mask and click OK to apply the refined edge.
Why the Edge Needs Refining Before Adding Hair
A raw Magic Wand selection typically leaves a jagged, obviously cut-out edge that would look artificial no matter how convincing the composite otherwise is. Softening that edge with Feather and Shift Edge first creates a smoother transition, which is what allows the custom hair brush added afterward to blend believably along the boundary instead of sitting on top of a hard line.
Reserving Space on the Collar for Hair
Painting black with a medium-hard brush directly over the collar on the layer mask reserves that space so hair can later be painted in to look like it’s emerging from the shirt.
-
Select a Medium-Hard Brush
Choose the Brush tool with a medium-hard edge to paint on the layer mask.
-
Paint Black Over the Collar
Paint black directly over the area where the collar should show through, making the deer’s neck fade into that space.
Creating a Custom Deer-Hair Brush
Selecting a small patch of the deer’s own hair against a plain background and defining it as a brush preset creates a custom brush that paints in strokes matching that exact hair texture.
-
Draw a Single Hair Stroke
On a new layer, set brush hardness to around 80% with a small size such as 3 pixels, and draw a single stroke resembling one hair.
-
Fill a Background Behind the Hair
Select an area around the hair with the Marquee tool, add a new layer beneath it, and fill that layer with white using Shift+Delete.
-
Define the Brush Preset
With both layers selected as one selection, go to Edit > Define Brush Preset and name the new brush.
-
Delete the Temporary Layers
Delete the hair-stroke and background layers now that the brush preset has been saved.
Why a Single Hair Stroke Needs Jitter to Look Like Fur
Painting repeatedly with one fixed brush shape produces an obviously repeating pattern, since every stroke would come out identical in size and direction. Adding randomized jitter to the brush is what turns one static hair shape into something that reads as a natural, varied patch of fur when painted across an area.
Adding Size and Angle Jitter to the Brush
Enabling Shape Dynamics and Angle Jitter in the Brush panel introduces random variation in size and rotation with every stroke, which is what makes painted hair look natural instead of mechanically repeated.
-
Open the Brush Panel
Go to Window > Brush to access detailed brush settings.
-
Enable Shape Dynamics
Turn on Shape Dynamics to allow individual hair strokes to vary in size as they’re painted.
-
Enable Angle Jitter
Turn on Angle Jitter to randomize the rotation of each stroke, producing hairs pointing in varied, natural directions.
-
Save the Full Brush as a New Preset
Open the Brush panel’s menu and choose New Brush Preset to save these jitter settings along with the hair shape as a complete, reusable brush.
Why Clone Stamping With the Custom Brush Beats Painting a Solid Color
Painting with the custom brush shape alone, using a flat black or white color, would still look like an obviously drawn hair pattern rather than real fur. Using the same custom brush with the Clone Stamp tool instead samples the deer’s actual photographed hair, so every stroke carries real texture, lighting, and color variation straight from the source image.
Cloning Real Hair Onto the Collar With the Clone Stamp Tool
Selecting the custom hair brush shape within the Clone Stamp tool lets actual sampled deer hair be painted directly over the collar area, which looks far more convincing than painting with plain black or white.
-
Select the Custom Brush on the Clone Stamp Tool
Press S for the Clone Stamp tool and right-click to choose the custom deer-hair brush from the brush list.
-
Sample Real Hair From the Deer
Hold Alt/Option and sample an area of the deer’s actual fur to clone from.
-
Paint Hair Over the Collar on a New Layer
On a new layer, paint over the area near the collar and shirt to add real sampled hair texture there.
-
Adjust Brush Angle to Match Direction
Change the brush tip’s angle setting so painted hair follows the natural direction it should grow in each specific area.
-
Clean Up With the Eraser Tool
Use the Eraser tool to tidy up any hair strokes that extend too far or look uneven.
Finishing the Ears, Antlers, and Adding Type
A few final touch-ups, patching a cut-off antler and painting hair around the ear, along with a short line of type, complete the finished card.
-
Paint Hair Around the Ear
Use the same custom hair brush to paint additional hair around the ear so it blends smoothly with the surrounding fur.
-
Fix Any Remaining Mask Gaps
Toggle the layer mask off, use the Magic Wand to select problem areas like a gap near the antlers, invert the selection, and paint white on the mask to restore that area.
-
Duplicate an Antler to Fix a Cut-Off Side
Clone stamp and copy one antler, then use Free Transform with a horizontal flip to place a matching copy on the opposite side if one was cropped.
-
Add a Line of Type
Press T for the Type tool, choose black, and type a short message such as the card’s greeting.
More Free Photoshop Tutorials
To build on the compositing and custom brush techniques used here, check out these free tutorials:
- How to Select Subjects and Refine Edges in Photoshop
- Three Ways to Use Blend If in Photoshop
- Curves vs Levels in Photoshop: What the Difference Actually Is
Why This Approach Works
Refining the mask’s edge before adding any hair is what keeps the final composite from looking obviously cut out, since a soft, natural edge gives the custom hair brush a believable boundary to blend into. Sampling real hair from the deer itself with the Clone Stamp tool, rather than painting with a flat color, is what makes the hair over the collar look genuinely photographic instead of illustrated. Building jitter for size and angle directly into the custom brush preset is what keeps hundreds of individual hair strokes from looking mechanically repeated, since each one comes out slightly different in scale and direction.
Final Thoughts
Turning someone’s head into an animal’s comes down to a handful of reusable techniques, cutting out the animal, removing the original head, refining the mask edge, and building a custom hair brush to blend the two together convincingly. The same approach works with any animal and any subject, so it’s worth trying on a completely different combination once the basic hair-brush technique feels familiar.
New Free Tutorials View All »











Enjoying This Free Tutorial? Go Further with PRO.
Unlock Full Sample Files, PSDs, and Hundreds of Masterclasses!

Download full project assets, original PSDs, and RAW images for every lesson
Unlimited access to our complete library of PRO Photoshop & Lightroom courses
Instant 4K Ultra HD streaming on all devices, anytime, anywhere
Full access to our entire library of Photoshop Actions, Presets, and LUTs
Flexible monthly and annual membership plans
Cancel anytime with zero hassle or commitments