

Download Assets
This tutorial includes 1 sample image. Downloads are free with a PHLEARN account.
- Free sample files with every tutorial on PHLEARN
- New tutorials published every week
- Unlimited downloads with your free PHLEARN account
description
Red eye happens when light from an on-camera flash bounces straight off the back of the eye and reflects into the lens, and Photoshop has a dedicated tool built specifically to fix it in seconds. This tutorial covers where that tool hides in the toolbar, how its two settings behave, and how to clear both eyes in a matter of seconds, then goes one step further with a bonus technique: replacing a missing tooth with the Clone Stamp tool, a horizontal flip, and a Lighten blend mode.
Enjoying This Free Tutorial?
We publish a new free tutorial every week, each one with sample images and PSDs you can download and follow along with. Sign up and they land straight in your inbox, along with early word on sales, events and subscriber-only offers.
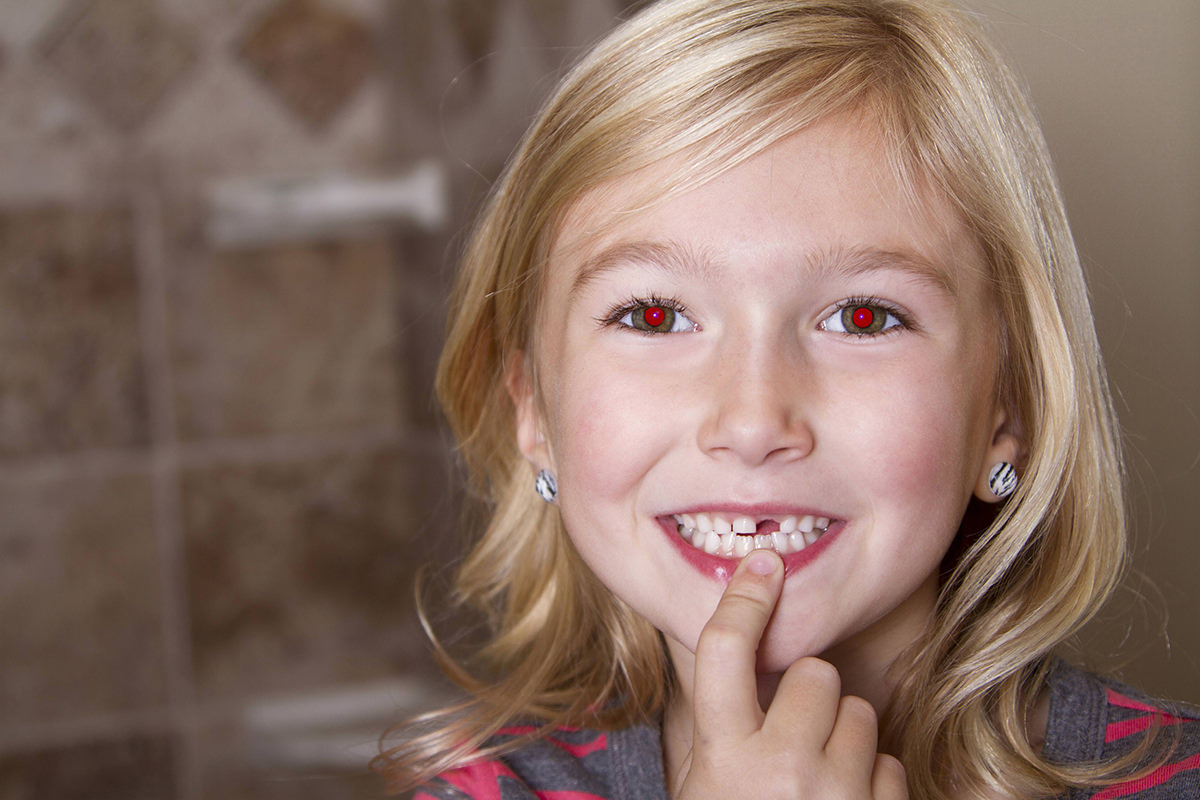
Red eye happens when light from an on-camera flash bounces straight off the back of the eye and reflects into the lens, and Photoshop has a dedicated tool built specifically to fix it in seconds. It looks like a complicated problem the first time it shows up in a photo, but the fix itself barely qualifies as a technique at all once the right tool is found. This tutorial covers where that tool hides in the toolbar, exactly how its two settings behave, and how to use it on both eyes in a matter of seconds. Then, because a five-minute fix leaves plenty of room in an episode, it goes one step further with a bonus technique: replacing a missing tooth using the Clone Stamp tool, a horizontal flip, and a Lighten blend mode that does most of the blending automatically.
What Causes Red Eye and How to Avoid It
Red eye is a physical effect of the camera’s own flash, not something that happens randomly, which means it’s often avoidable before a photo is ever taken. The light from a flash mounted directly above or right next to the lens travels in almost a straight line to the subject’s eye, bounces off the blood vessels at the back of the eye, and reflects right back along nearly that same path into the lens. The closer the flash sits to the lens, the more likely that reflection is to get captured.
-
Understand Why Red Eye Happens
Recognize that red eye is caused by light from an on-camera flash reflecting off the pupil directly back into the camera lens.
-
Use an Off-Camera or Larger Flash
Use a flash that isn’t mounted directly on the camera, such as a speedlight positioned off to the side, to reduce the chance of red eye.
-
Shoot in Natural Light When Possible
Turn the flash off entirely and shoot in natural light as another simple way to avoid red eye altogether.
Why Flash Position Matters More Than Flash Power
It’s not the brightness of a flash that causes red eye, it’s how close the flash sits to the lens itself. A speedlight held off to the side, or bounced off a ceiling or wall, sends light into the eye from a different angle than the lens is pointed from, so the reflection bounces away from the camera instead of straight back into it.
Locating the Red Eye Tool
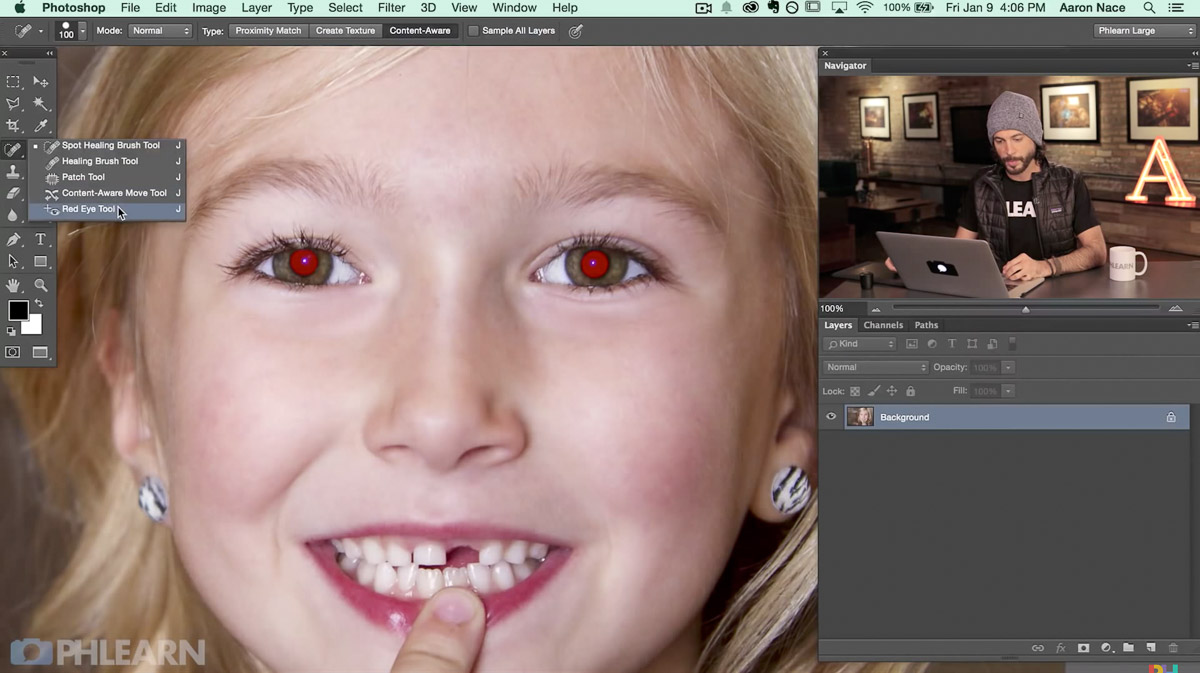
The Red Eye tool is tucked away under the healing brush tools, easy to miss but simple to find once you know where to look. It’s one of those tools that a lot of Photoshop users never even notice is there, since it doesn’t get its own dedicated spot in the toolbar the way the Brush or Move tool does.
-
Click and Hold the Healing Brush Tool Group
Click and hold on the Spot Healing Brush or Healing Brush tool in the toolbar to open its flyout menu.
-
Select the Red Eye Tool
Choose the Red Eye tool from the bottom of the flyout menu.
Why the Red Eye Tool Is Worth Remembering
Plenty of Photoshop users go years without ever opening this particular flyout menu, since red eye is the kind of problem that only comes up occasionally. Knowing exactly where it lives means reaching for a purpose-built, one-click fix instead of trying to recolor a pupil manually with a brush or a Hue/Saturation adjustment.
Setting Pupil Size and Darken Amount
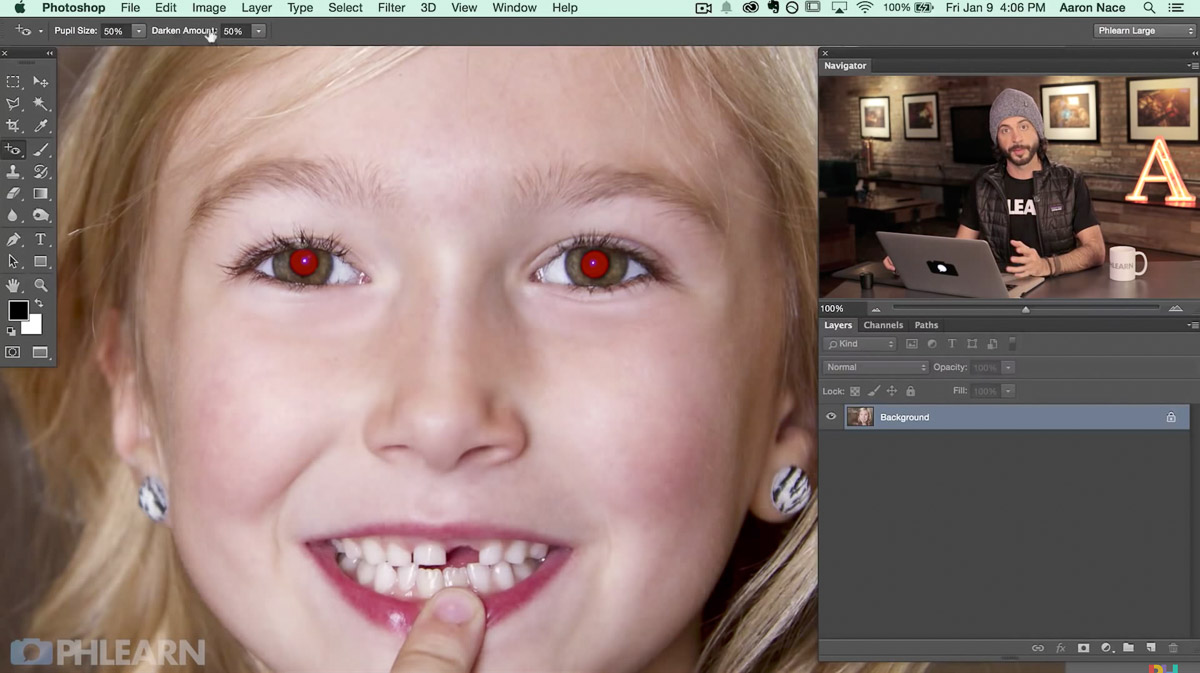
The Red Eye tool’s two settings, Pupil Size and Darken Amount, come with defaults that work well for most photos straight out of the box.
-
Leave Pupil Size at the Default 50%
Keep the Pupil Size setting at its default of 50%, since it works well in most cases.
-
Leave Darken Amount at the Default 50%
Keep the Darken Amount setting at its default of 50% as well, adjusting later only if a particular image needs it.
Removing Red Eye From Both Eyes
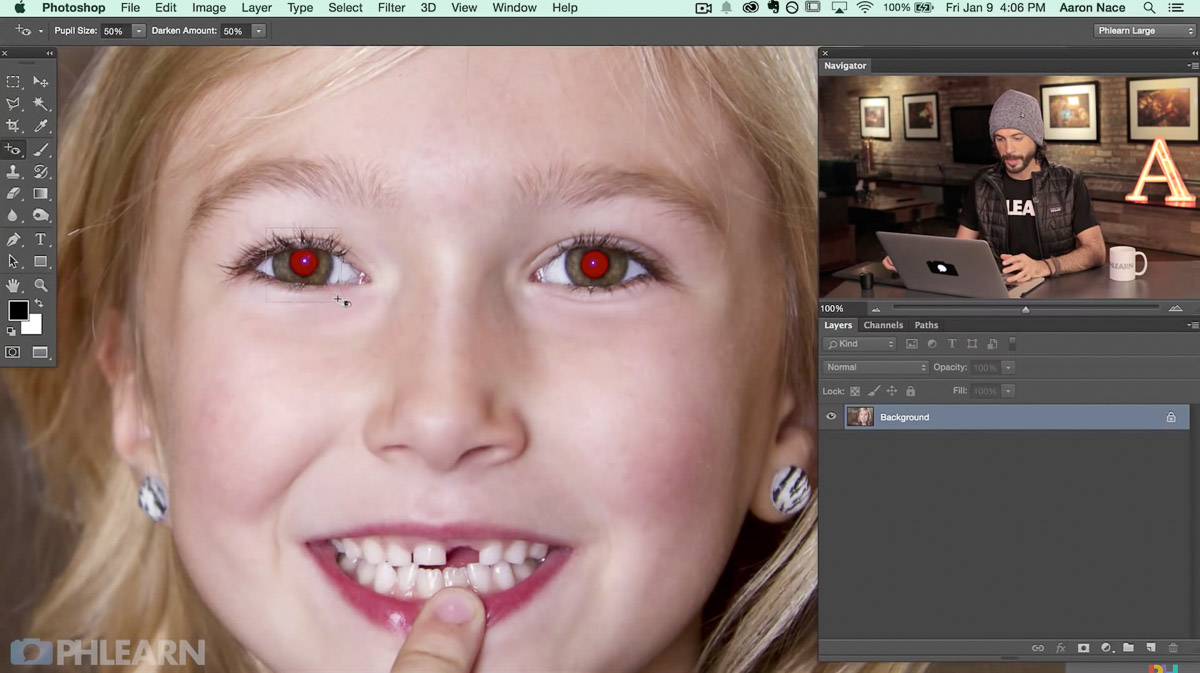
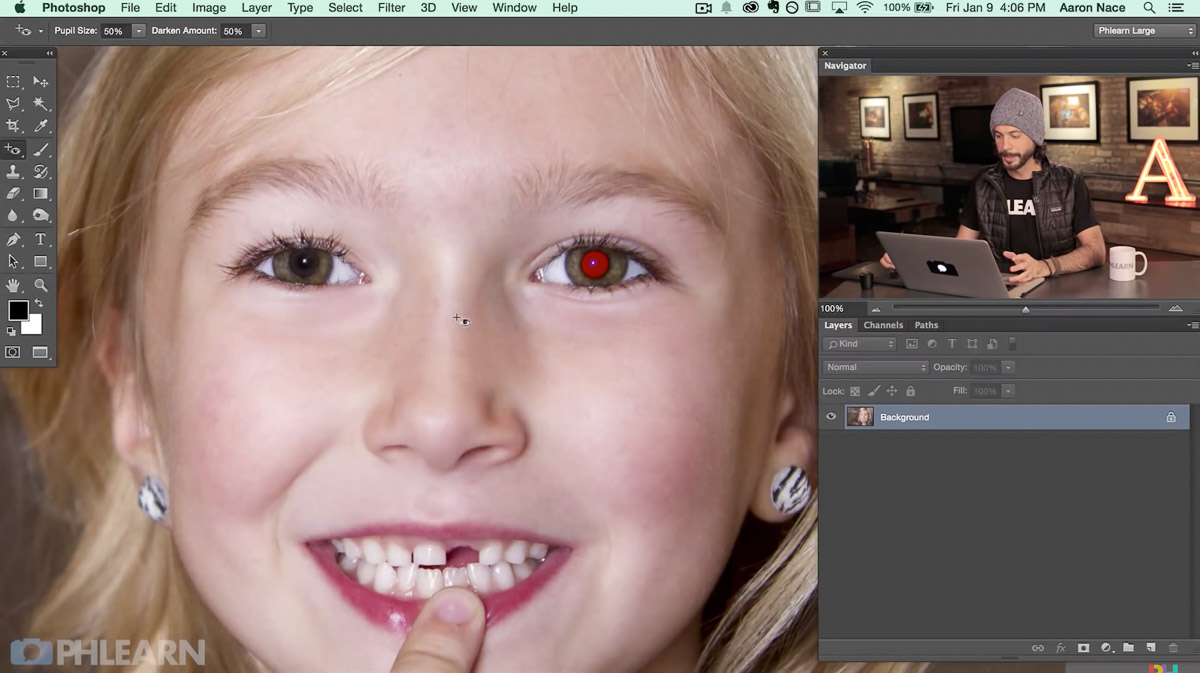
With the tool selected, removing red eye is as simple as dragging a small rectangle around each pupil. There is no need to be especially precise about the rectangle’s size or exact placement, since the tool automatically finds the pupil within the area that has been roughly selected and works from there.
-
Click and Drag Around the First Pupil
Click and drag a small rectangle around the center of the first red pupil, then release the mouse.
-
Click and Drag Around the Second Pupil
Repeat the same click-and-drag rectangle around the second eye’s pupil.
-
Compare the Result
Check both eyes to confirm the red reflection has been replaced with a natural, dark pupil.
Why Keeping the Default Settings Usually Works Best
The Red Eye tool’s default Pupil Size and Darken Amount were tuned to handle the vast majority of typical red eye cases without any adjustment at all. Leaving both sliders alone the first time through, and only nudging them afterward if the result looks off, keeps the whole fix as quick and simple as it’s meant to be.
Sampling a Replacement Tooth With the Clone Stamp Tool
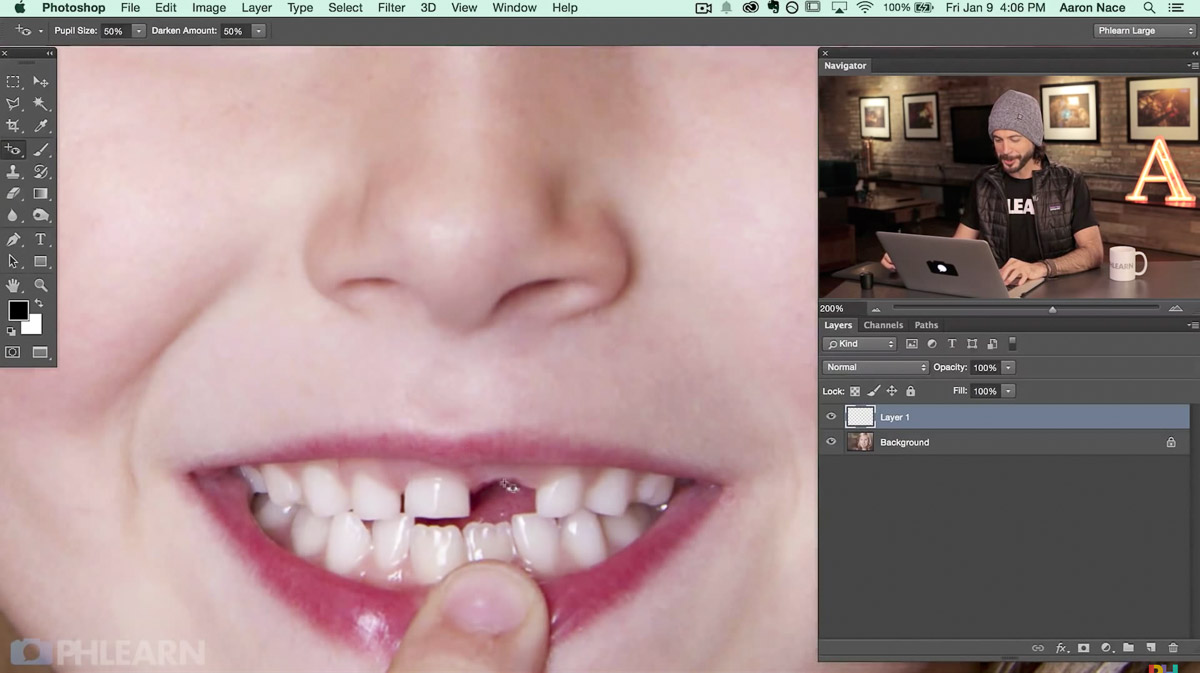
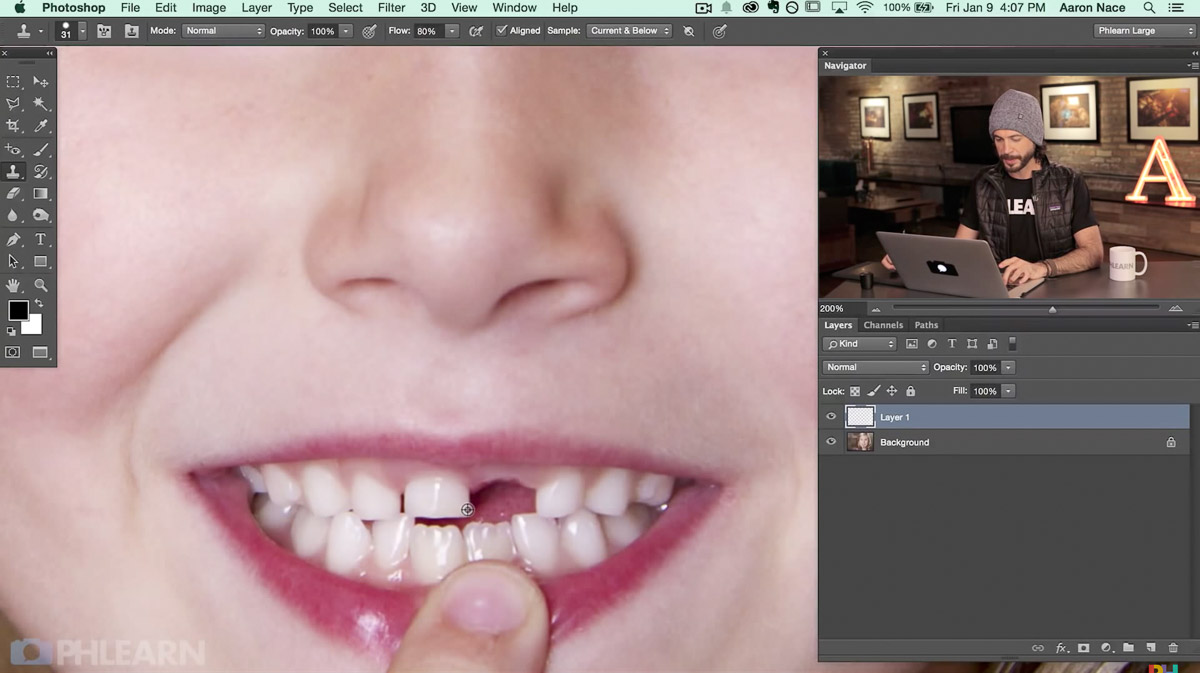
As a bonus technique, the Clone Stamp tool can sample an existing tooth and paint a copy of it onto a new layer to fill in a gap from a missing tooth. This is not part of removing red eye at all, it is simply a second small fix applied to the same photo, included here as an extra technique worth knowing.
-
Create a New Layer
Add a new layer above the photo to hold the cloned tooth.
-
Select the Clone Stamp Tool
Press S for the Clone Stamp tool.
-
Sample an Existing Tooth
Hold Alt/Option and click on a healthy tooth to sample it.
-
Paint the Sampled Tooth Over the Gap
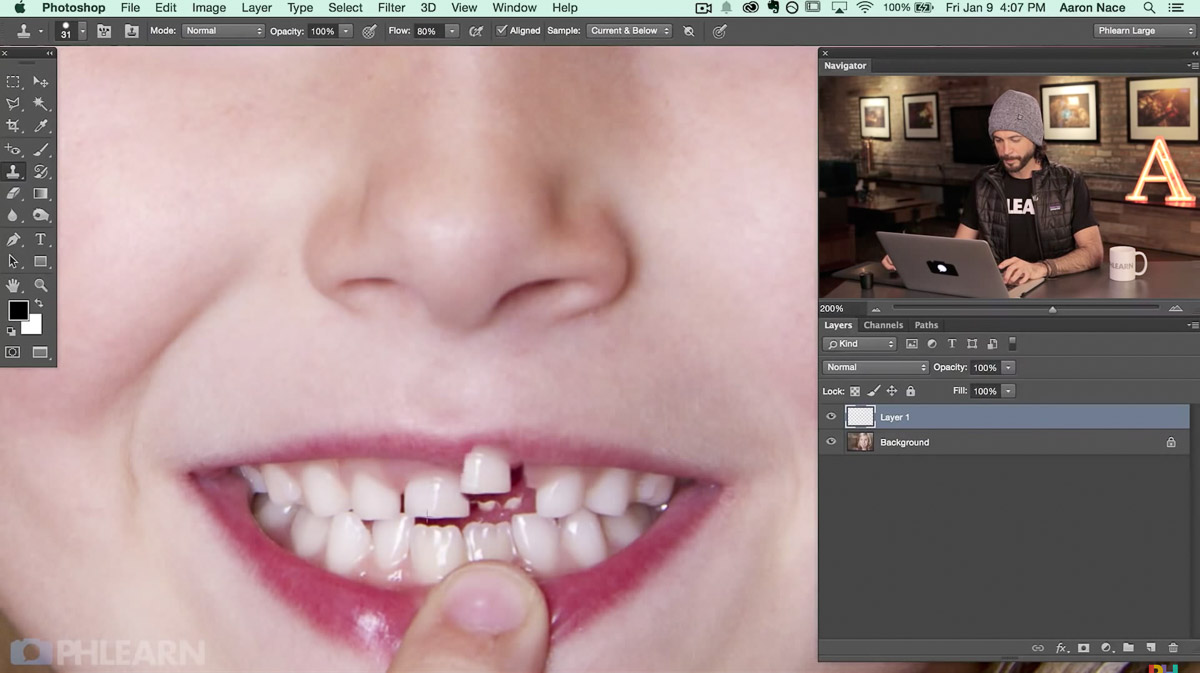
Paint over the gap left by the missing tooth to place a copy of the sampled tooth there, on the new layer.
Flipping and Blending the New Tooth
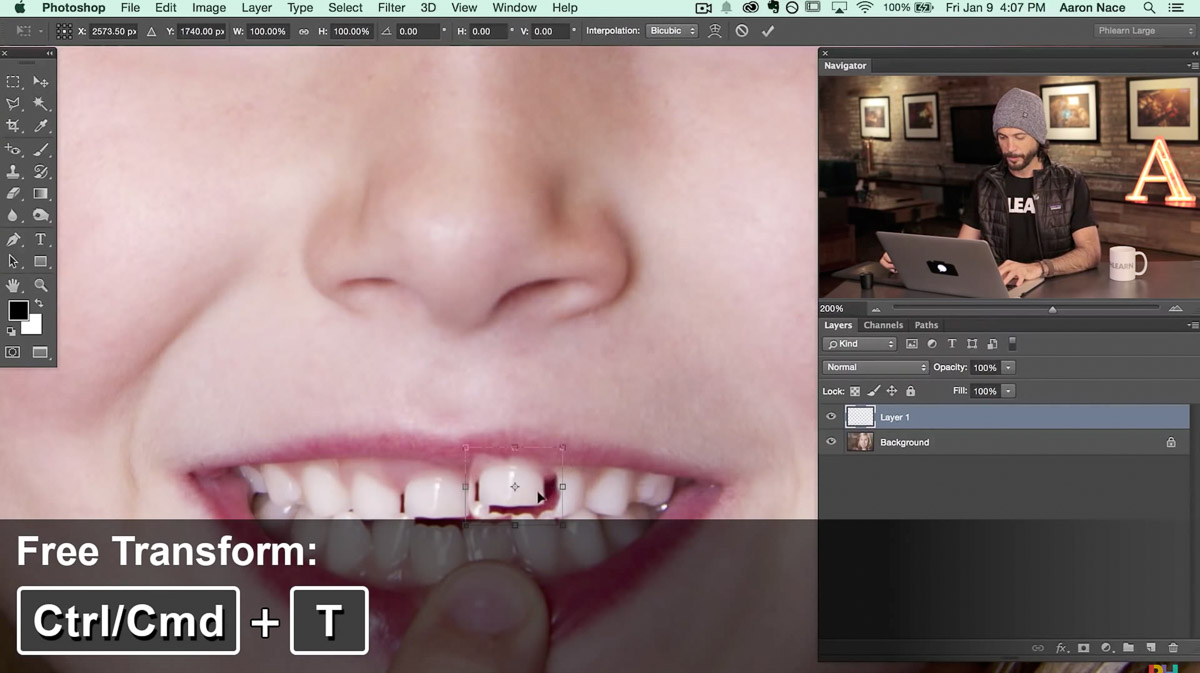
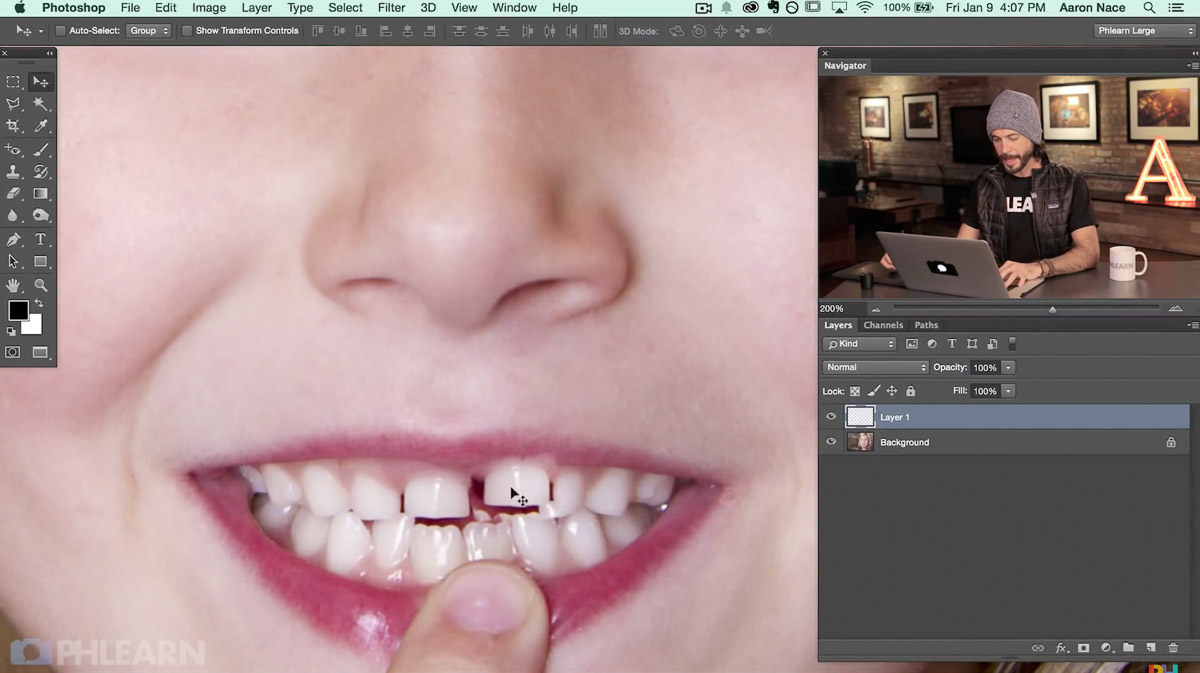
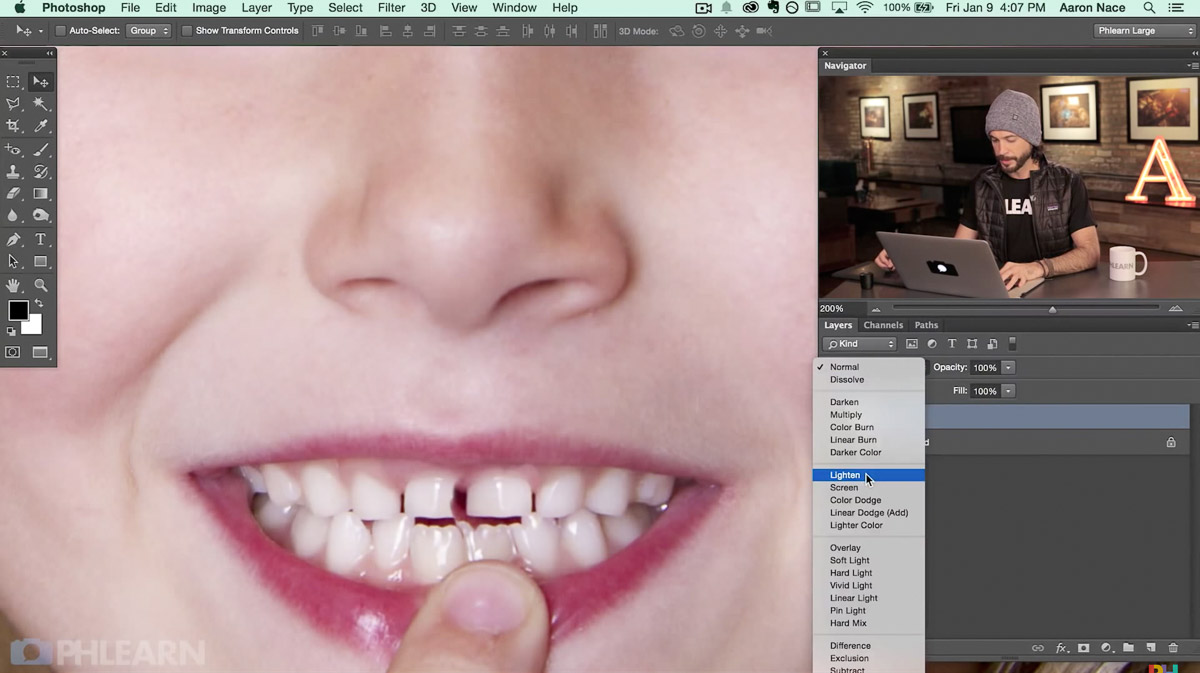
Flipping the cloned tooth horizontally corrects its orientation, and switching its blend mode to Lighten keeps only the tooth’s pale color visible over the darker mouth beneath it. Because teeth on opposite sides of a smile mirror each other, a tooth sampled from one side needs to be flipped before it will look correct once it is moved to the other side.
-
Enter Free Transform
Press Cmd/Ctrl+T to enter Free Transform on the new tooth layer.
-
Flip the Tooth Horizontally
Right-click and choose Flip Horizontal so the cloned tooth faces the correct direction for its new position.
-
Change the Blend Mode to Lighten
Change the layer’s blend mode from Normal to Lighten so only the lighter tooth color shows through, ignoring any darker surrounding pixels.
Cleaning Up the Blended Tooth’s Edges
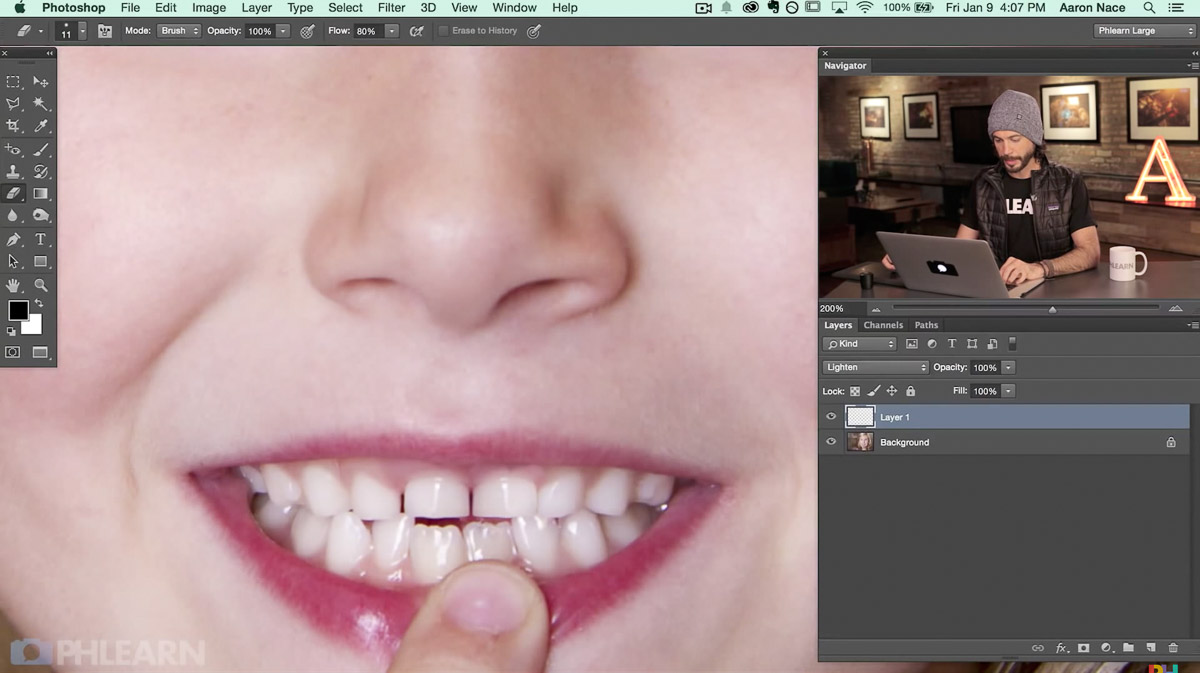
A quick pass with the eraser or a layer mask removes any leftover edges from the cloned tooth so it blends seamlessly into the smile.
-
Erase or Mask Away Stray Edges
Use the Eraser tool or a layer mask to remove any leftover edges from the cloned tooth layer that don’t blend naturally.
-
Compare the Finished Smile
Check the result to confirm the new tooth blends convincingly with the rest of the smile.
Why Lighten Blend Mode Works So Well for This Fix
A tooth is naturally lighter than the darker gum and shadow around it, so switching the cloned layer to Lighten blend mode means only pixels lighter than what’s underneath actually show up. That one setting does most of the blending work automatically, leaving just a small amount of edge cleanup instead of a painstaking manual mask.
More Free Photoshop Tutorials
To build on the healing and cloning techniques used here, check out these free tutorials:
- How to Select Subjects and Refine Edges in Photoshop
- Three Ways to Use Blend If in Photoshop
- Curves vs Levels in Photoshop: What the Difference Actually Is
Why This Approach Works
The Red Eye tool’s default settings handle the physical cause of red eye directly, targeting the exact reflective quality that makes a pupil appear red in the first place, which is why so little adjustment is usually needed. Working on a separate layer for the cloned tooth keeps that experiment fully reversible and easy to reposition without touching the original photo underneath. Switching to Lighten blend mode rather than manually masking is what makes the tooth replacement blend almost automatically, since only the parts of the new layer lighter than the photo beneath it end up visible.
Final Thoughts
Red eye removal turns out to be one of the fastest fixes in all of Photoshop, needing little more than finding the right tool and dragging two small rectangles around a pair of pupils. The bonus tooth-replacement technique shown here, sampling, flipping, and a Lighten blend mode, is worth remembering too, since the same combination works for filling in far more than just a smile, and it is a good reminder that a blend mode can often do more of the blending work than a brush and a mask ever could on their own.
New Free Tutorials View All »











Enjoying This Free Tutorial? Go Further with PRO.
Unlock Full Sample Files, PSDs, and Hundreds of Masterclasses!

Download full project assets, original PSDs, and RAW images for every lesson
Unlimited access to our complete library of PRO Photoshop & Lightroom courses
Instant 4K Ultra HD streaming on all devices, anytime, anywhere
Full access to our entire library of Photoshop Actions, Presets, and LUTs
Flexible monthly and annual membership plans
Cancel anytime with zero hassle or commitments