

Download Assets
This tutorial includes 2 sample images and 1 sample PSD. Downloads are free with a PHLEARN account.
- Download the sample images and PSDs from every free tutorial on PHLEARN
- New free tutorials published every week
- One free account — sign up once, then download anything
description
Hunting through a long Layers panel to work out which entry matches which part of your image has always been tedious. This tutorial tries out the new layers feature in Photoshop Beta, which adds hover highlighting that connects the canvas and the Layers panel in both directions. Learn how to turn on the hover bounds toggles, change the highlight color, see a layer and its mask outlined at once, expand groups on click, and decide whether Auto Select belongs on.
Enjoying This Free Tutorial?
We publish a new free tutorial every week, each one with sample images and PSDs you can download and follow along with. Sign up and they land straight in your inbox, along with early word on sales, events and subscriber-only offers.
Image Source
Photo by Andrii Robitnytskyi via Pexels


Trying the Smart New Layers Feature in Photoshop (Beta)
Navigating a document with a lot of layers has always been one of Photoshop’s more tedious workflows — hunting through a long layers panel to figure out which entry corresponds to which piece of your image. The new layers feature in Photoshop Beta adds hover highlighting that connects your document directly to your Layers panel, plus a handful of related settings that make working with groups, masks, and selections noticeably faster.
Getting Started with the New Layers Feature
This feature ships in the beta version of Photoshop, available through the Creative Cloud installer, and introduces several new toggles in the options bar alongside the familiar Auto Select and Show Transform Controls settings.
-
Drag One Image into Another Document
Press V for the Move tool, then click and drag a layer from one open document into another to start combining them.
-
Turn On Show Hover Bounds from Layers
In the options bar, check Show Hover Bounds from Layers, then hover over any layer in the Layers panel itself to see it highlighted directly on the canvas.
What Each New Setting Does
Alongside the existing Show Transform Controls option, the beta adds three related toggles: Show Layer Bounds on Hover highlights a layer on the canvas as you hover over it there; Expand Layer Group on Click automatically opens a group in the Layers panel when you click its contents on the canvas; and Show Hover Bounds from Layers highlights the canvas when you hover over an entry in the Layers panel. They can be mixed and matched independently depending on how you like to work.
Building a More Complex Document to Test It
The new layers feature’s usefulness becomes obvious once a document has enough layers that keeping track of them by name alone gets difficult.
-
Remove a Layer’s Background
Select a layer, then click Remove Background in the contextual taskbar to cut it out.
-
Generate Additional Layers with Generative Fill
Make a selection, click Generative Fill, type a prompt like “sticker,” and generate a few extra layers purely to build up a more complex test document.
-
Switch to the Move Tool to See Highlights
Make sure the Move tool is active (not a selection tool like the Marquee), since the new hover highlighting only appears while it’s selected.
Customizing the Hover Highlight Color
The default highlight color is a light blue, which can be hard to distinguish from Photoshop’s existing light-blue guides, artboards, and grid overlays.
-
Open the Guides, Grids, and Slices Preferences
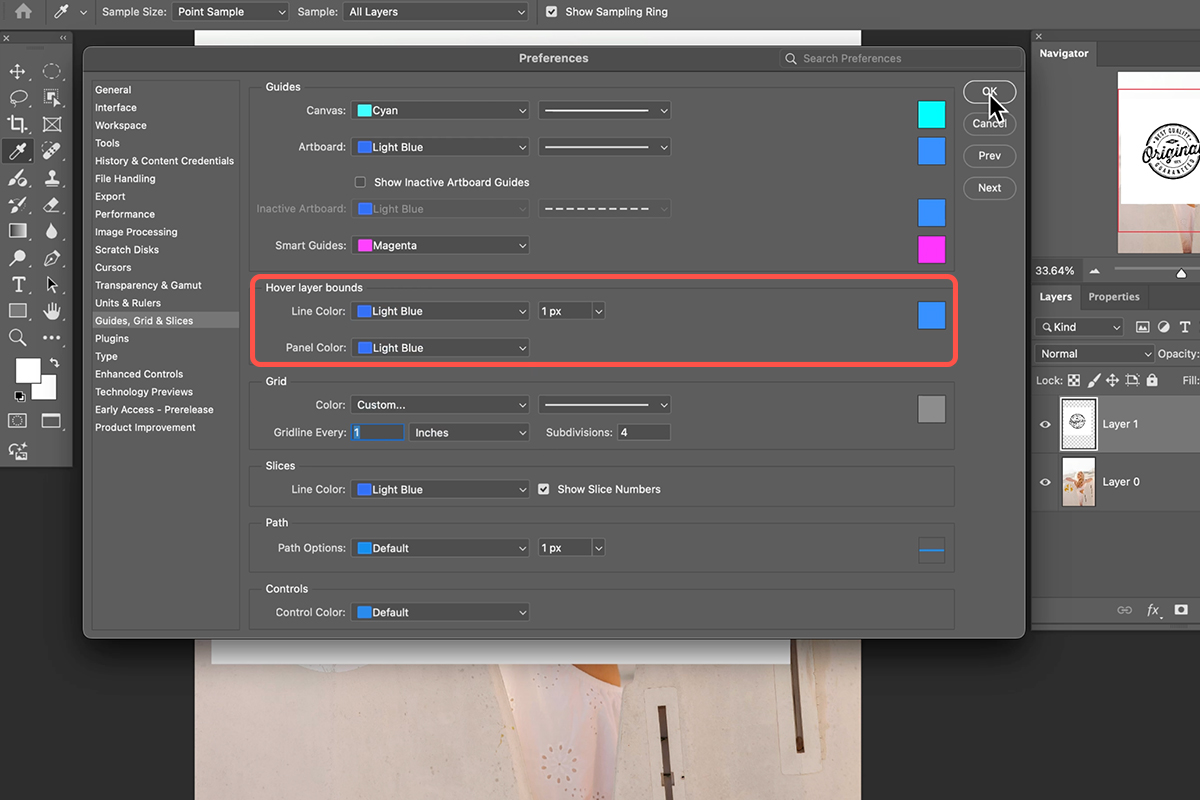
Go to Photoshop > Preferences > Guides, Grids & Slices to find the new Hover Layer Bounds settings.
-
Set the Line and Panel Colors
Change both the Line Color (used on the canvas) and the Panel Color (used in the Layers panel) to a color Photoshop doesn’t already use elsewhere, like green.
-
Increase the Outline Thickness
Set the thickness to around 3 pixels so the highlight is easy to spot, then click OK.
Seeing Both the Layer and Its Mask
-
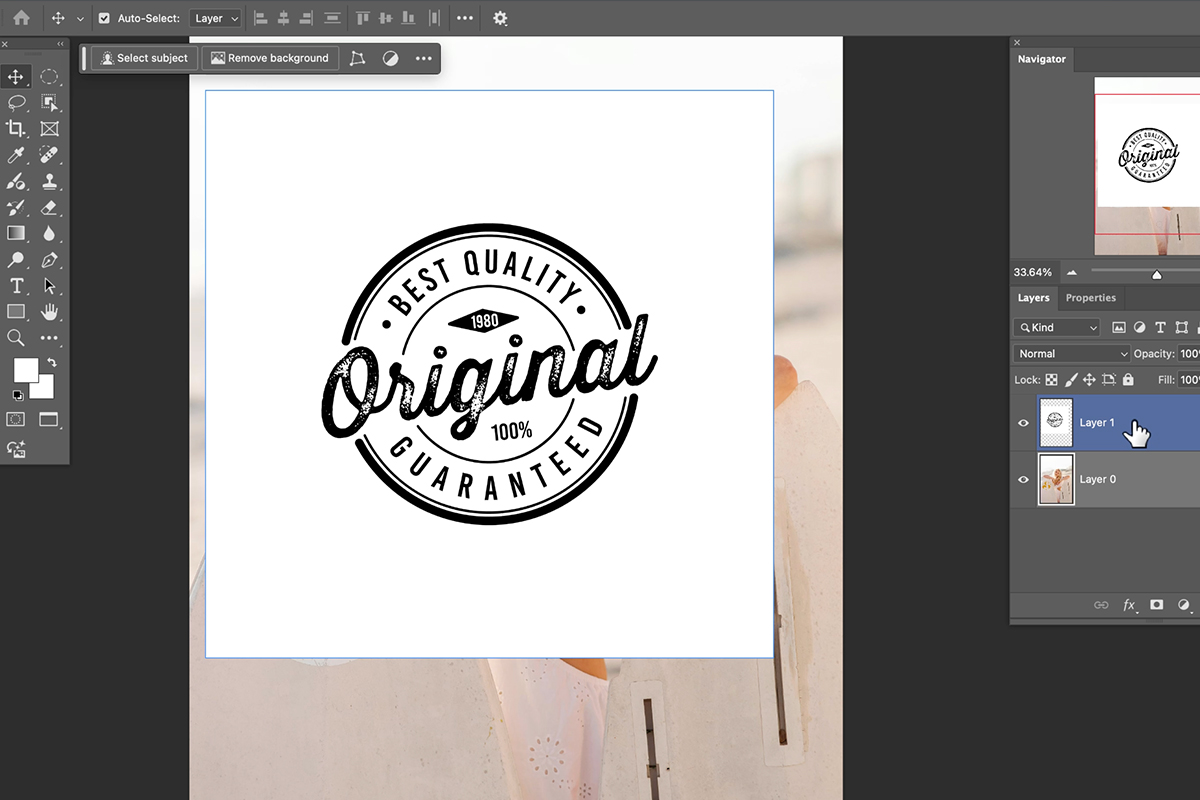
Hover Over a Masked Layer
With Show Hover Bounds from Layers turned on, hover over a layer that has a layer mask applied to it.
Why Two Outlines Appear
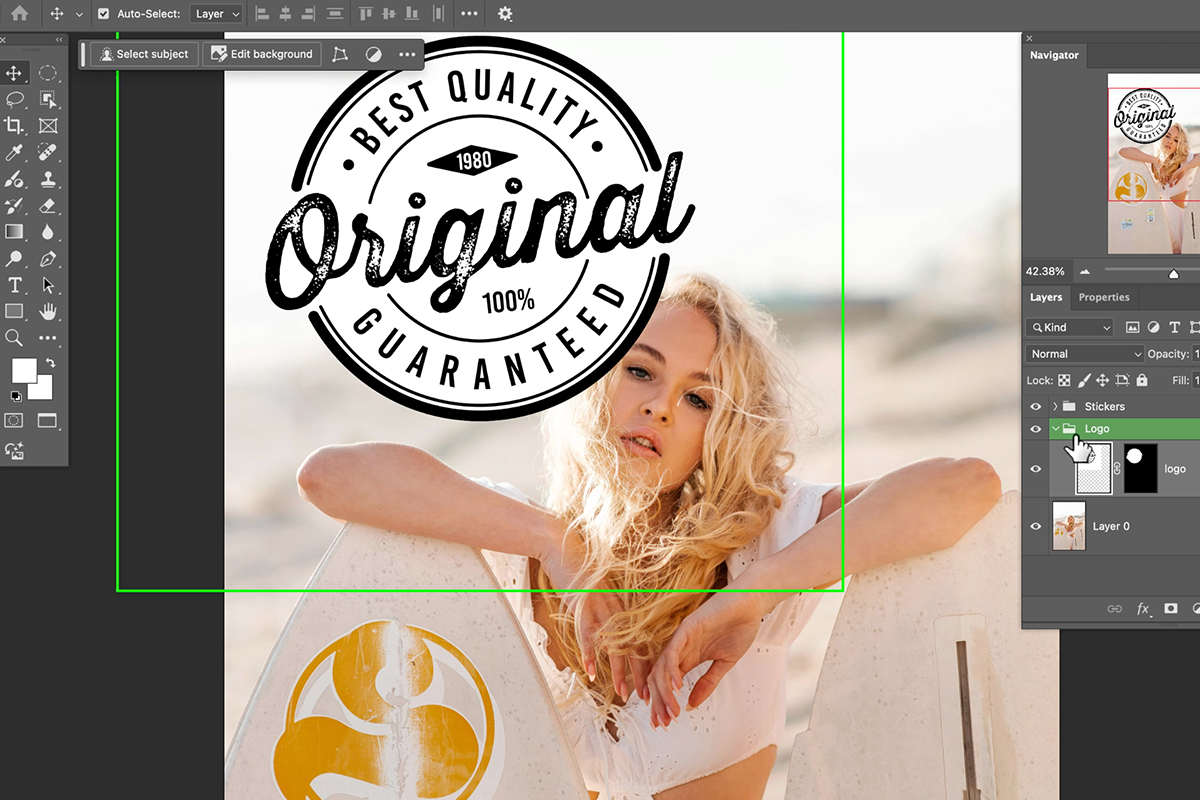
Hovering over a masked layer shows two separate outlines at once: a smaller, fully opaque one marking what’s actually visible from that layer, and a larger one that includes the full extent of the layer mask. Seeing both at the same time makes it much easier to understand exactly how a mask is cropping or revealing a layer’s content without opening the mask separately.
Grouping Layers and Hiding Content Behind a Subject
Groups get the same hover-highlighting treatment as individual layers, and combining a group with a layer mask makes it possible to hide an entire group’s contents behind a subject in one step.
-
Group Related Layers
Shift-click multiple layers, like a set of stickers, and press Ctrl + G (Cmd + G on Mac) to group them, then rename the group descriptively.
-
Select Subject on the Background Layer
Click the background layer, then go to Select > Subject to select your portrait subject.
-
Mask the Group with the Selection
With the selection active, click the group containing the layer you want hidden behind the subject (like a logo), then click the Layer Mask icon.
-
Invert the Mask if Needed
If the result is backward, right-click the mask and choose Invert Mask so the group is hidden behind the subject rather than only visible there.
Expanding Groups on Click
-
Turn On Expand Layer Group on Click
In the options bar, check Expand Layer Group on Click.
-
Click a Grouped Layer on the Canvas
Click directly on an element that lives inside a group, like one of the sticker layers, and the Layers panel automatically expands that group and highlights the specific layer inside it.
Choosing Your Auto Select and Transform Preferences
With the highlighting features dialed in, the last step is deciding which of the remaining default behaviors actually fit your own workflow, since some can make a complex document feel cluttered rather than clearer.
-
Turn Off Auto Select
Uncheck Auto Select in the options bar so clicking anywhere in the document moves whichever layer is currently selected in the panel, rather than whatever layer happens to be under the cursor.
-
Hold Ctrl/Cmd to Temporarily Enable Auto Select
Hold Ctrl (Cmd on Mac) and click any layer on the canvas to select and work with it directly, without permanently turning Auto Select back on.
-
Turn Off Show Transform Controls
Uncheck Show Transform Controls to reduce on-screen clutter, especially once hover bounds are already active.
-
Use Ctrl/Cmd-Click and Ctrl/Cmd+T Together
Hold Ctrl/Cmd and click a layer to select it, then press Ctrl/Cmd + T to transform it directly, even with transform controls turned off by default.
Why Turn Off Auto Select by Default
With Auto Select left on, clicking anywhere in a busy document risks accidentally grabbing and moving the wrong layer. Turning it off and relying on a temporary Ctrl/Cmd-held override keeps you working confidently on a single selected layer, while still giving you a fast way to jump to a different one whenever you actually need to.
Common Mistakes to Avoid
Trying to use hover highlighting while a selection tool like the Marquee is active, instead of the Move tool, is the most common early confusion — the feature simply doesn’t activate outside the Move tool. Leaving the highlight color at its default light blue is also easy to overlook, and it makes the new layers feature much harder to distinguish from Photoshop’s other blue overlays. And leaving Auto Select turned on in a document with many overlapping layers invites accidentally moving the wrong one.
Why This Approach Works
What makes the new layers feature genuinely useful, rather than just a visual novelty, is that it closes the gap between a document’s Layers panel and its canvas in both directions at once — hover a layer in the panel and see it on the canvas, or hover an element on the canvas and see it highlighted in the panel. That two-way connection is what makes a complex document with groups, masks, and many layers actually navigable instead of requiring you to click through entries one at a time guessing which is which.
Showing both a layer’s visible bounds and its mask’s bounds simultaneously solves a related problem: understanding how a mask is shaping a layer used to mean opening the mask separately, and now it’s visible at a glance. And the choice to turn off Auto Select and Show Transform Controls by default, relying on a Ctrl/Cmd-held override instead, reflects a deliberate trade-off worth adopting broadly: a cleaner, quieter canvas most of the time, with fast, deliberate access to move or transform any layer the moment you actually need to.
Final Thoughts
Since this feature is still in beta, the specific settings and defaults may continue to change, but the underlying idea — connecting hover states between the canvas and the Layers panel — is a genuinely useful addition for anyone working with complex, layer-heavy documents. Spending a few minutes customizing the highlight color, deciding which hover toggles fit your workflow, and choosing whether Auto Select should be on by default is well worth it before diving into a real project, since these are exactly the kind of small preferences that add up to a noticeably smoother editing session.
Download the Practice Files
The practice files for this tutorial include 2 sample images and 1 sample PSD, a document with enough layers and groups in it to actually put the new Layers panel through its paces. Downloads are free with a PHLEARN account.
More Free Photoshop Tutorials
If you enjoyed exploring this new layers feature, these free tutorials cover related tools and workflows:
- How to Use Smart Objects in Photoshop
- New Generative Fill Enhance Feature Explained (Beta)
- How to Create and Use Layer Masks in Photoshop
Related Tutorials






Enjoying This Free Tutorial? Go Further with PRO.
200+ PRO courses. 1,000+ practice files. One membership.

Unlimited access to every PRO course
New PRO courses every month
Layered PSDs and RAW files to follow along
100+ Lightroom Presets, LUTs, Actions and Brushes
Stream in up to 4K, with captions and chapters
Watch on any device: desktop, tablet or phone
4.93 average from 3,900+ reviews · 2M+ students