


Download Assets
This tutorial includes 5 sample images, 1 sample PSD and 1 PDF guide. Downloads are free with a PHLEARN account.
- Download the sample images and PSDs from every free tutorial on PHLEARN
- New free tutorials published every week
- One free account — sign up once, then download anything
Free PDF Guide · 3 Pages
This Tutorial as a Step-by-Step PDF
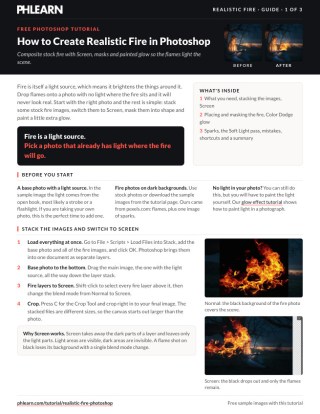
The guide walks through File > Scripts > Load Files into Stack, switching the fire layers to Screen, Levels to hide leftover backgrounds, masking the flames along an edge, a Color Dodge glow, distorting the sparks toward the fire and a final Soft Light pass. Keep it next to your keyboard.
description
Realistic fire in Photoshop starts from one idea — fire is a light source, not a sticker — so a convincing composite begins with a photo that already has light hitting the subject. Learn how to load several stock fire images into one document, use Screen blend mode to drop their black backgrounds, layer them with inverted masks for density exactly where you want it, and paint extra glow on Color Dodge and Soft Light layers so the flames light the scene around them.
Enjoying This Free Tutorial?
We publish a new free tutorial every week, each one with sample images and PSDs you can download and follow along with. Sign up and they land straight in your inbox, along with early word on sales, events and subscriber-only offers.


How to Create Realistic Fire in Photoshop
Fire is a light source, which means it doesn’t just sit on top of a photo — it needs to actually brighten the things around it to look believable. This technique composites several stock fire images into a photo using the Screen blend mode, so the fire’s own light naturally interacts with the scene instead of looking pasted in.
Choosing the Right Base Photo
The single most important decision in this effect happens before you ever open Photoshop.
-
Pick a Photo with an Existing Light Source
Choose a base image where a light source — a strobe, a flashlight, or similar — has already been used to light the subject the way fire would. Fire images composited onto a flat, evenly lit photo will never look convincing, no matter how good the fire source images are.

Loading Your Fire Images as a Stack
Rather than opening each fire photo separately and dragging it in, Photoshop can load a whole set of images into one file at once.
-
Load Files into a Stack
Go to File > Scripts > Load Files into Stack, then add your base photo along with all of your fire stock images. Click OK to bring them into a single document as separate layers.
-
Move the Base Photo to the Bottom
Drag your base photo — the one with the light source already in it — all the way to the bottom of the layer stack, underneath every fire image.

Switching Fire Layers to Screen Blend Mode
A single blend mode change is what turns these separate fire photos into something that reads as flames within the scene.
-
Select All the Fire Layers
Shift-click each fire layer in the Layers panel to select them all at once, leaving the base photo unselected.
-
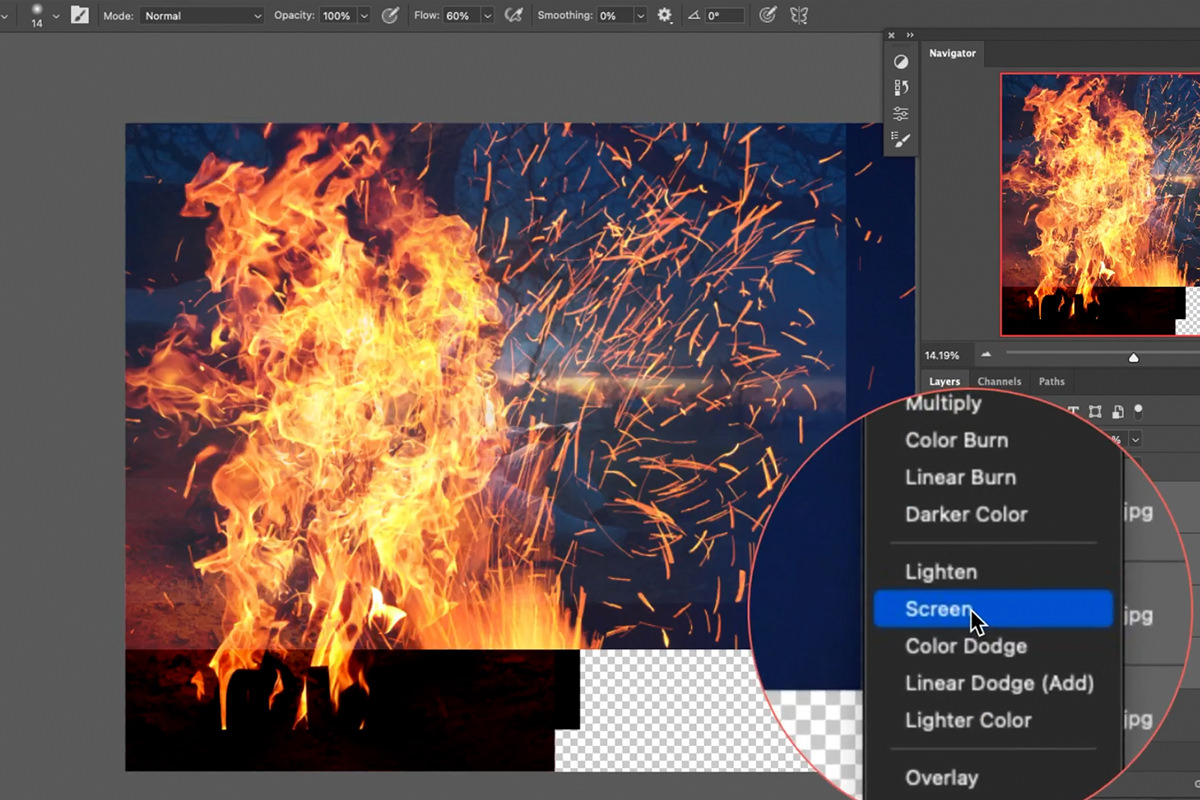
Change the Blend Mode to Screen
With the fire layers selected, change their blending mode from Normal to Screen. Screen mode removes the dark areas of each fire image and leaves only the bright flame areas visible.
Why Screen Mode Isolates the Bright Parts
Screen blend mode compares each fire layer against the layers beneath it and only lightens — it can never make anything darker. Since most stock fire photos are shot against a black or very dark background, Screen mode effectively erases that background entirely while keeping the bright orange and yellow flame detail fully visible, without any manual masking needed just to remove the black backdrop.
Cropping and Cleaning Up the Composite
Once the first fire layer is in place, a couple of quick adjustments clean up the edges of the black background that Screen mode doesn’t fully remove.
-
Crop to Your Final Composition
Press C for the Crop tool and crop the document down to your intended final image size.
-
Darken the Remaining Background with Levels
If a faint outline of the fire image’s background is still visible, press Ctrl + L on PC (Cmd + L on Mac) for Levels and pull the black point slider further to darken the darks, which makes any remaining background disappear.
-
Scale and Position the Fire Layer
Press Ctrl + T on PC (Cmd + T on Mac) to transform the fire layer into position over your subject.

Masking Fire onto Your Subject
Fire rarely needs to cover the entire frame — a layer mask lets you control exactly where it shows.
-
Add a Layer Mask
With the fire layer selected, add a layer mask, then paint with black to hide the fire anywhere it shouldn’t appear — for example, off of a person’s hand where it would look wrong.
Why Fire Needs a Defined Edge, Not a Fade
Real fire has a distinct, physical shape — it doesn’t gradually fade into nothing. When masking fire away, look for a natural edge in the scene, like the edge of an object the fire is supposedly coming from, and let the fire stop cleanly at that edge rather than feathering it into a soft fade. A soft fade reads as a Photoshop effect; a clean edge reads as flame with real physical boundaries.

Layering Additional Fire Sources
A single fire image rarely has enough density and variation on its own, so adding more fire layers builds up a richer, more convincing flame.
-
Add Another Fire Image
Bring in another fire layer from your stack, scale it down with Ctrl + T on PC (Cmd + T on Mac), and position it to add extra density right where the flame should be most concentrated.
-
Invert the Mask to Start Hidden
Add a layer mask to the new fire layer, then press Ctrl + I on PC (Cmd + I on Mac) to invert it to solid black, making the layer completely invisible.
-
Paint White to Reveal Fire Selectively
Paint with white on the inverted mask to reveal fire only in the specific spots where you want more density, giving you precise, additive control instead of starting from a fully visible layer and hiding parts of it.


Painting Extra Glow with Color Dodge
The composited fire images alone don’t always cast quite enough light onto the subject, so a hand-painted glow layer fills that gap.
-
Sample a Color from the Fire
Create a new layer, grab the Brush tool, and hold Alt on PC (Option on Mac) to sample an orange color directly from one of your fire layers.
-
Paint on a Color Dodge Layer
Change the new layer’s blending mode to Color Dodge, then paint the sampled orange color onto the areas nearest the fire — the base of the flame and the edges of your subject closest to it — to add an extra glow. If your first strokes are haphazard, press Cmd/Ctrl + A to select all, press Delete to clear the layer and paint again with more intention: brighter toward the book and the base of the fire, and around the light source so it defines the edge of your subject.
What Color Dodge Is Doing Here
Color Dodge brightens whatever’s underneath based on the color you paint, producing a hot, glowing quality rather than a flat wash of orange — which is why it reads as light rather than as paint. Because the effect is so strong, it’s worth painting with intention on a fresh, empty layer rather than haphazardly, and lowering the layer’s opacity if the glow becomes too intense in any one spot, such as on a person’s face.

Adding Sparks and Trimming Composite Edges
A final fire layer of sparks or embers adds movement and finishes off the effect, but composited images like this often carry a telltale sign that needs cleaning up.
-
Add a Sparks or Ember Layer
Bring in another fire image focused on sparks, scale and position it with Ctrl + T on PC (Cmd + T on Mac), and use Levels again to darken the darks until the remaining background disappears. While transforming, hold Cmd/Ctrl and drag a corner to distort the sparks so they look like they come from the fire itself.
-
Mask Away Any Hard Cutoff Edges
Add a layer mask and paint away any spot where the original fire image’s rectangular edge is still visible — a hard straight line cutting across a fire effect is an immediate giveaway that the image has been composited.


Finishing with a Soft Glow Pass
One last painted glow layer, using a gentler blend mode than Color Dodge, softens and unifies everything that’s been built up so far.
-
Paint a Final Glow Layer
Create one more new layer, sample an orange color from your fire, and paint a soft glow across the areas closest to the flame.
-
Try Different Blend Modes
Test the layer’s blending mode against a few options — the video starts on Soft Light, tries Overlay and finds it a little too much on this image, then goes back to Soft Light and makes the layer a little less visible — and pick whichever looks most natural on your specific image, lowering opacity if it reads as too strong.
-
Group and Compare Before and After
Once you’re happy with the result, select all of your fire and glow layers and group them together, then toggle the group’s visibility off and on to compare your final composite against the original photo.
Comparing Blend Modes for the Final Glow
Different blend modes push the same painted color in different directions — Soft Light tends to produce a subtler, more natural-looking glow, while Overlay pushes contrast harder and can quickly look too intense on the same paint. Trying a layer at a couple of different blend modes costs nothing and often reveals which one actually matches the specific lighting of your photo.


Why This Effect Works
The whole technique rests on one core idea: fire is a light source, so it should be treated like one rather than like a static object being pasted into a scene. Starting from a base photo that already has real light hitting the subject, then using Screen mode to let only the fire’s bright areas contribute, keeps the composite grounded in believable lighting from the very first layer. Building up multiple fire layers with inverted masks lets you add density exactly where it’s needed instead of accepting whatever a single stock photo happens to show, and the hand-painted Color Dodge and Soft Light glow layers extend that same light logic onto the subject itself, so the fire doesn’t just sit next to the person or object — it actually appears to be lighting them. If you’d rather paint your own light sources from scratch instead of compositing stock fire, this glow effect tutorial covers the painting techniques this same approach relies on.
Final Thoughts
Realistic fire compositing comes down to two things: starting with a photo that already has a light source built in, and layering multiple fire images with masks and blend modes rather than relying on one image to do everything. Screen mode does most of the heavy lifting for isolating the flames themselves, but it’s the additional hand-painted glow, the attention to clean edges, and the final comparison against the original that push a fire composite from looking pasted-on to looking like it belongs in the scene. Stock fire photography sites make the source images easy to find, so the real skill worth practicing here is the layering and masking process itself, since it transfers directly to any other light-based compositing effect.
Quick Reference: Keys, Menus and Settings
- Load the imagesFile > Scripts > Load Files into Stack; drag the base photo to the bottom
- Fire to ScreenShift-click the fire layers, blend mode Normal to Screen; C to crop
- Hide leftover backgroundCmd/Ctrl + L, make the darks a little darker
- Place and maskCmd/Ctrl + T; layer mask, Cmd/Ctrl + I to start hidden, paint white to reveal
- Hot glowNew layer, B, Alt/Option-click an orange, Color Dodge; Cmd/Ctrl + A, Delete to start over
- Aim the sparksIn Free Transform, Cmd/Ctrl-drag a corner toward the fire
- Soft glowNew layer set to Soft Light, lowered until it looks right; group everything to compare
No AI, no generative credits.
Free Downloads
Follow Along on the Same Photos
Get the base photo, the stock fire and spark images, the layered PSD and the 3-page PDF guide. Free with a PHLEARN account.
Realistic Fire in Photoshop: Common Questions
Why does my fire look pasted on?
Fire is a light source, so it brightens the things around it. Start with a photo that already has light where the fire will go; the sample was lit from the book with a strobe or a flashlight. Without one, you have to paint the light yourself.
How do I get all the fire images into one file?
Go to File > Scripts > Load Files into Stack, add the base photo and all of the fire images and click OK. Then drag the base photo to the bottom of the layer stack.
How do I get rid of the black background around the flames?
Shift-click the fire layers and change the blend mode from Normal to Screen. Screen keeps the light parts and drops the dark ones. If a faint outline is still visible, press Cmd/Ctrl + L and make the darks a little darker.
Should I fade the fire out with a soft mask?
No. Fire always has a defined shape, so a fade never looks realistic. Decide where the fire should end, find an edge there, like the edge of the book, and hide the fire along that edge.
How do I add more fire in just one spot?
Bring in another fire layer, make it small with Cmd/Ctrl + T, add a layer mask and press Cmd/Ctrl + I to invert it so the layer is hidden. Then paint white where you want more density.
How do I make the fire light up my subject?
Create a new layer, press B, Alt/Option-click to sample an orange from the fire and set the layer to Color Dodge. Paint toward the base of the fire and around the light source; lower the layer if it’s too much on a face.
My glow strokes look messy. How do I start the layer over?
Press Cmd/Ctrl + A to select all, press Delete to clear the layer, then paint again with more intention.
How do I make the sparks look like they come from the fire?
In Free Transform, hold Cmd/Ctrl and drag a corner to distort the sparks toward the fire. Then add a layer mask and paint away the hard line where the sparks image ends; that line is a dead giveaway.
Soft Light or Overlay for the final glow?
Try both. On this image Overlay was a little too much, so the video goes back to Soft Light and makes the layer a little less visible.
Are the sample files free?
Yes, with a free PHLEARN account. You get 5 sample images, 1 sample PSD and 1 PDF guide: the base photo and the stock fire and spark images, the layered PSD and a 3-page step-by-step guide.
From the Magazine View all
Stories, interviews and guides for photographers, new every week.
 EditingLightCraft vs Lightroom: I Edited the Same RAW Files in BothThe free clone on the same RAW files: what matches, what breaks and who should switch.
 InspirationRare Historical Photos: 13 of the Rarest Pictures Ever TakenFrom the earliest surviving picture of a person to the last passenger pigeon: who took each one and why it survives.
 EditingArtCraft: Photoshop Cloned by AI in Two Weeks. Is It Legal?ArtCraft cloned Photoshop and Lightroom with AI and gave them away. Any good? Legal? Safe?
Master Photoshop, Lightroom and Photography
Join PHLEARN PRO for $12.99 a month, or $99.99 a year (save 36%). Cancel anytime, with a 100% money-back guarantee.





