Download Sample Images
Click the link below to download the sample images and follow along with this tutorial.
DownloadTutorial Description
There are plenty of ways to remove backgrounds from photos in Photoshop. But when you’re working with areas that have intricate textures and details, nothing does it better than the Clone Stamp Tool! Follow along and learn how to use the Clone Stamp Tool to sample details and textures and use them to cover up anything in an image. We also show you powerful techniques to match the color and light of any Clone Stamped areas for the most realistic results possible.
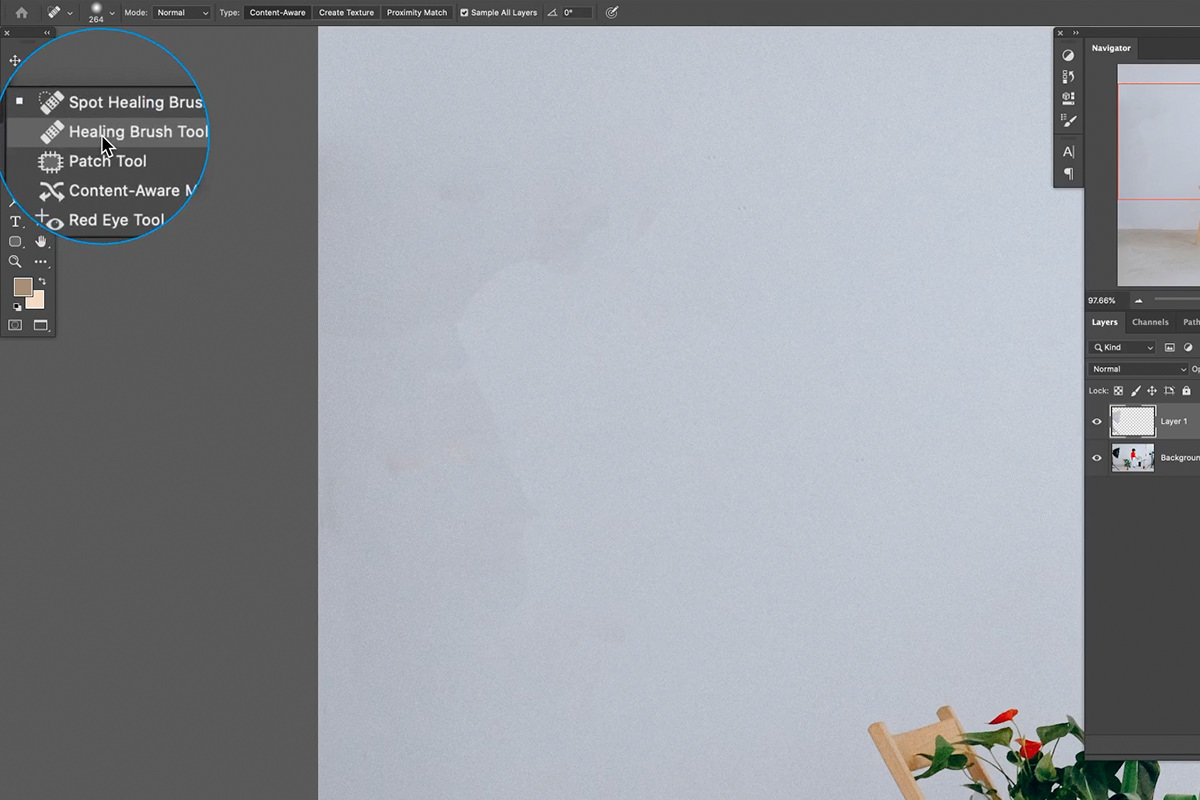
The Healing Brush & Spot Healing Brush
The Healing Brush Tool and the Spot Healing Brush Tool are commonly used and are each extremely useful in certain situations. If you’re doing any skin retouching, hair retouching, or removing objects that are on a low-detail background, these are the best tools for the job.
As good as they can be for removing distractions, they falter a bit when working around areas where there are intricate details, lines, and textures. You might remove something successfully only to have it replaced by a muddy mess. Say, for example, you want to remove a car from the background of a portrait, but that car is in front of a building. If you try to remove it using the Spot Healing Brush, the car will be removed, but it will not do very well at recreating the hard lines and details of the building behind.
So keep keep this in mind! When you’re working with parts of a photo where there either isn’t much detail or, if there is,
Using the Clone Stamp Tool
Before we get started with removing distractions, we have a few important tips for using the Clone Stamp Tool:
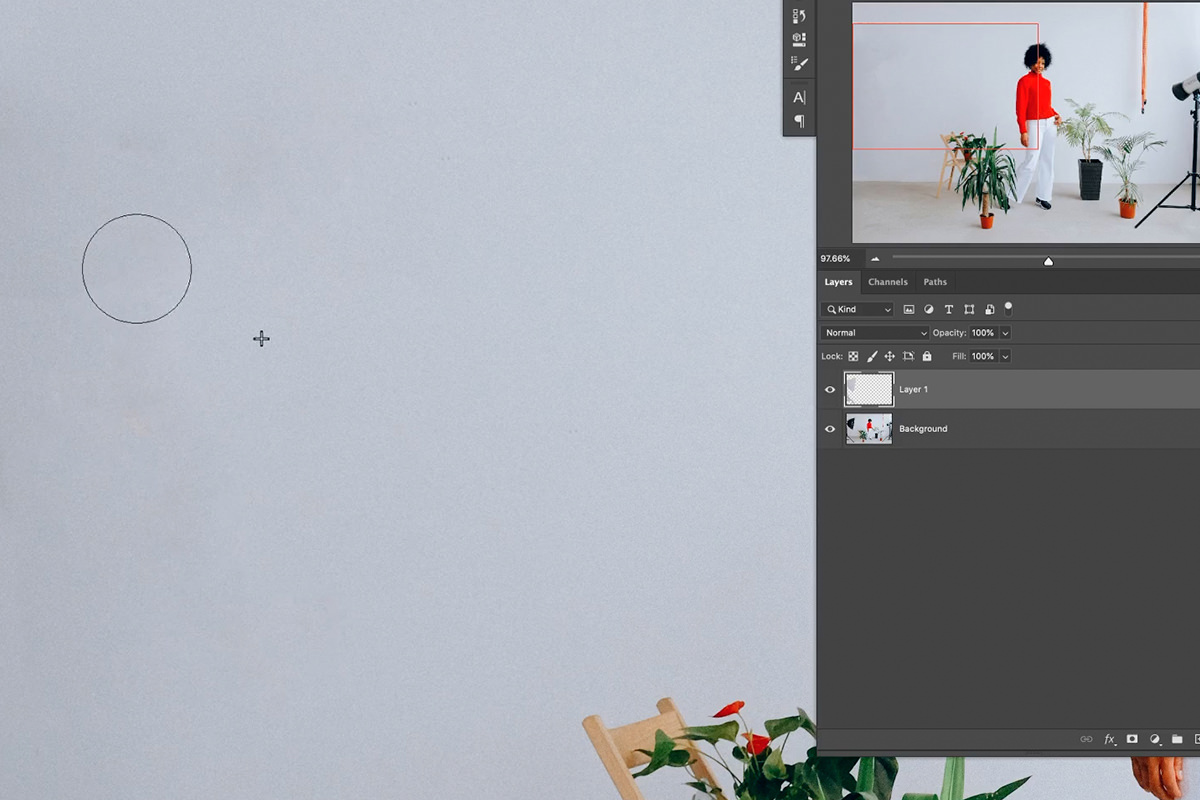
1.) Always work on a new Layer! If you want to remove something from a photo with the Clone Stamp Tool, make those edits on a new, blank Layer. This way you can always get back to your original image and make changes/edits to your Clone Stamped areas (which, as you’ll see, will be important later).
2.) When using the Clone Stamp Tool on a new Layer, be sure to check ‘Sample Current and Below’ in the tool options. This setting allows you to sample and paint on a blank Layer using the pixel information from all of the Layers below.
3.) Go to the Window Menu and select the Clone Source option. This will open the Clone Source dialog which allows you to enable a preview of what you have sampled. It can be helpful to see exactly what you’ll be painting with the Clone Stamp when sampling detailed areas that need to be lined up in a particular way.
Once you’re done with these steps, you’re ready to start removing distractions!
Removing Objects & Distractions
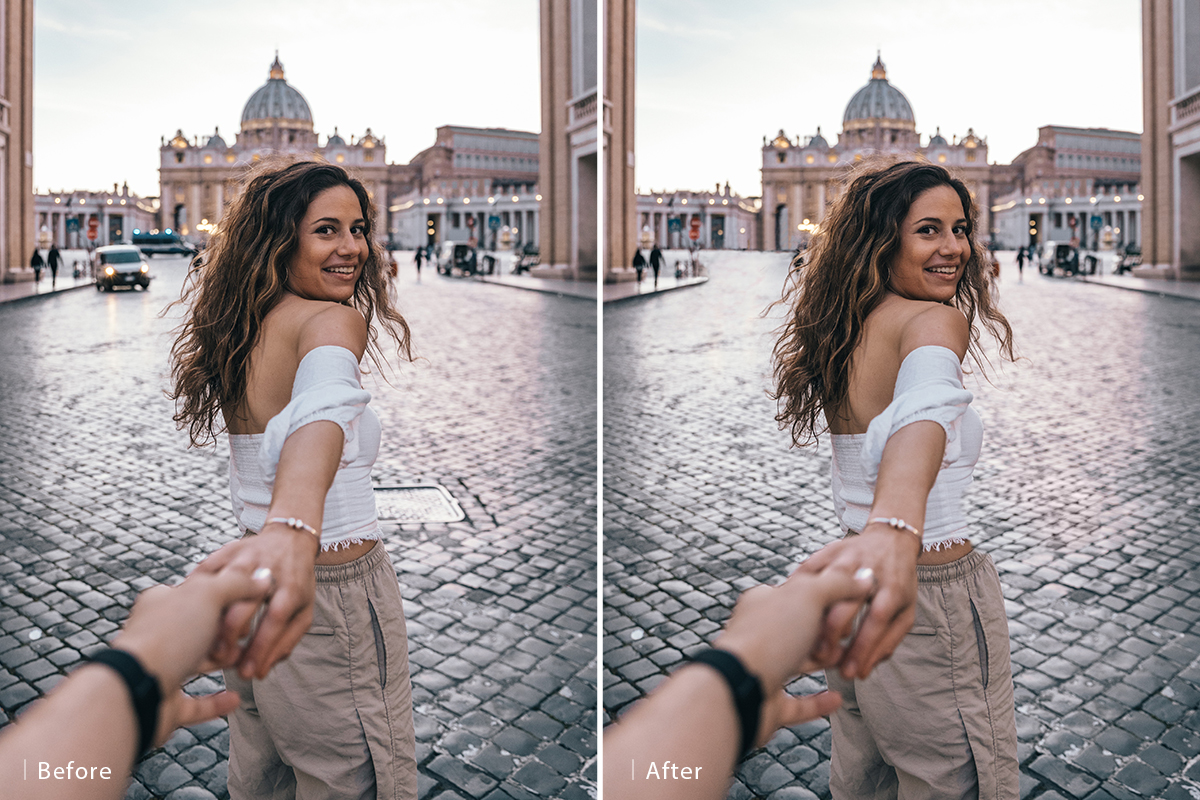
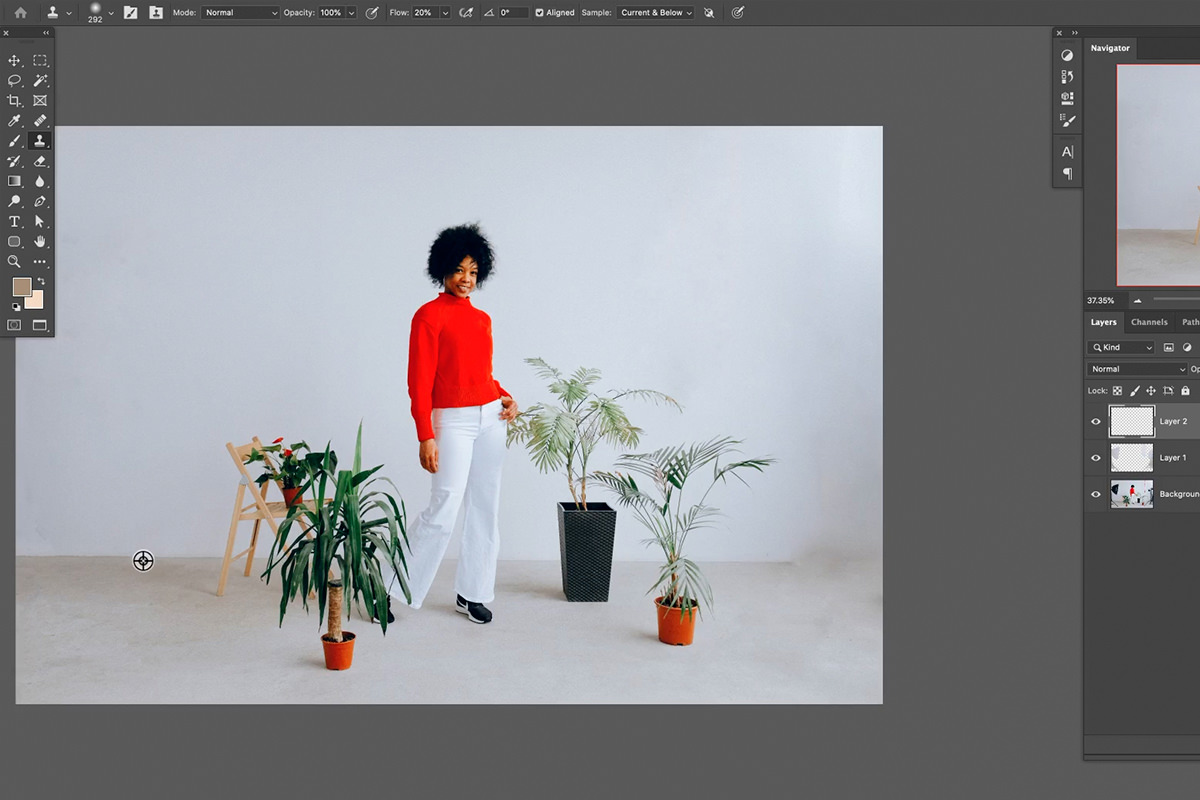
The Clone Stamp Tool is very easy to use once it’s set up. Simply hold ALT or OPTN to Sample the part of the photo you want to use to cover up a distraction. In our example, we wanted to remove a sewer grate that was next to our subject. We created a new Layer, sampled an area of the cobblestone road that matched, and then paint with that sample over the grate.
In general, it’s always better to overpaint and make refinements later than to underpaint and potentially miss some spots.
So don’t worry about painting perfectly. You can always go back and make adjustments using a Layer Mask. Just add a Layer Mask to your Clone Stamp Layer and paint black on areas that you want to erase.
Once you have the area covered, it might help to make some additional adjustments with the Transform Tool. Hit CTRL or CMD + T and then you can move, scale, and rotate the layer to line up better with the details in the original background.
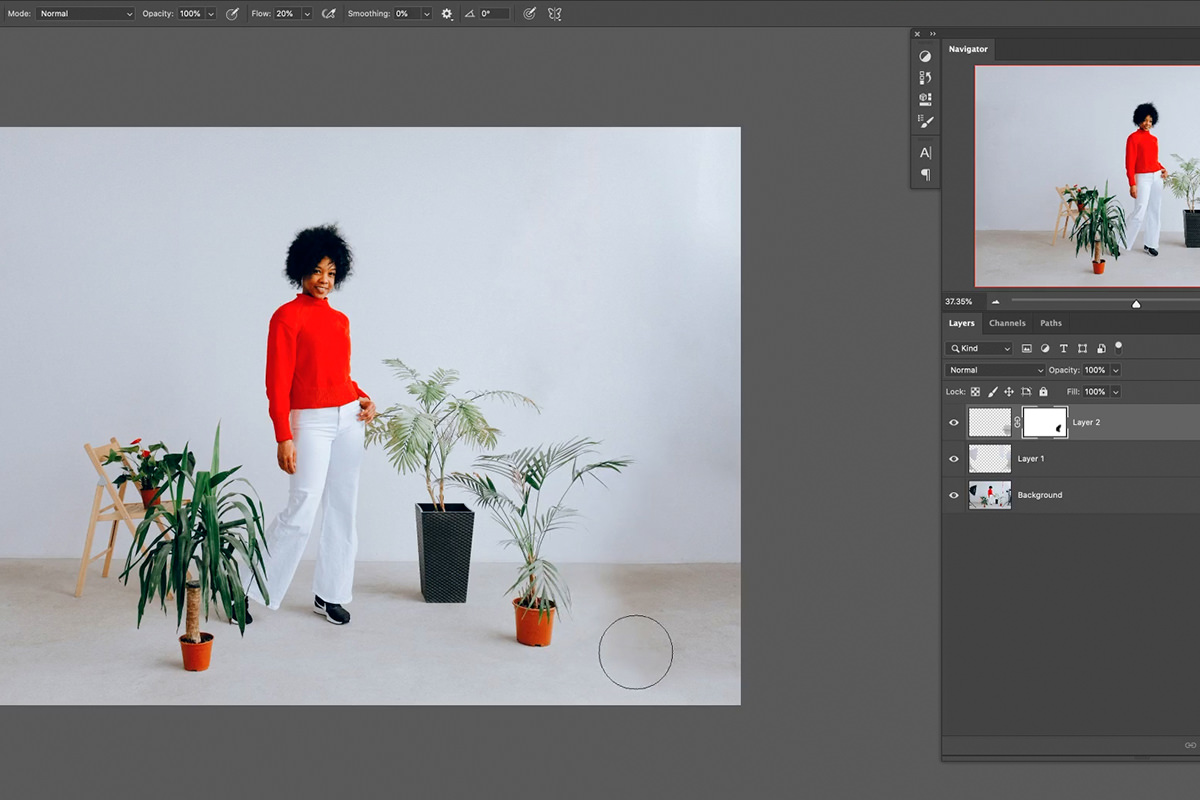
Matching Light & Color
If you’re following along, you might notice that your Clone Stamp Layer still doesn’t quite fit in with the rest of the photo. Oftentimes you’ll be sampling other parts of a photo where the light and color are slightly different than the are you want to cover. Fortunately, we can easily make adjustments to the light and color of the Clone Stamp Layer using a variety of Layers and Adjustment Layers.
For example, if we wanted to adjust the color of our newly Clone Stamped Layer, we can create a new Layer, Sample a color from nearby bricks in the original photo, and then paint over the Clone Stamp Layer. Right click on the paint Layer and select ‘Create Clipping Mask’. This will make it so that the color only appears where the Clone Stamp Layer is visible. Change the Blending Mode of the painted color Layer to Color and adjust the Opacity until it looks natural.
This same process can be done using Adjustment Layers as well. Try experimenting with Curves, Levels, and Hue/Saturation Adjustment Layers in combination with Clipping Masks to get an even closer match to the original photo.
Remove Anything in Photoshop with the Clone Stamp Tool
-

-
Add to
favorites
-
DifficultyEasy
-
Videos1
-
Software
Description
Hmm, I like that part of this photo, let’s duplicate it to another area!
In this tutorial, learn to use one of the most powerful tools in Photoshop to remove blemishes from a portrait!
THIS COURSE INCLUDES
- 1 Sample Image
Share
Course Downloads

What is the Clone Stamp Tool?
One of the essential tools in the Photoshop arsenal is the Clone Stamp tool. If you spend any time editing or color-correcting digital photos, you’re going to want to make this tool your new best friend. Read on to learn what it does.
Why Do You Need a Clone Stamp?
This tool allows you to use what is in one area of a photo and recreate it in a different area. This is one of the original tools from the earliest versions of Photoshop, and it’s extremely useful for getting rid of unwanted elements in your photo while keeping its natural look intact.
Perfect Your Photos
Very often in photos, there are elements you want to keep and elements you want to get rid of. The question is, how do you get rid of the elements you don’t want? Better yet, what do you replace them with? The Clone Stamp is great for:
- Covering slight blemishes
- Duplicating objects
- Adding layers
Let’s say you have a beautiful backdrop such as an ocean, a lovely sunset or a wide expanse of grass that is simply marred by a single person or object you wish to get rid of. The Clone tool will reproduce what you like about the photo and simply cover over what you want to remove from the photo while still preserving your background.
Lighting May Be an Issue
There are, of course, some instances where this tool may be challenging to use. For example, let’s say the area you want to clone is marred in shadow, whereas the area you want to replace is in the light. The darker pixels of the shadowed area will look unnatural in the lighter area.
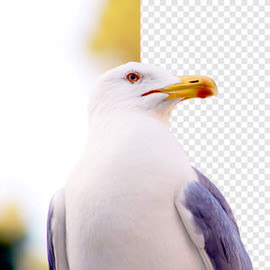
As another example, let’s say you have a photo of a couple standing on a gorgeous beach, but a large bird’s beak is poking out from behind one of the people. You may want to use an area of sandy beach to cover the bird’s beak to create a nice, smooth backdrop for this beautiful photo.
But what if the couple is standing under something that provides shade in the left half of the photo, while the beautiful, empty expanse of sunny beach consumes the right half of the photo? If the bird’s beak appears to the left side of the couple, you might have a problem. You might not have a large enough patch of beach on the left side of the photo (which is darker) to easily cover over the bird’s beak, and if you try and pull a section from the right side of the photo using the Clone Stamp, it may be too bright to blend in with the beach to the left of the couple. In cases like this, you’ll simply have to select a smaller patch to duplicate on the darker side. It’s definitely doable; it will just take a bit of extra time and patience.
For more tips, tools and tricks with the Clone Stamp tool, check out our video.


Reviews
The Importance of the Clone Stamp Tool
The Clone Stamp Tool is one of the most important Tools that Photoshop has to offer. It allows you to copy areas of an image and i very useful for getting rid of Distractions or Skin blemishes.
In this episode we show you how to master the clone stamp tool in Photoshop. You will learn how to navigate the settings and preferences for the Tool. We also show you how we use the tool through several examples.
Using the Clone Source Dialog
The Clone Source Dialog is available by going to Window > Clone Source. Here you will see options for Clone Source, Transformation options, as well as Overlay options. We go through each of these options and show you how we set up our Clone Stamp Tool.
Photoshop has the “Show Overlay” option checked by default however we prefer to keep it unchecked. The Overlay can get in the way and is always available by hitting OPTN+SHIFT.
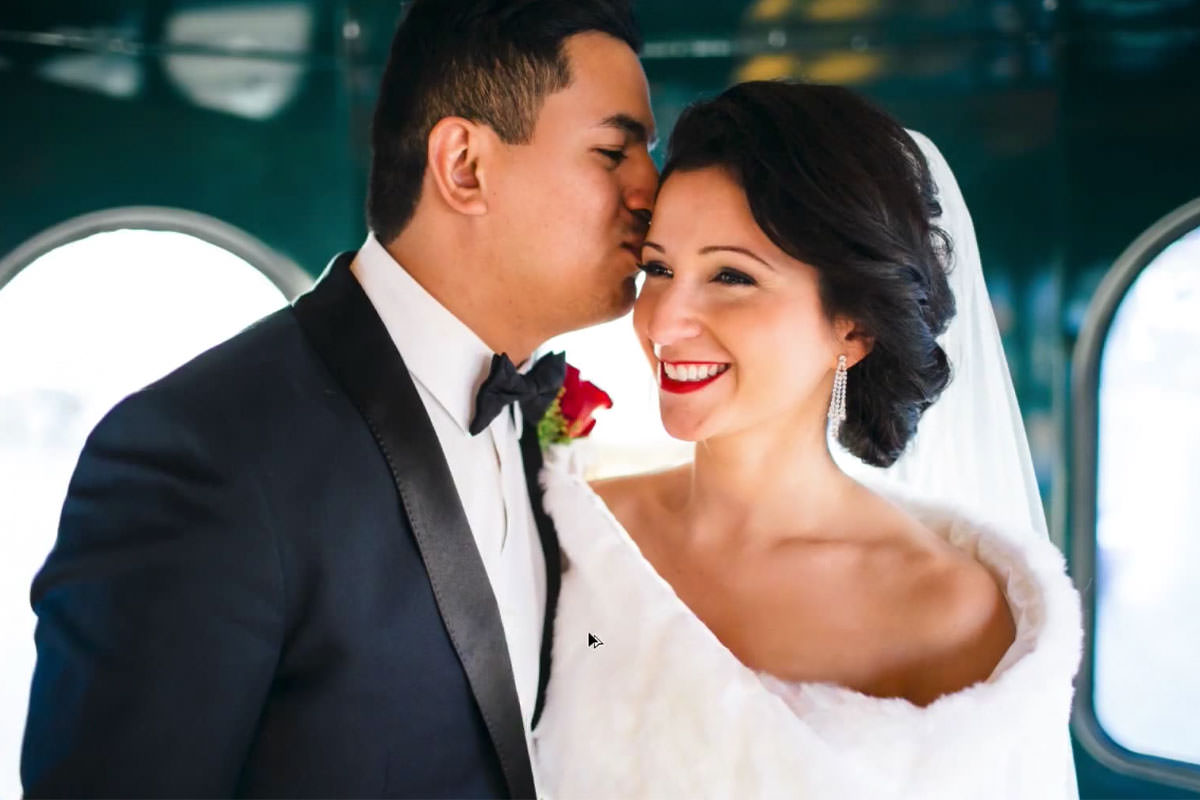
Adjusting Clone Stamp Selections
After using the Clone Stamp Tool to cover the lapel microphone there are still some Adjustments that need to be made. It is best to use the Clone Stamp tool on New Layers so you can Transform the selection afterwards. To do this hit CMD+T then right click on the layer. You will be able to rotate, skew, Transform and Warp the selection so it fits with the image better.
After getting the Clone Stamp selection in place we use a great technique to blend Exposures. Some areas of this layer need to be lighter and some need to be darker and we accomplish this using a combination of a Brush Tool set to blending mode “Soft Light” and the “Lock Transparency” Option in the layer dialog; This will allow you to only paint over non-Transparent pixels.
We then paint Black and White over the layer to brighten or Darken it accordingly.
Use Clone Stamp with Different Brushes
Many people think that you are limited to a soft round Brush when it comes to the Clone Stamp tool. The Clone Stamp tool can use any custom Brush the regular Brush Tool can use. Try adjusting your Brush shape or creating your own custom brush to best complete your project.
Tutorial Description
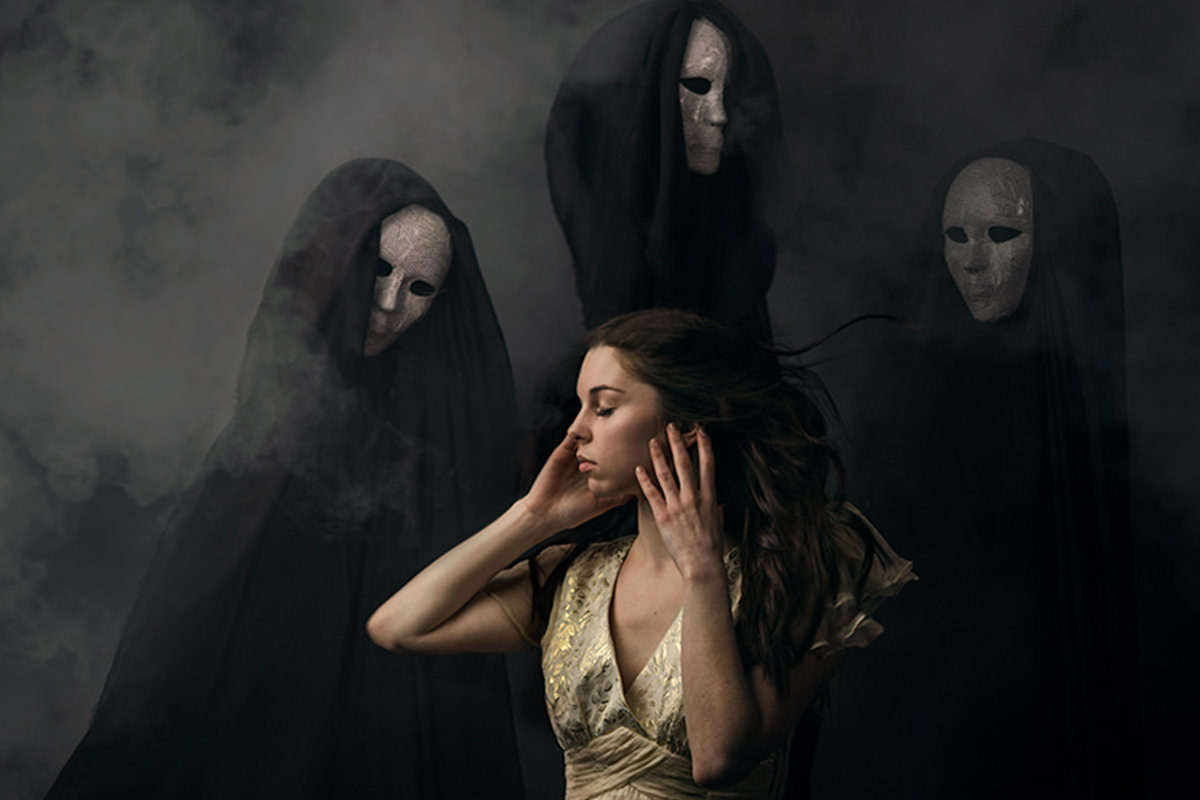
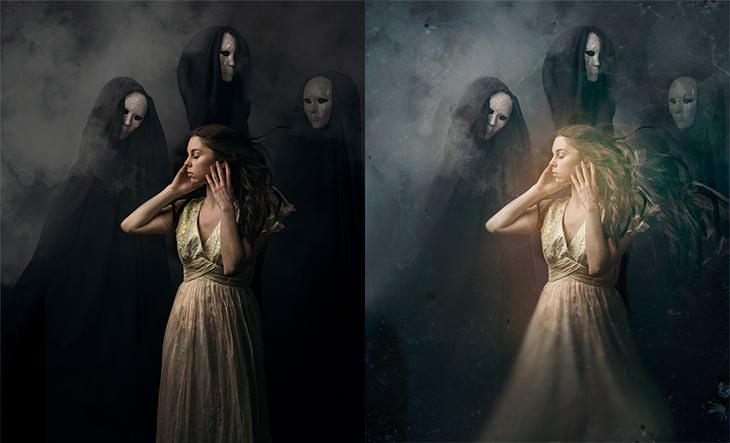
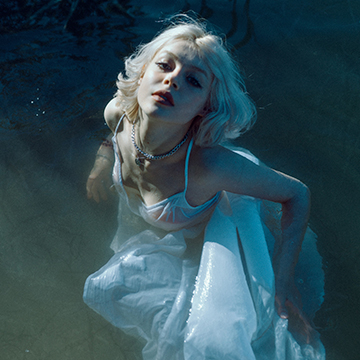
Today we’re editing an amazing self portrait by Amelia Fletcher. Make sure to check out the rest of her work, she rules!
Blurring Hard Lines
The ghosts in this photo create some heard lines that become slightly distracting. By using the Smudge Tool to blur these lines, they look more ghostly and take away less attention from the focal points of the image. This is a destructive technique, so make sure to duplicate your layer before using the Smudge Tool!
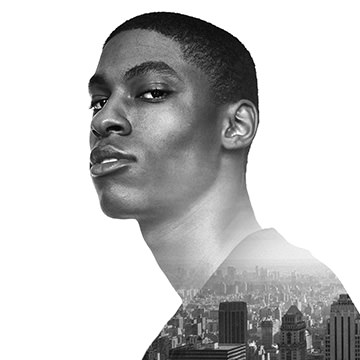
Adding Atmosphere and Textures
By using parts of your original image to create Special Effects, you can create a unique and organic look. We take parts of the ghosts and use different layer blending modes, and even use part of the image to create the glow in the center. Using Textures is also a big part of creating an effect like this. Textures can be confusing, but you just have to take the time to figure out what looks good and experiment with different blending layers.
Before & After

Clone Stamp VS Healing Brush Tool
We get a lot of people asking us what the Difference is between the Healing Brush Tool and the Clone Stamp. While they both have similar uses, there is a Difference in how these Tools get the job done.
What’s the difference?
Both of these Tools let you select a sampling point. This is the part of the image you want to keep, and paint over Distractions and blemishes. The clone stamp paints a complete copy of whatever you select. However, the Healing Brush Tool keeps the Highlights and Shadows of wherever you’re painting and only paints the Color of your sampling area. This makes the Clone Stamp much more suitable for areas with defined edges, since the Healing Brush will only blur the Color and you’ll end up with messy, smudged edges.
Make sure to become part of the Phlearn Family on Facebook, conversate with us on Twitter, and #hashtag your Phlearn Inspirations on Instagram. We want to know what the Phlearn community social chatter is about, and who is sharing it. You all keep us motivated to do our best.

Creating Custom Brushes
Creating Custom Brushes is a great way to add more of an organic feel to your editing. Often times a regular soft round brush will not work for your image and you will have to go with something that imitates the Texture of the area you are to clone. The reason is that a soft round brush results in fuzzy edges and blurred looking clone areas. Even a hard round Brush shows obvious signs that a cloning job has been done.
In today’s episode we create a custom Brush that looks like dirt and show you how to configure it perfectly. We then save the Brush and load it into the Clone Stamp tool to finish the job. The resulting effect is seamless and fun!
Download Assets
description
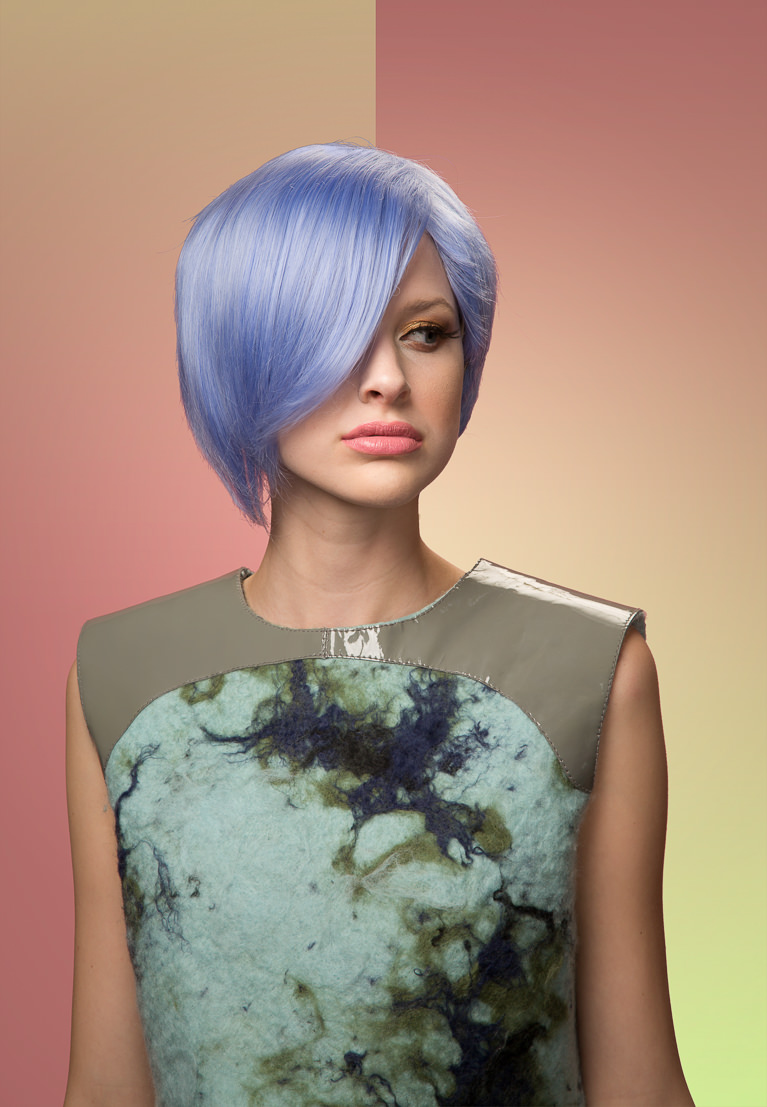
Learn to use the clone stamp tool, healing brush and liquify to fix wrinkles, shapes and other issues with clothing. Download the sample images and PSD to follow along.
Artist Credit
Photo by Charles Wundengba on Pexels
Share
MAKE DETAILED SELECTIONS OF HAIR
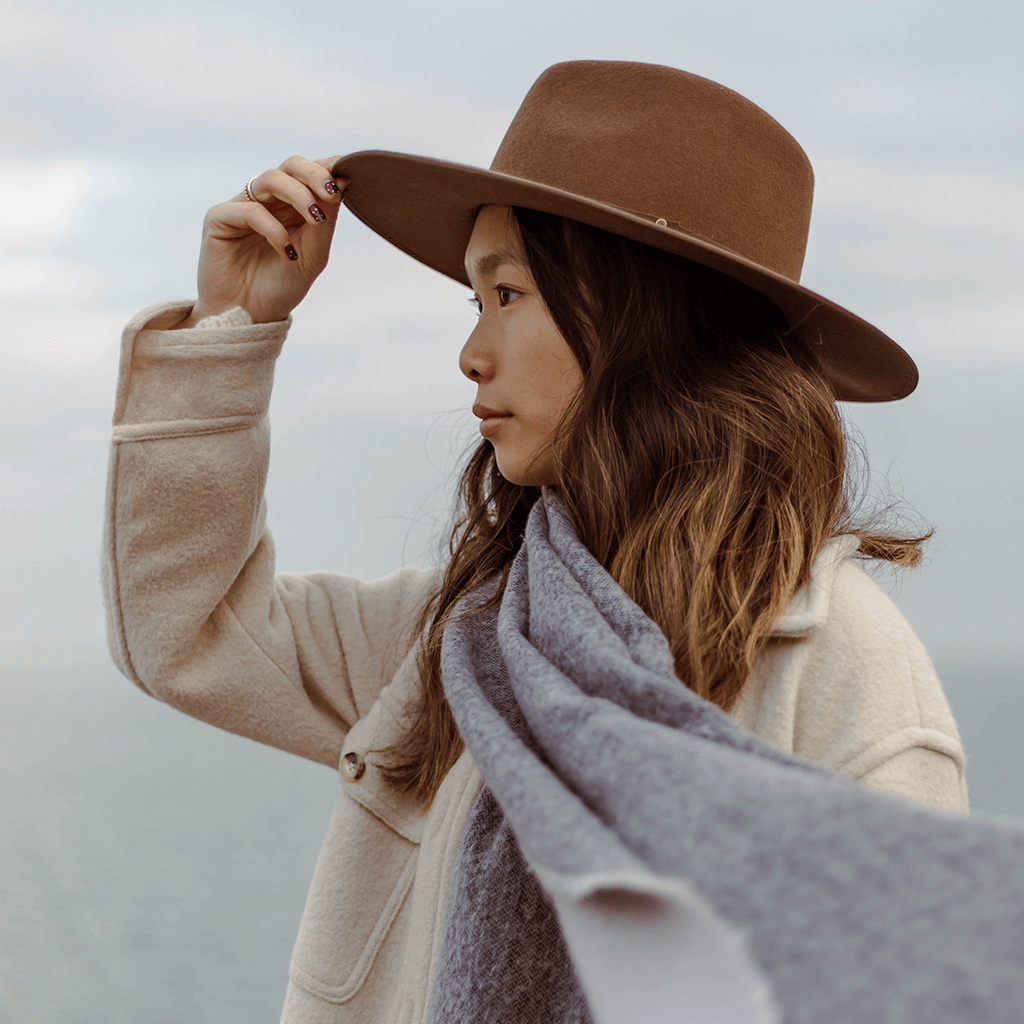
BEFORE

Download Sample Image
description
In episode three of our four-part series, learn how to remove objects large and small from a background with complicated lines, edges, and details.
Click here to download the complete PSD file (139MB).
Free Object Removal Series
- A Tour of the Best Object Removal Tools in Photoshop
- Clean Up Simple Backgrounds in Photoshop
- Remove Objects Around Lines & Edges in Photoshop (This Episode!)
- Remove Objects From Complex Textures in Photoshop (Coming Soon)
If you’re ready to take these skills to the next level, be sure to check out our PHLEARN PRO series on object removal in Photoshop.
Share
Clean Up Edges with the Clone Stamp
Lines & Edges with the Clone Stamp Tool
In the first two episodes of our object removal series, we covered most of the major tools in Photoshop that can help us remove distractions from our images. In this episode, we’re going to dive in a little deeper.
The images we used in episodes one and two were both relatively easy to clean up as they had fairly simple backgrounds to work with. Our example image for this episode will ramp up the difficulty while helping us explore one of the more powerful tools for object removal, the Clone Stamp Tool.
Aside from just being busier and more complicated than the previous examples, this image features one of the trickier things to work around while doing object removal: lines and edges. And when working around the lines and edges, as you may recall us mentioning, there’s no better tool for the job than the Clone Stamp.
Clone Stamp Tool Settings
Before digging into how to use the Clone Stamp Tool, there’s a couple settings that we can take advantage of that will help us work a little easier.
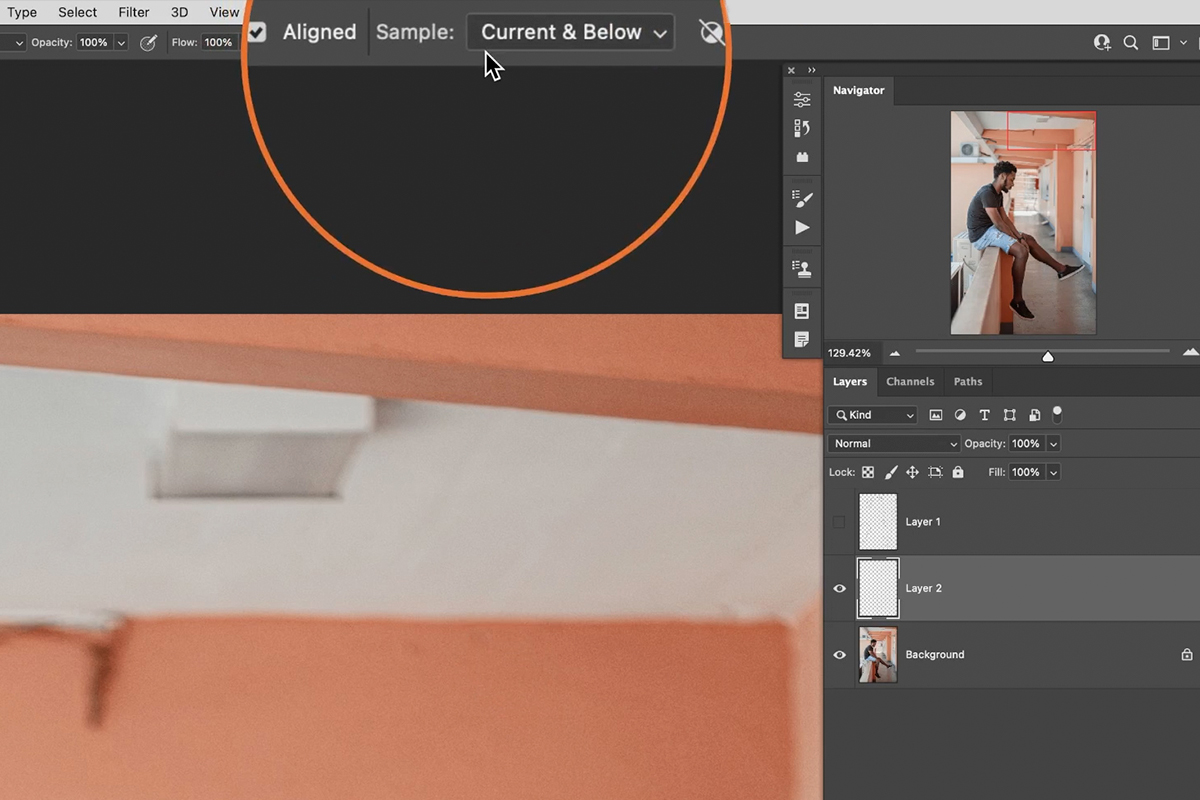
If you know PHLEARN, you know that we always preach the importance of a non-destructive workflow. That means that any and all adjustments should happen on new Layers–we should never directly edit our background image. That being the case, we’ll want to make sure that we’re using the Clone Stamp Tool on a new, blank Layer.
In order to do this, make sure that the Sample setting is set to Current & Below. This option tells Photoshop to use information from every Layer underneath our new Layer (as well as from the Layer itself once there’s image data on it).
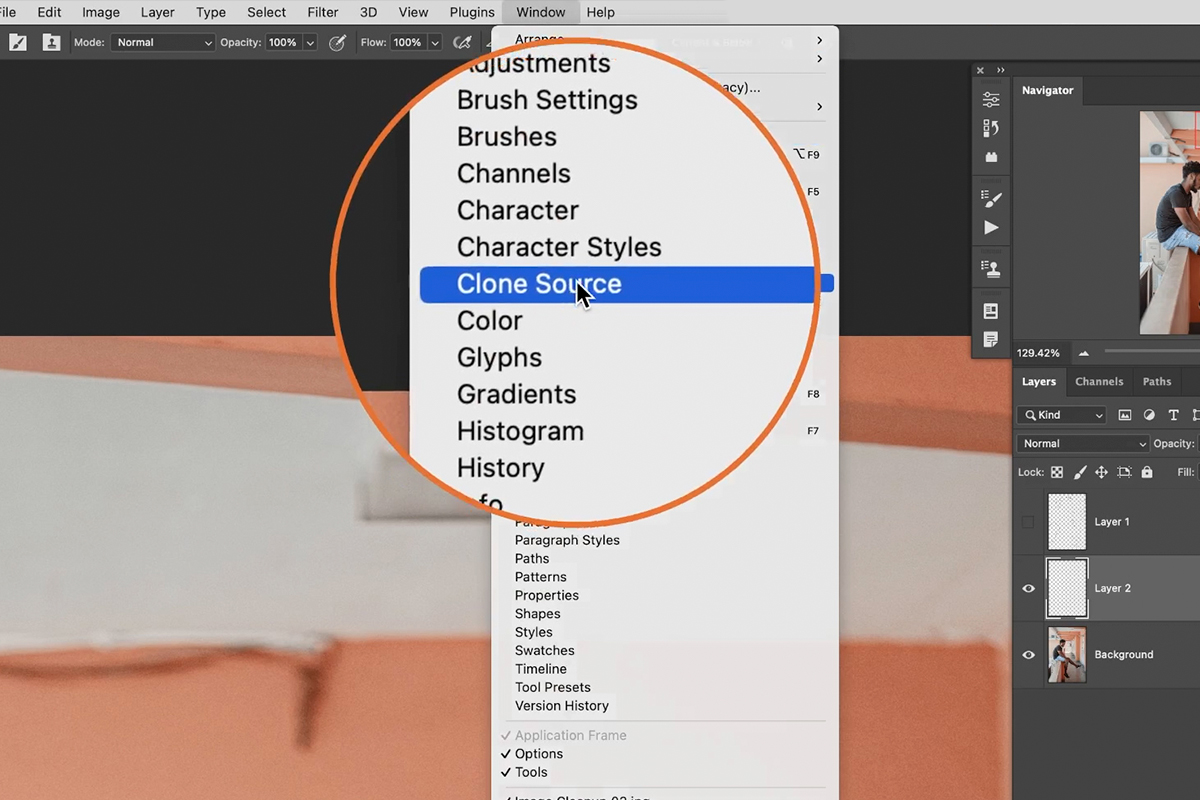
We’re going to be using the Clone Stamp Tool to copy lines and edges from one area and paint them over another. Being able to see what we’ve sampled will make our lives much easier when trying to line things up.
To enable a preview of the sampled area, open the Window menu and select the Clone Source option.
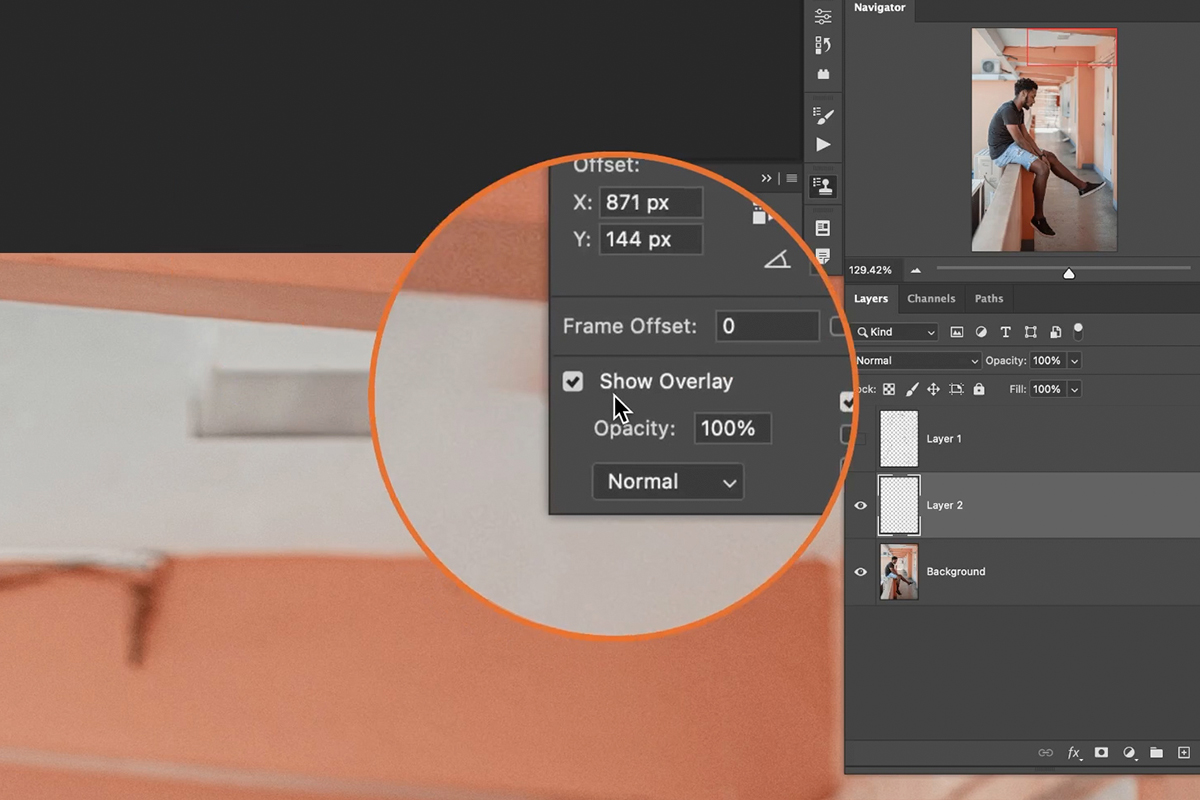
A dialog will open–just make sure that the Show Overlay option is checked. This will enable a live preview of what you’re about to paint with.
How to Use the Clone Stamp Tool
Now that we’re set up, let’s jump into how to use the Clone Stamp Tool to work around line and edge detail in an image.
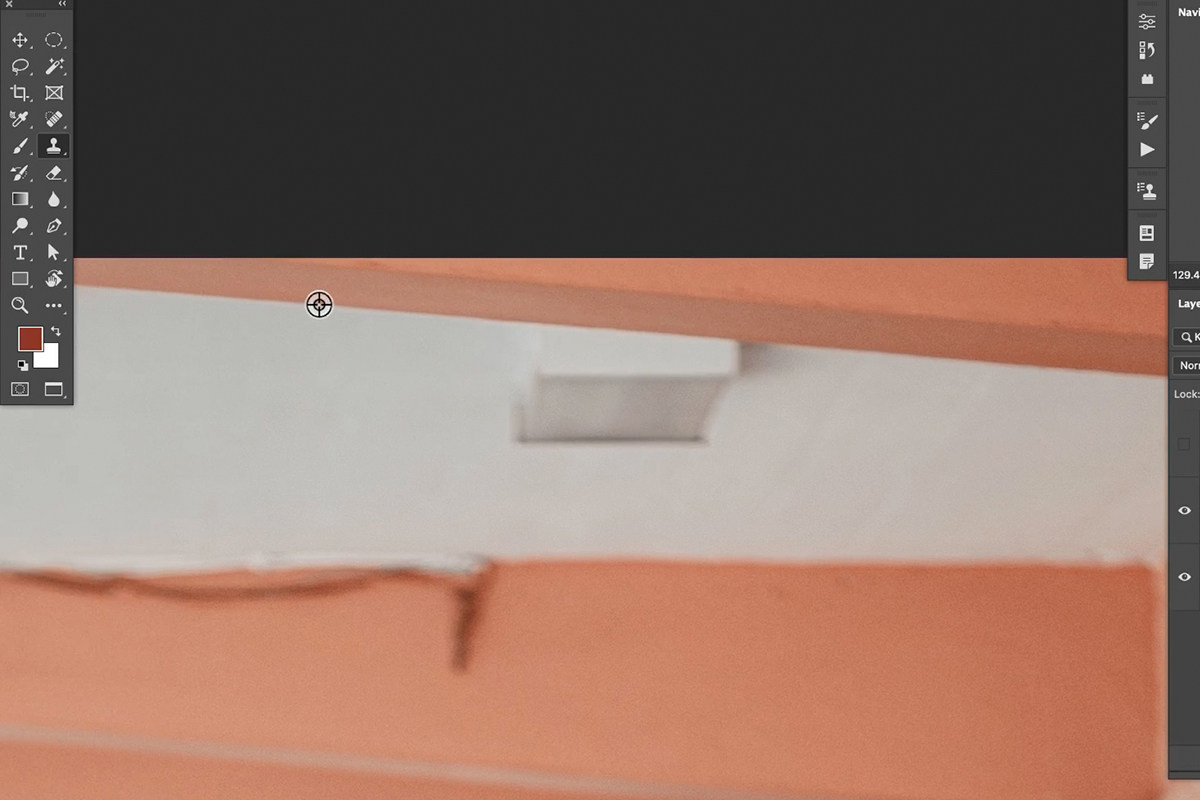
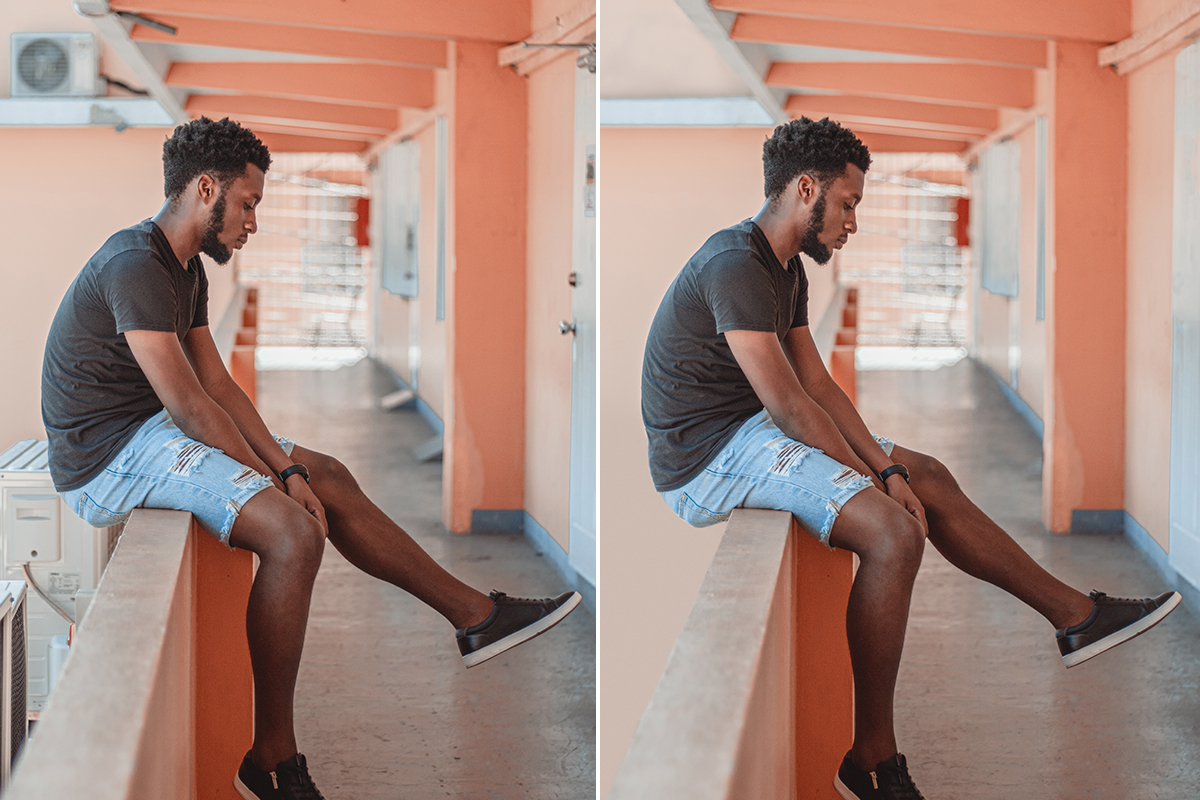
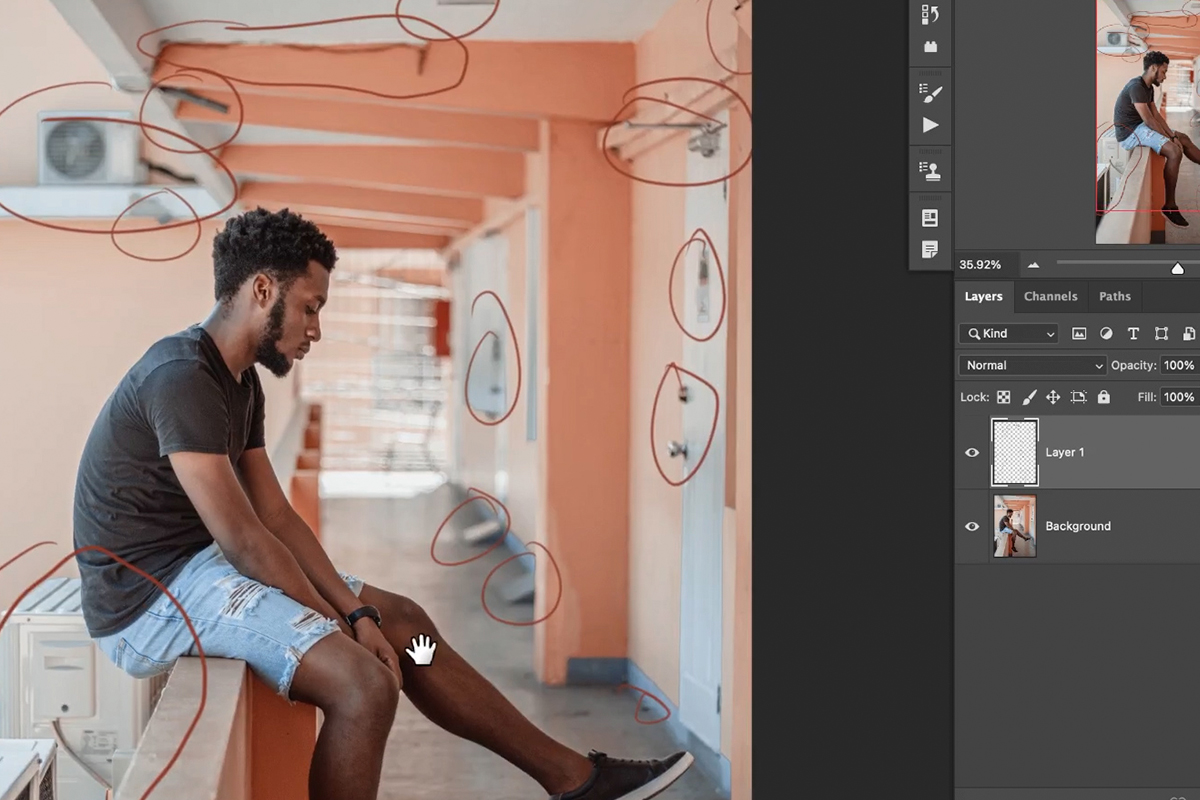
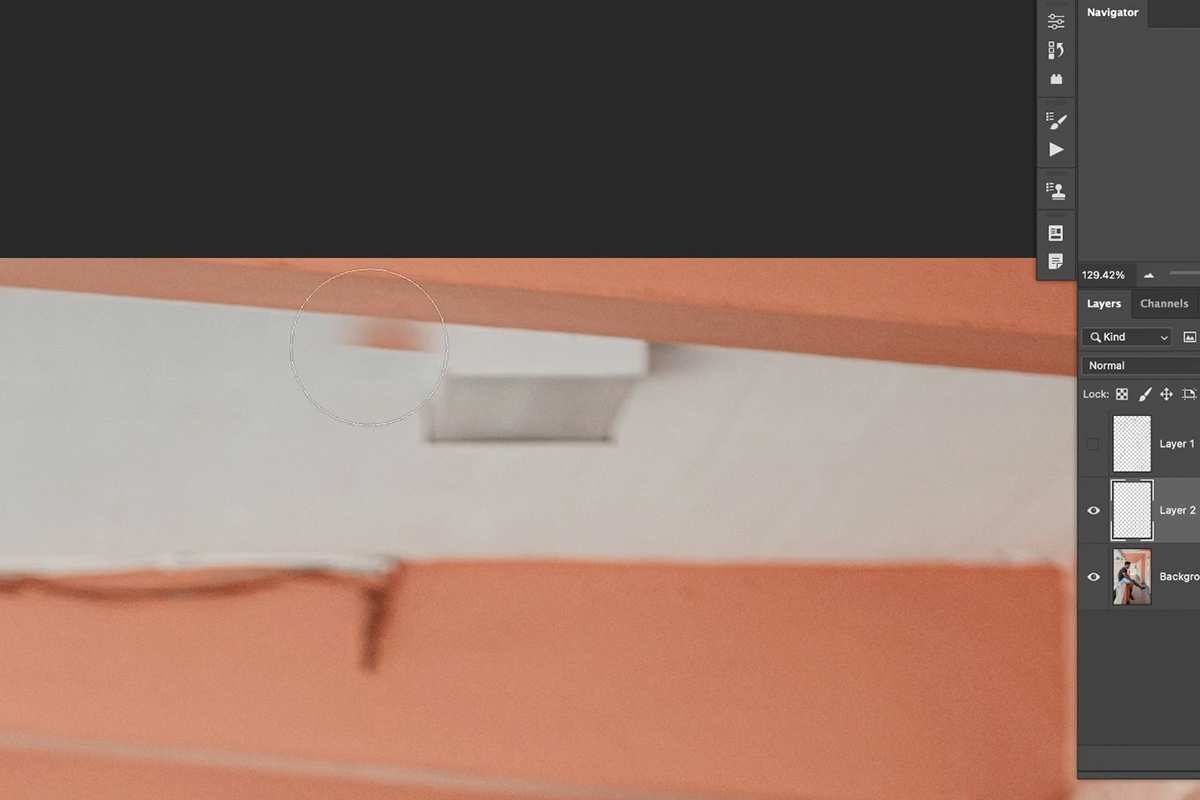
Zooming in on the roof area of the building, there are some wires and objects that we want to get rid of. But notice that they’re surrounded by the lines and edges of other elements of the building. We need to remove those unwanted bits without distorting any of the structural details.
First, create a new, blank Layer above the background image. Select the Clone Stamp Tool. After analyzing the area where the object is that you want to remove, find another spot in the image with a similar edge but that’s clear of any unwanted objects. Hold ALT or OPTN to Sample that area.
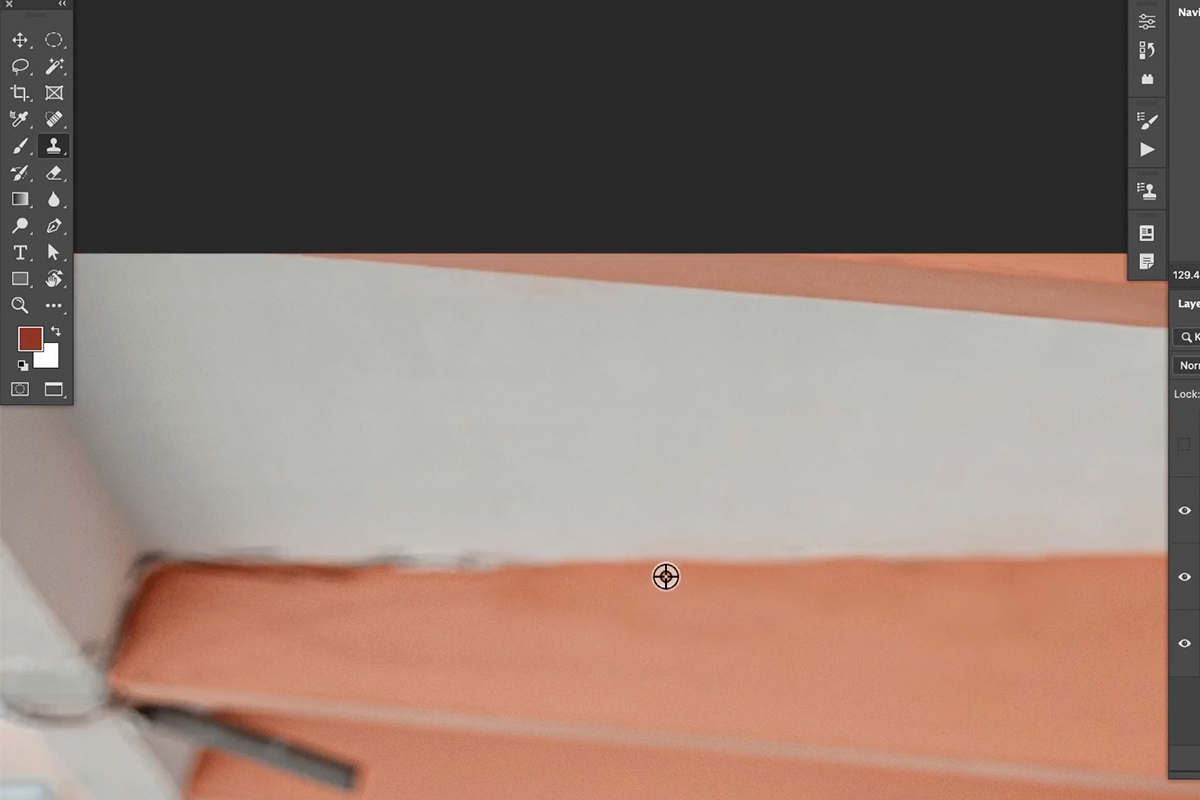
Once you’ve sampled a clean edge, move the cursor until you can easily see a preview of the Clone Stamp. Notice that the preview shows exactly what you’ll be painting with: an exact copy of the edge you sampled.

With that sampled area active, use the preview to line it up with edge around the object you want to remove. Then start painting over the object. Photoshop will continue to pull information from the sampled area, moving the sample point relative to the direction you paint.
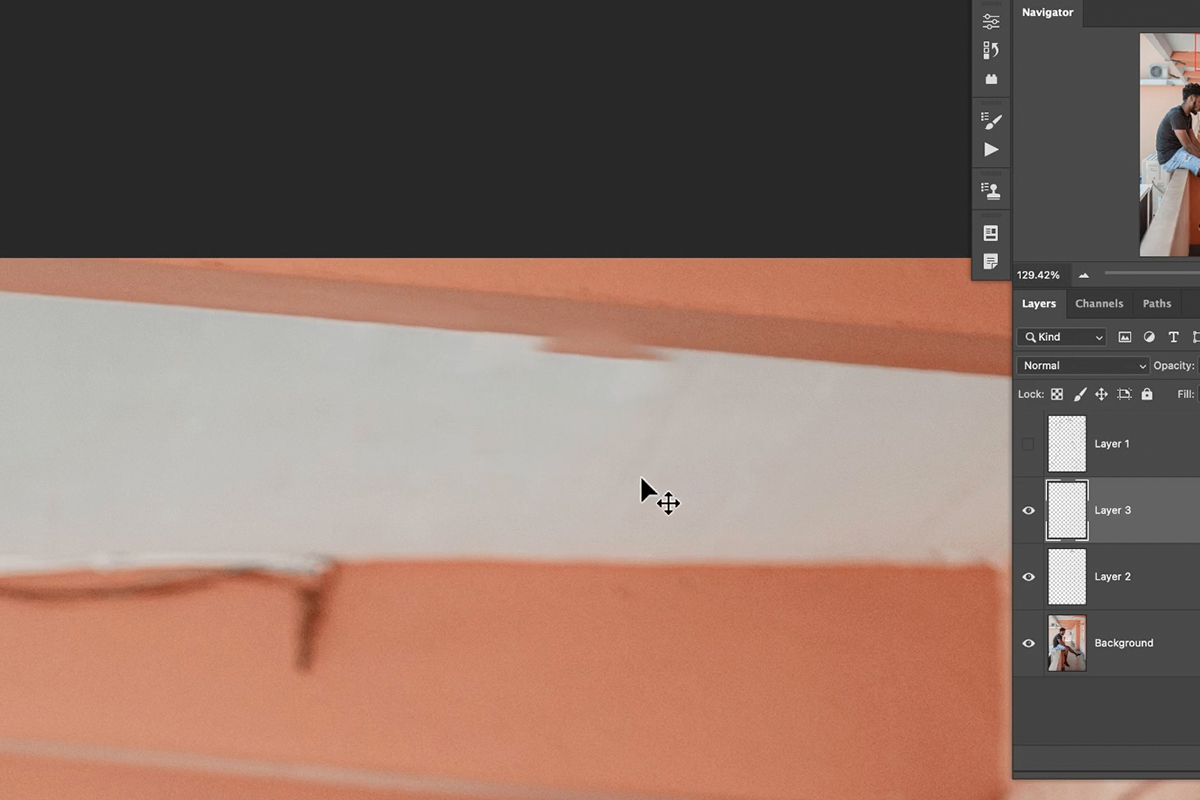
You should be able to cover up the unwanted object while maintaining a clean, straight edge. But what if you missed when initially lining up the preview? Since you’re working on a new Layer, you can simple use the Move Tool to move the Layer into the correct position.
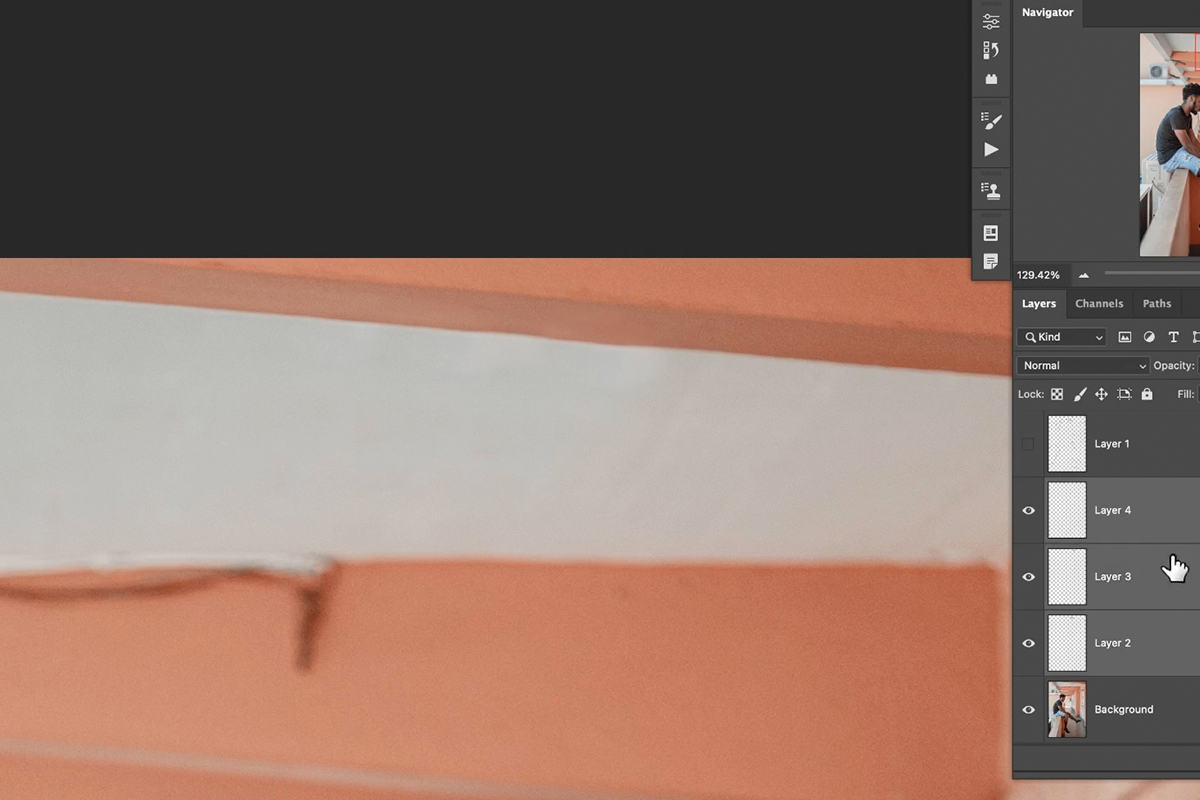
It’s even a good idea to continually create new Layers as you use the Clone Stamp, that way each edit can be moved and adjusted independently. Once you’ve successfully removed the object, you’re free to Group these Layers together, or merge them together if you’re happy with the result.
Backgrounds like this can be challenging, and can take a lot of time to clean up since you’ll need to rely more heavily on manual removal tools. Continue working around the image, removing as many distractions as possible. Stick to the Clone Stamp Tool for anything that’s near any lines or edges, but don’t forget to practice the other removal tools we covered in the previous episodes!


Download Sample Images
description
Learn how to remove tourists from your travel photos using the Clone Stamp Tool and Spot Healing Brush in Photoshop.
Ready to learn more Photoshop? Check out The Beginner’s Guide to Photoshop and our comprehensive series of courses in our Photoshop Learning Path.
Share

REMOVE TOURISTS FROM ANY TRAVEL PHOTO
Download Sample Images
description
Gear is great, but it’s pretty common for light stands, lights, bags, and cables to sneak into the frame as we’re shooting. Learn how to use tools like the Spot Healing Brush, the Healing Brush, and the Clone Stamp Tool to make short work of removing distractions from your images.
Share

Quickly Remove Photo Gear & Distractions
How to Remove Distractions in Photoshop
When we talk about removing distractions from photos in Photoshop, we’re really talking about covering them up. Our process involves creating new, blank Layers, and then using object removal tools to paint over distractions to hide them from view.
Photoshop has a variety of tools that take information from elsewhere in a photo and use it to cover up anything we paint over. For example, let’s say you have a landscape photo that you love, but there’s a plane in the sky that’s too distracting. You just need a way to cover up the plane, pulling information from the sky and clouds around it.
Working Non-Destructively
As with any work we do in Photoshop, it’s important to work non-destructively so that we can get back to our unedited, original image at any time. This is especially important with object removal, as the process can often require multiple tools and attempts to get it looking good.
The great thing about the tools we’ll be using is that they all can be used on New Layers. That means you can create a new Layer above the image, paint on that Layer while pulling information from the image below, and then disable or remove that Layer if you ever want to get back to the original photo.
The Spot Healing Brush Tool
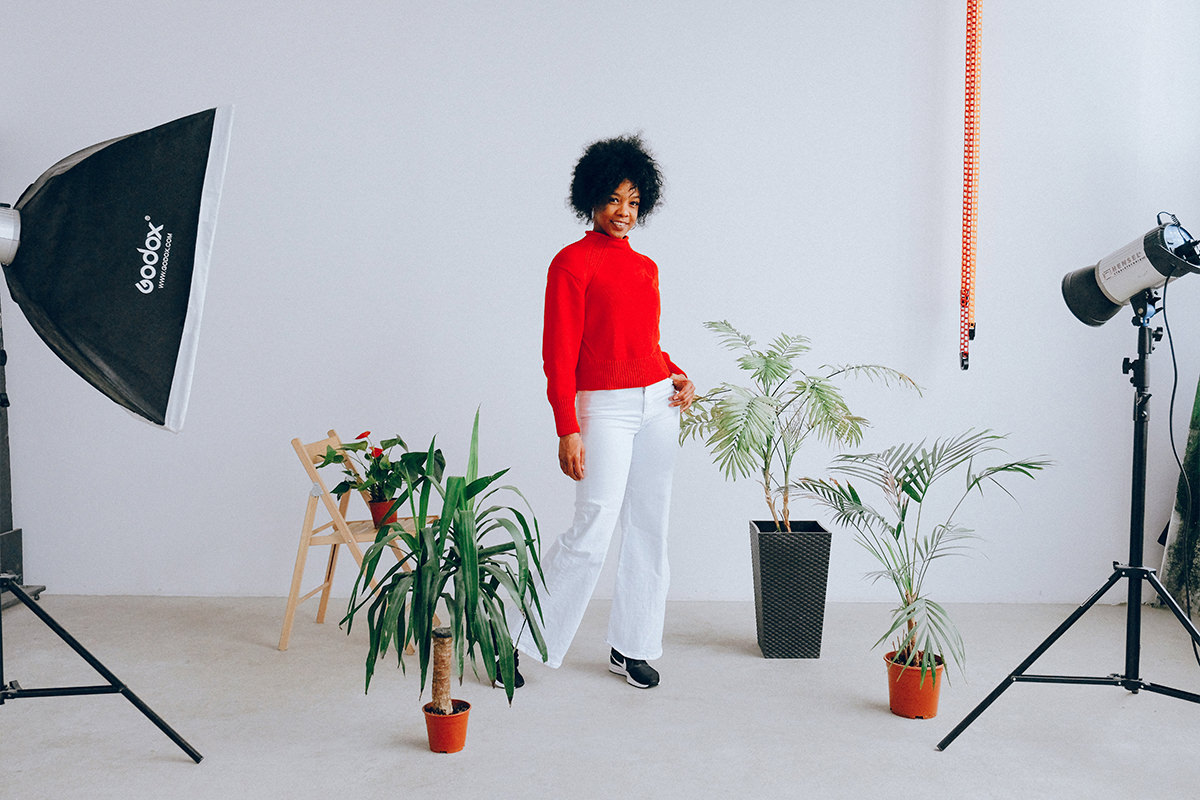
The Spot Healing Brush should be your go-to when you start any object removal. It’s an automated tool that usually make quick work of distractions that are on a relatively simple background. The image we’re using is a good example of a background you might see or use during a studio shoot. A solid-colored backdrop with a few props spread around the scene. This is a great situation to use the Spot Healing Brush to start things off.
The Spot Healing Brush is an automated tool that makes object removal very easy under the right circumstances. However, before using it, make sure that a couple of options are turned on so that you get the results you want and so you can work on a new blank Layer.
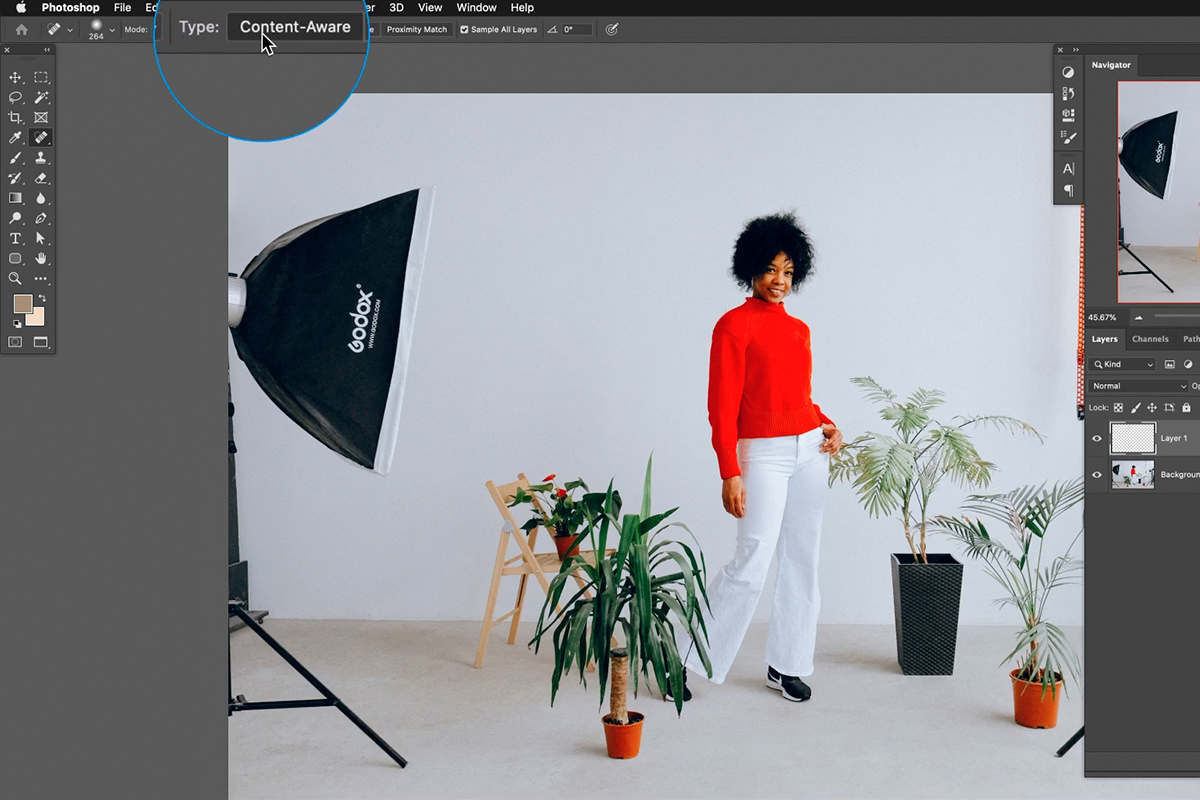
The first is Content-Aware. This option instructs Photoshop to automatically pull in color and texture from similar surfaces in the image. It will use these colors and textures to fill in areas as you paint over them.
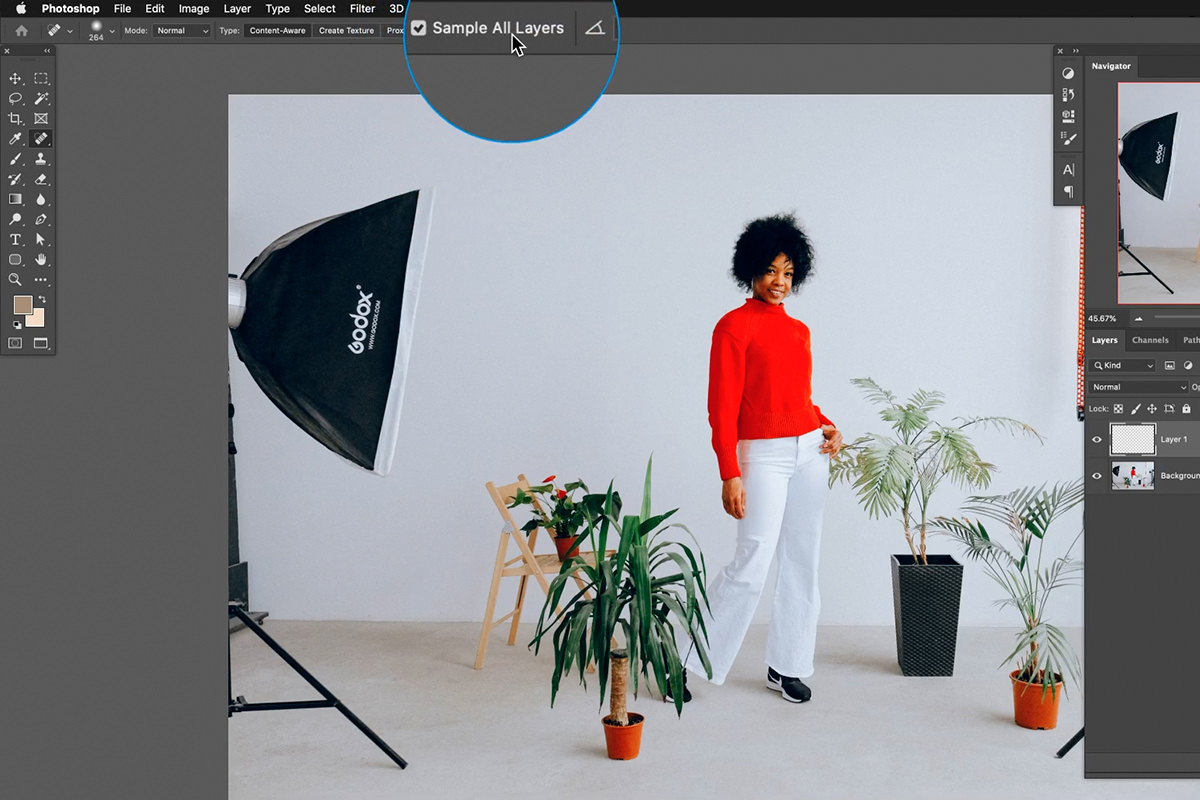
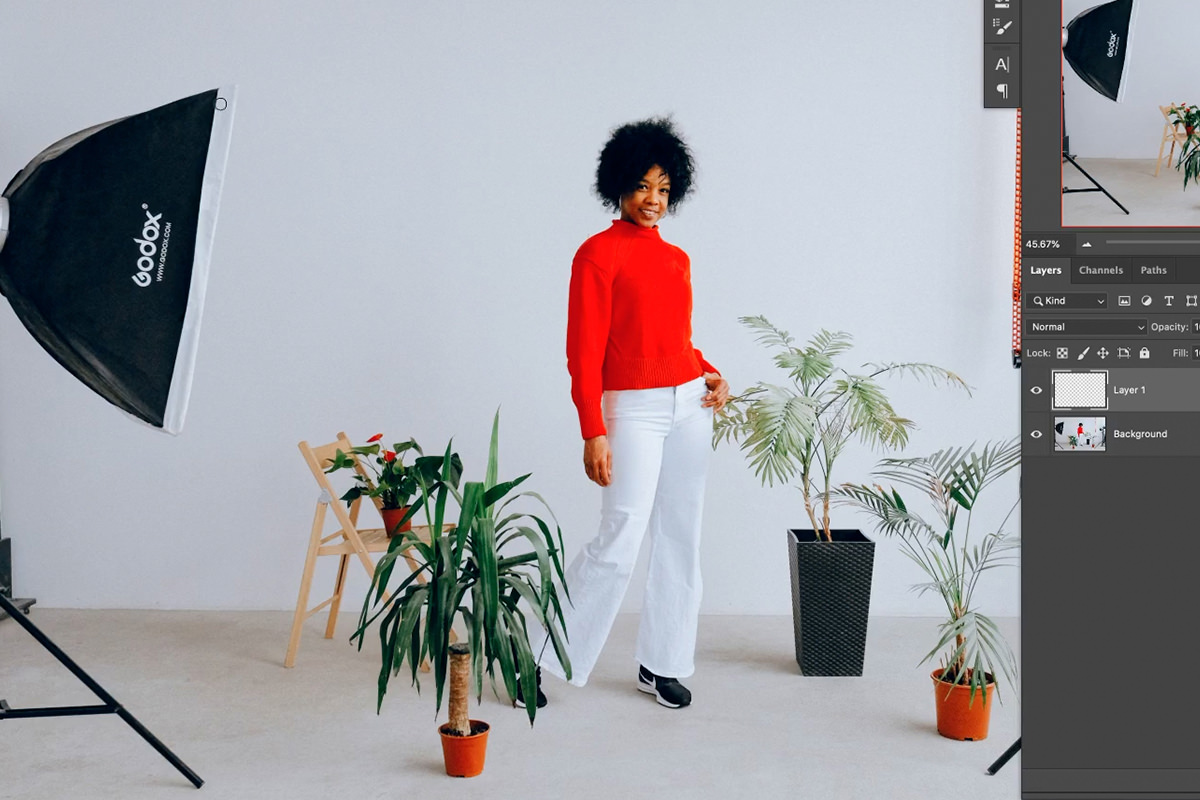
The second option is Sample All Layers. This tells Photoshop to pull information from all of the Layers in a project. This makes it so you can paint with the Spot Healing Brush on a new, blank Layer while pulling the information from the image below. This is what lets us work non-destructively!
Once those options are set, create a new Layer above the image and begin painting over the object you want to remove. We recommend painting in small areas first. Working with larger sections will often lead to strange and unrealistic results. As you paint, Photoshop will work its magic and pull all the information in that it needs to create a realistic fill.
Keep in mind that, while the Spot Healing Brush is fast and powerful, it won’t always get the job done right the first time. It might take several passes over the same area to get a large object covered up. And even then, it might leave behind some noticeable evidence of Photoshopping.
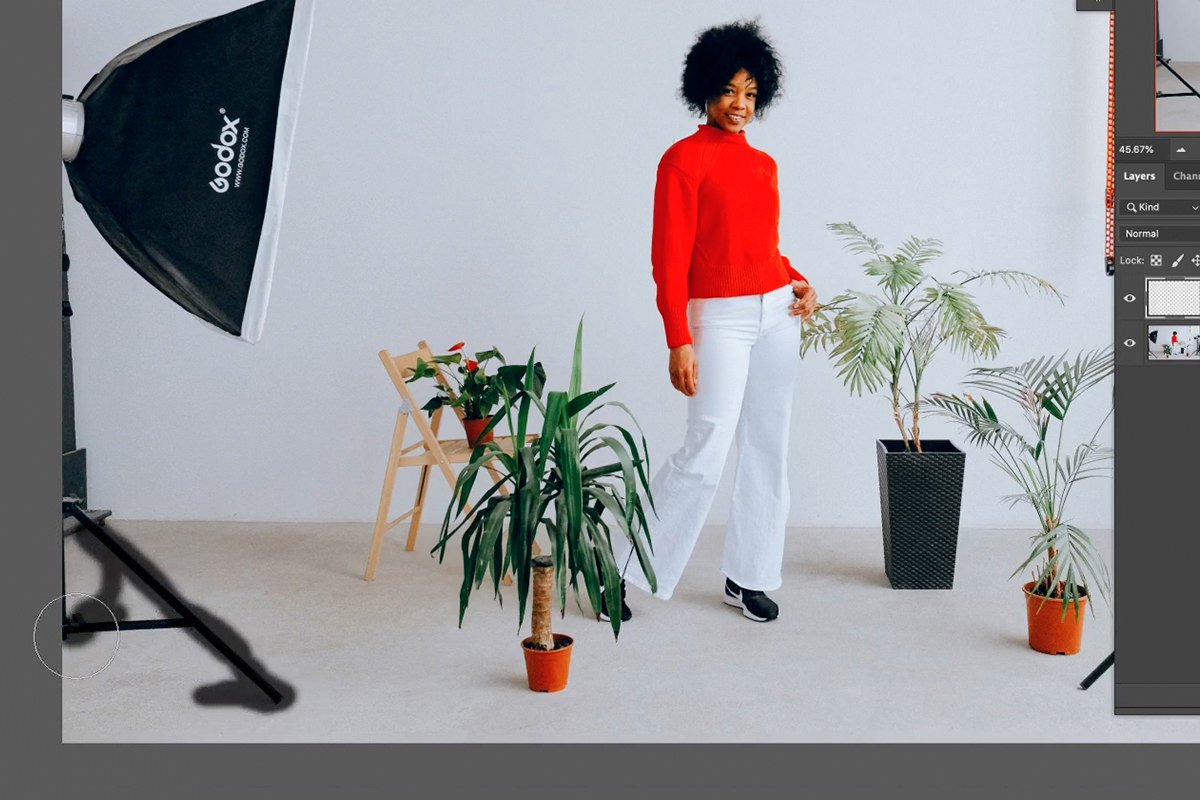
After removing a large softbox, Photoshop had some trouble filling in that space with even texture and lighting. There is a noticeable blotchiness that makes it obvious that something was removed. This is not uncommon, especially when removing larger objects. When the Spot Healing Brush doesn’t cut it, it’s time to turn to a slightly more manual tool to even things out. Enter the Healing Brush!
The Healing Brush
The Healing Brush is similar to the Spot Healing Brush, but it allows you to choose an area to sample. When you sample an area, Photoshop will pull the texture from that spot and try to blend it with the color of the area where you paint.
This gives you more control over blending different areas of slightly different lighting and texture together.
Just like with the Spot Healing Brush, make sure that you’re working on a new Layer so that you can get back to the original photo or undo your changes at any time!
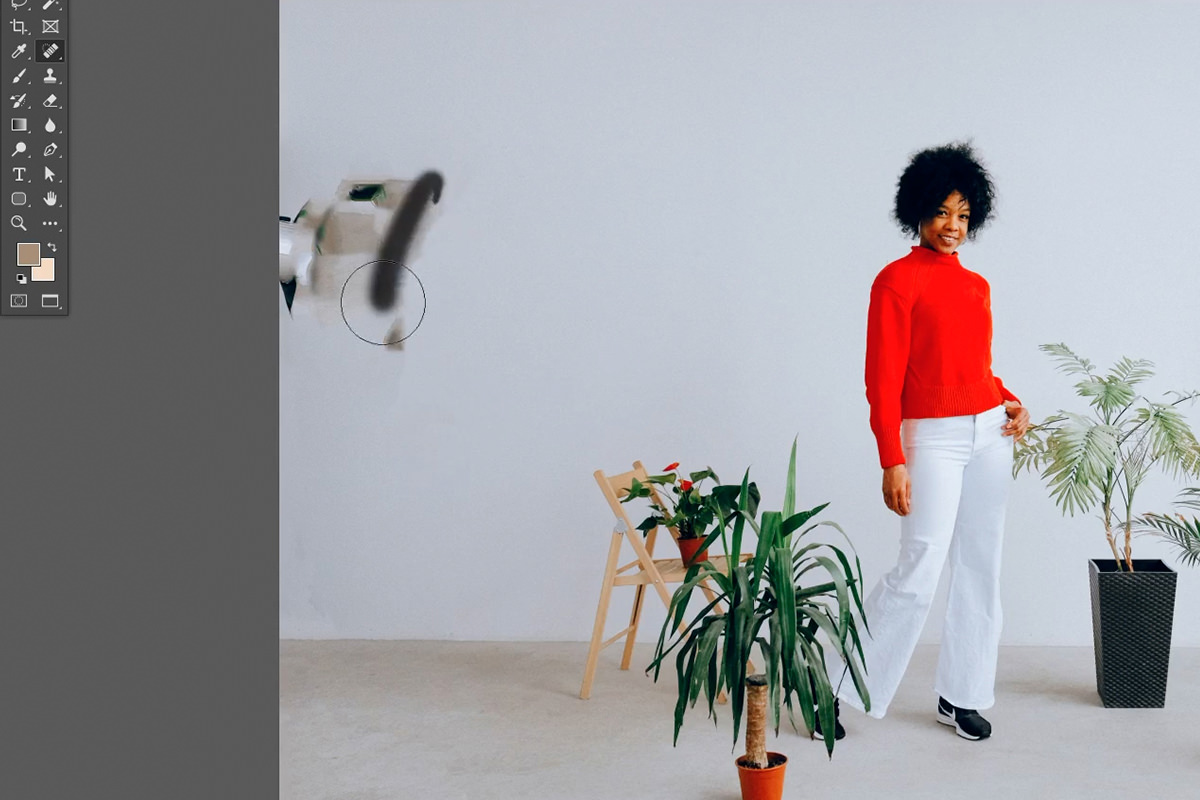
The Clone Stamp Tool
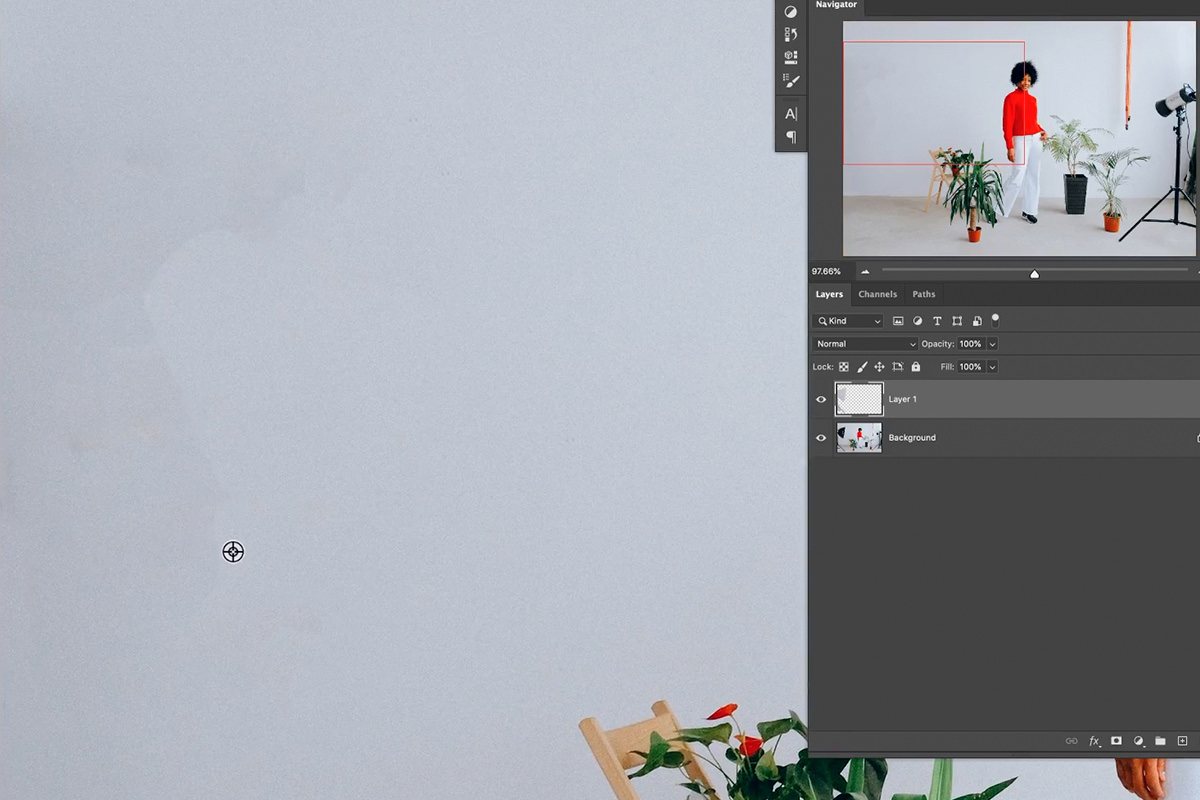
The Healing Brush and Spot Healing Brush work great over top of simple backgrounds. But what if you have to work around hard edge or continuous details? In our example image, we need to remove a light that is sitting in front of a line where the wall meets the floor. We need to preserve that line, otherwise the removal will look extremely unrealistic. This is where the Clone Stamp Tool shines.
The Clone Stamp Tool allows you to sample an area and then paint an exact copy of that area wherever you want. So if we want to make sure that line along the edge of the floor continues, we can sample it from another area of the photo, paint it on to a new Layer, and then place the copy where we need it to go.

Once the new section of floor has been placed and everything has been lined up, you can use a Layer Mask to blend the new section in with the original surroundings. But you’ll notice still that the lighting doesn’t quite match up.
Simply use a Curves Adjustment Layer to adjust the light levels to match the new surrounding area!
With some minor adjustments and blending, the new section of floor should fit in seamlessly. We’ve removed the light, the light stand, and managed to maintain continuity across all of the major elements that make up the background.

Download Sample Images
Sample PSD
Download the sample PSD for this tutorial!
description
Shooting images for a client? Submitting photos to a stock image website? Just need to get some pesky distractions out of a scene? Learn a valuable skill as we show you how to remove text, logos, and branding from any photo in Photoshop!
Follow along as we use the Spot Healing Brush, Clone Stamp Tool, Brush Tool, and more to seamlessly remove unwanted elements from a scene. We even show you how to recreate important details like light rays, texture, and noise for an ultra-realistic final image.
Share


SEAMLESSLY REMOVE TEXT, LOGOS & BRANDING
Seamless Logo Removal
Removing Logos and Branding in Photoshop
In truth, removing text, logos, and branding is a similar process to removing any sort of object and distraction in a photo. Some removal is relatively simple; such as a small amount of text on a plain, single-colored background. And some removal can get extremely complex; such as logos over top of detailed backgrounds containing lines, edges, different colors, and lighting. The most important thing to remember is that any removal will usually require a couple of different tools to get the job done right. Knowing what tools to use and how to combine them will not only help you take care of these issues faster, but will also end in a much more realistic result.
Removing objects is so in-depth that we have entire PRO course dedicated to mastering all of the necessary tools and techniques. Check out How to Remove Anything in Photoshop to learn more!
The Tools of the Trade
There are a wide variety of tools that help us remove objects in Photoshop. There are also a handful of tools that aren’t directly related to object removal, but can help a great deal when it comes to improving precision and recreating texture and details. We’ll be taking a look at these tools today:
Object Removal Tools
- Spot Healing Brush Tool
- Healing Brush Tool
- Clone Stamp Tool
- Brush Tool
Other Helpful Tools
- Pen Tool/Selections
- Noise Filter
Let’s get started!
The Spot Healing Brush & Healing Brush
Whenever you first try to remove text, logos, or branding from an image, one tool should be your go-to before all others: the Spot Healing Brush Tool. Why? Simply put, it is the fastest way to get the job done. If it can’t do it alone, it’s also the best way to get object removal started before finishing it off with tools that might be a little more manual or precise.
Before we go any further, it’s extremely important to keep a non-destructive workflow in mind throughout the entire process and no matter what tool you’re using. That means creating new Layers and making sure certain options are selected that will allow you to work on a blank Layer using information from other Layers in the project. For the Spot Healing Brush Tool, there is a checkbox labeled Sample All Layers. Make sure this is checked! This option allows you to work on a new, blank Layer while still pulling all of the photo information you need from every other Layer.
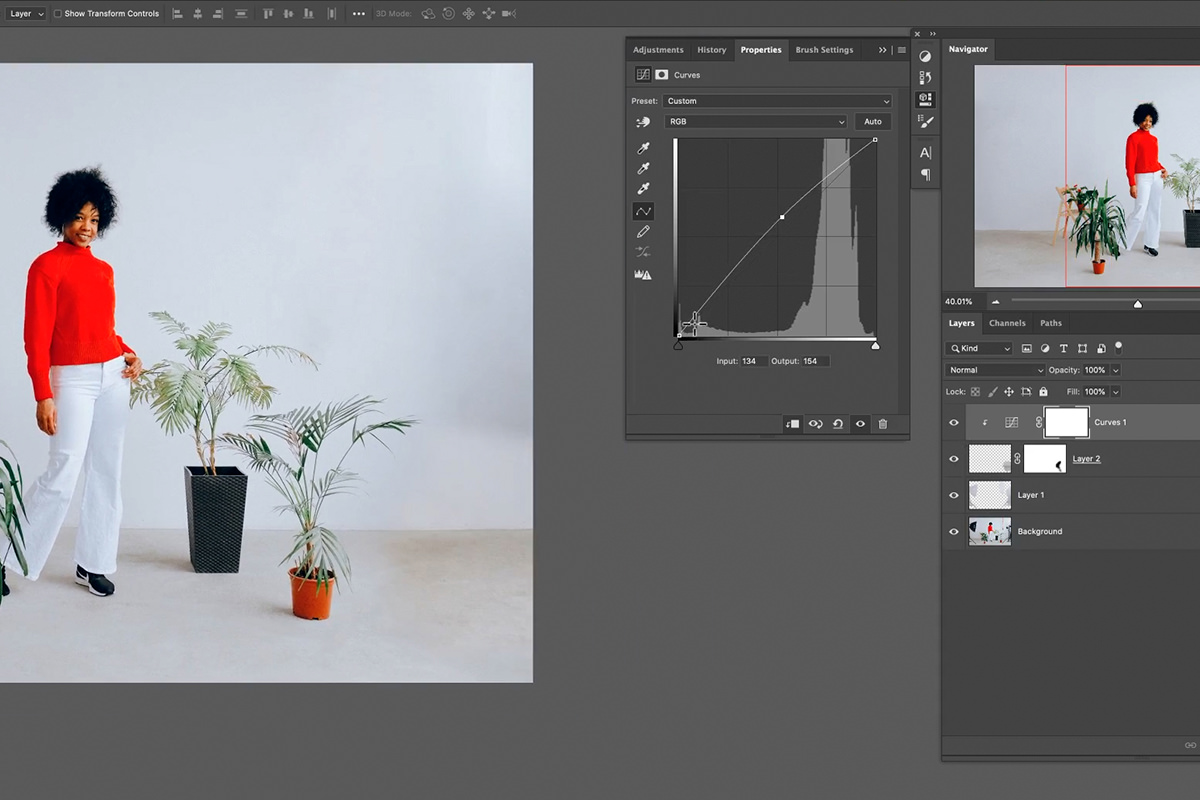
Here you can see that we have the Spot Healing Brush active, a new Layer created and selected, and the Sample All Layers checkbox is checked. Now we can paint over the things we want to remove in the photograph and Photoshop will use the information from the background Layer to make the magic happen. There will be similar settings for every other tool we work with. Just remember to always work on a new Layer for each tool that you use; never work on the background Layer directly!
Once all of that is ready to go, the Spot Healing Brush is very easy to use. Simply paint over the object you want to remove and Photoshop takes care of the rest. We recommend working in small sections at a time, so instead of trying to remove a large area all at once, try painting over portions of it until the entire area has been covered.
Now things may not look great initially, especially if there area has a lot of color variation and detail. You can make multiple passes with the Spot Healing Brush to clean things up, so if it doesn’t look great the first time, try it again and again.
Our initial pass got rid of the logo, but it looks pretty rough. We can make several more passes to clean things up and that will get us most of the way there. But chances are high that we’re going to need a couple of other tools to get it looking seamless. When you need a little bit more control than the Spot Healing Brush offers, try out the standard Healing Brush Tool.
The Healing Brush provides a bit more control. It works by requiring you to first Sample an area that you want to pull texture from. Next, just paint over the area you want to cover up. Photoshop will automatically try to blend the two elements together, taking the texture from where you sampled and blending it with the color from where you paint.
Combing these tools can tackle almost every type of simple object removal you’ll come across. But in our example there are some problem areas that these just can’t handle: lines and edges. For realistic removal, it’s important to maintain perfectly consistent lines and edges with any objects that pass in front of or behind the thing you’re removing. Luckily, Photoshop has a tool perfect for those situations.
The Clone Stamp Tool
The Clone Stamp Tool might be our favorite tool for object removal. The Spot Healing Brush is fast, which we love, but the Clone Stamp Tool is the queen of control and detail. Like the Healing Brush, the Clone Stamp first requires you to Sample an area you want to copy. But instead of trying to blend two areas together, it will create an exact copy of the sampled area wherever you paint.
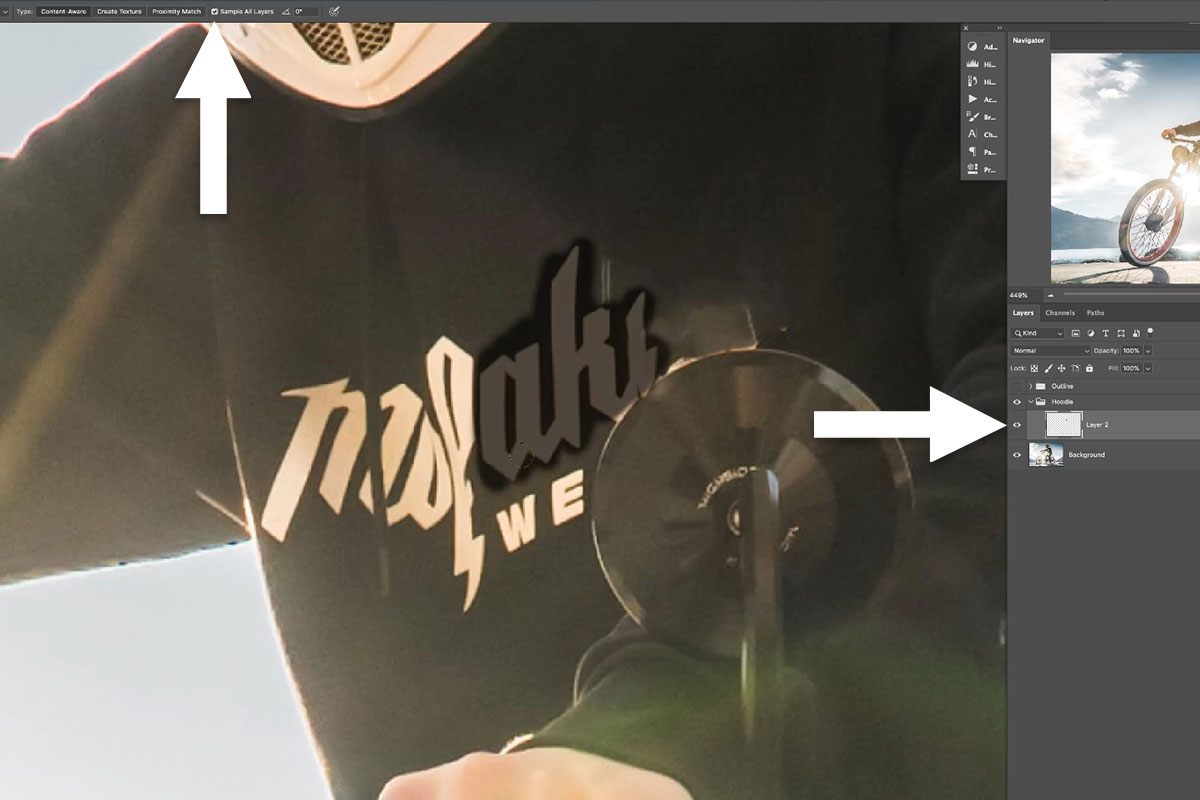
Say, for example, that you removed part of a logo that overlapped an edge, and now part of that edge is missing. You can use the Clone Stamp Tool to sample an area where that edge is still in tact, and then paint over the area where there is a gap. The Clone Stamp Tool will allow you to fill in the edge so that is continuous.
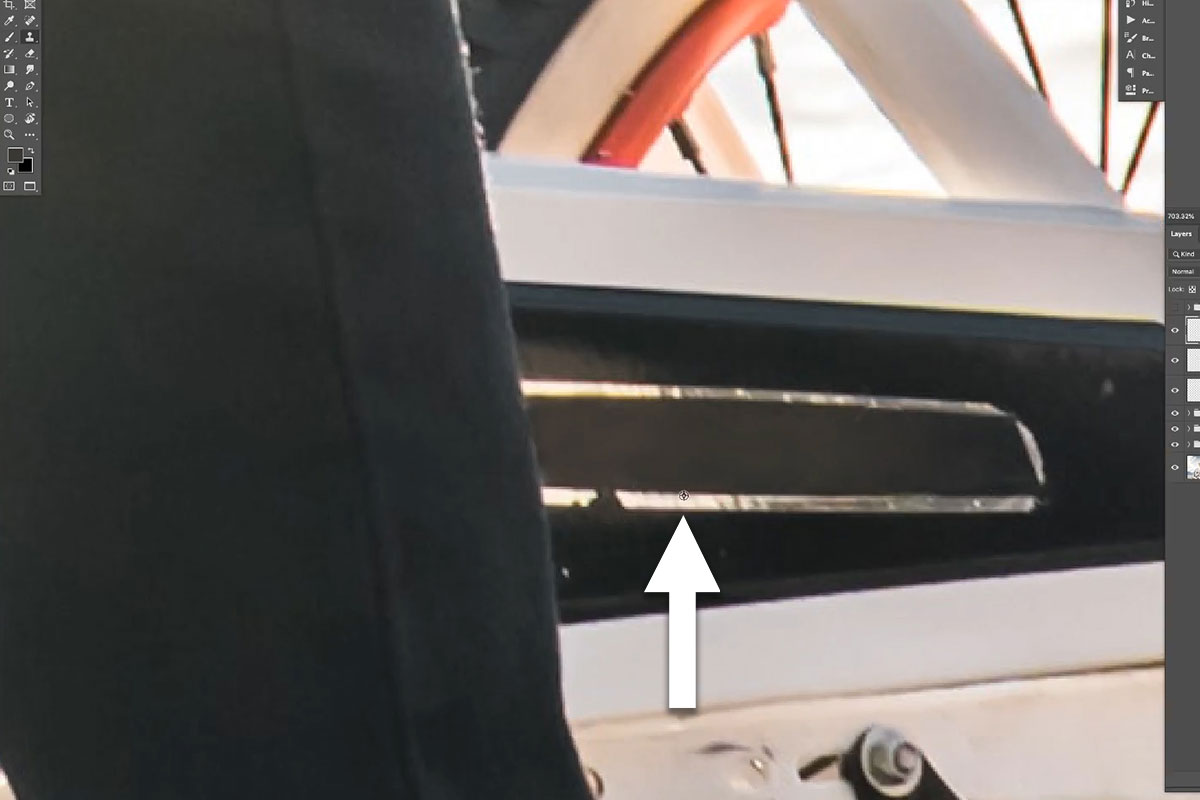
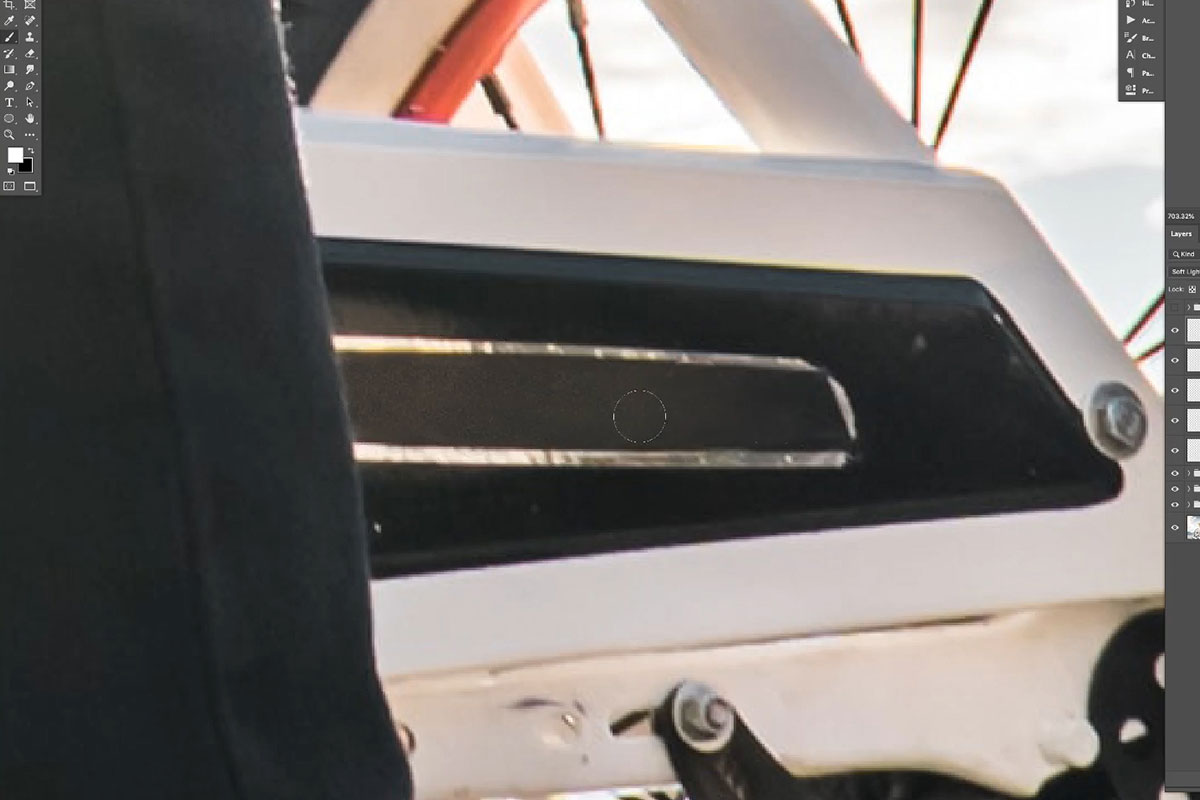
In the picture above you can see one such example. We removed some text inside of the chrome trim, but had to remove some of the trim in the process. With the Clone Stamp Tool we can Sample some of the trim that was unaffected.
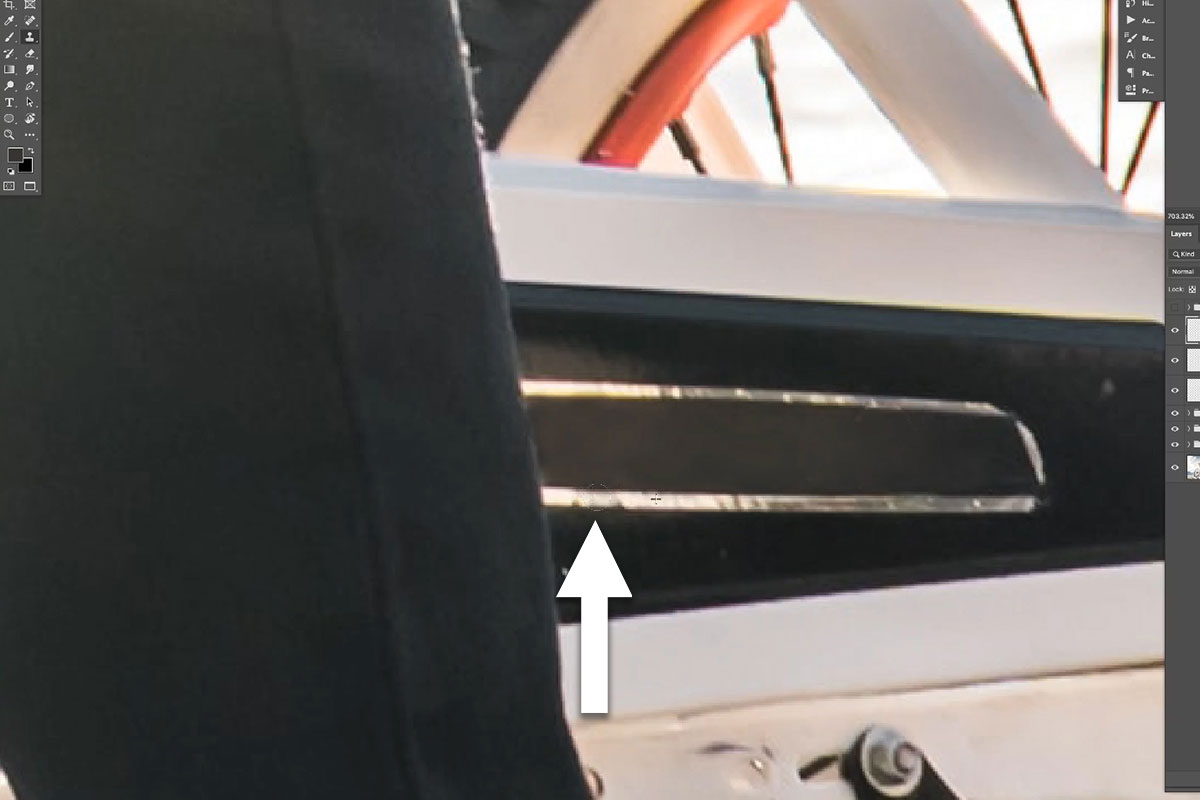
And then paint where the trim was removed, successfully filling the gap and creating a continuous line. Perfect!
So the Clone Stamp Tool is great for lines and edges, but it’s also extremely powerful for standard removal as well. It can be extremely useful when you need to recreate areas of fine detail and texture. Since it’s a 1-for-1 copy, it can create perfect detail where the Spot Healing Brush or Healing Brush might look too muddy or unrefined. Just keep in mind that since it’s an exact copy, you’ll want to take extra care in making sure that there isn’t obvious repetition of patterns and textures.
The Brush Tool
We’ve said it many times before; the Brush Tool can do just about anything. And when it comes to object removal, there is no better option to create soft, seamless areas of blending and gradients. Best suited for relatively plain backgrounds, the Brush Tool excels when you need to recreate colors and gradients, highlights and shadows.
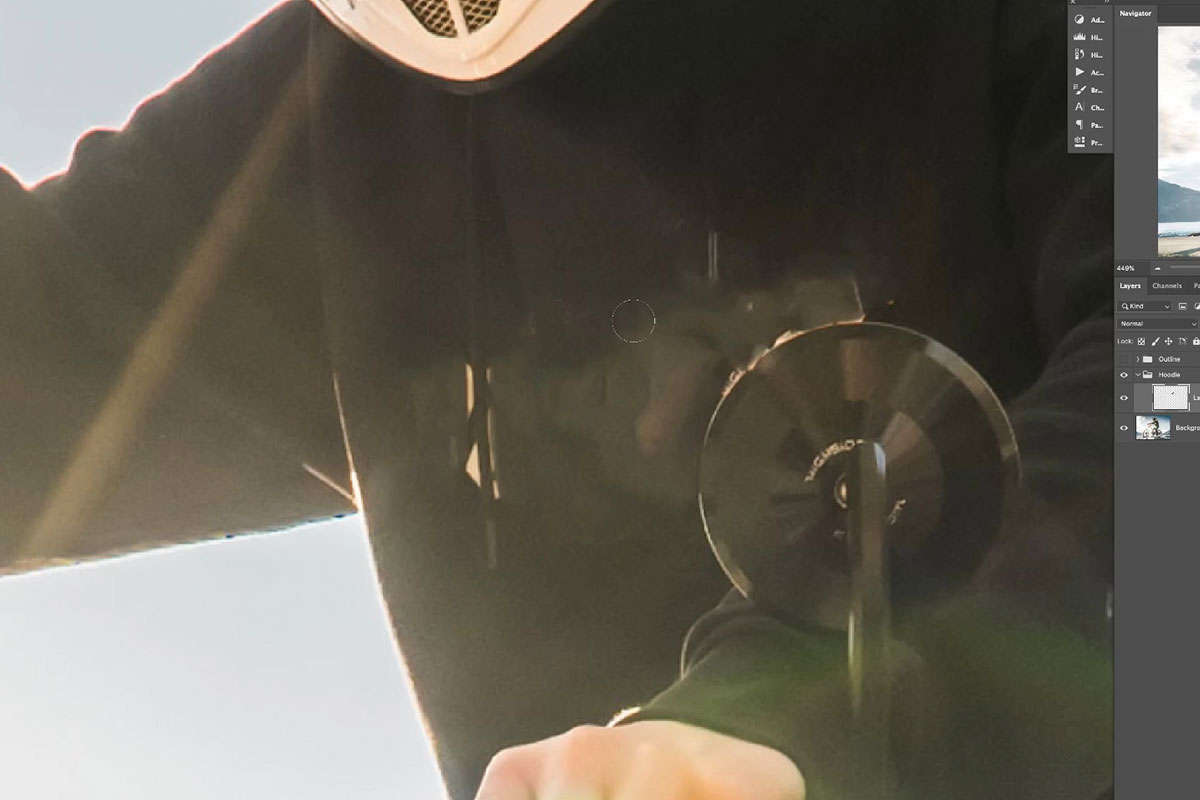
As with the other tools, you just need to Sample the color you want to paint with, and then paint over the area you want to cover up (using a new Layer, of course). For the absolute most control, make sure to use a soft brush set to a low Flow. This allows you to build up the paint effect gradually, helping everything blend together.
Also, make sure that you’re constantly sampling colors from the areas surrounding wherever you paint. In our example above, we’re working with quite a bit of variation in light and color due to the sun rays. To compensate for that, we need to constantly Sample colors and paint them in patterns and shapes that fit with the surrounding environment.
Add Noise & Texture
As much as we try not to, we’re going to lose some of the original texture and detail as we continue to cover up areas of the image using the tools above. But there’s one simple and effective trick to recreate some of that original detail: add noise! Every photograph has some amount of noise present, no matter how low of an ISO it might have been captured at. This noise is often lost when using tools like the Brush Tool or Spot Healing Brush. Creating artificial noise over those areas is a powerful way to blend of all of the object removal Layers with the original background Layer below.
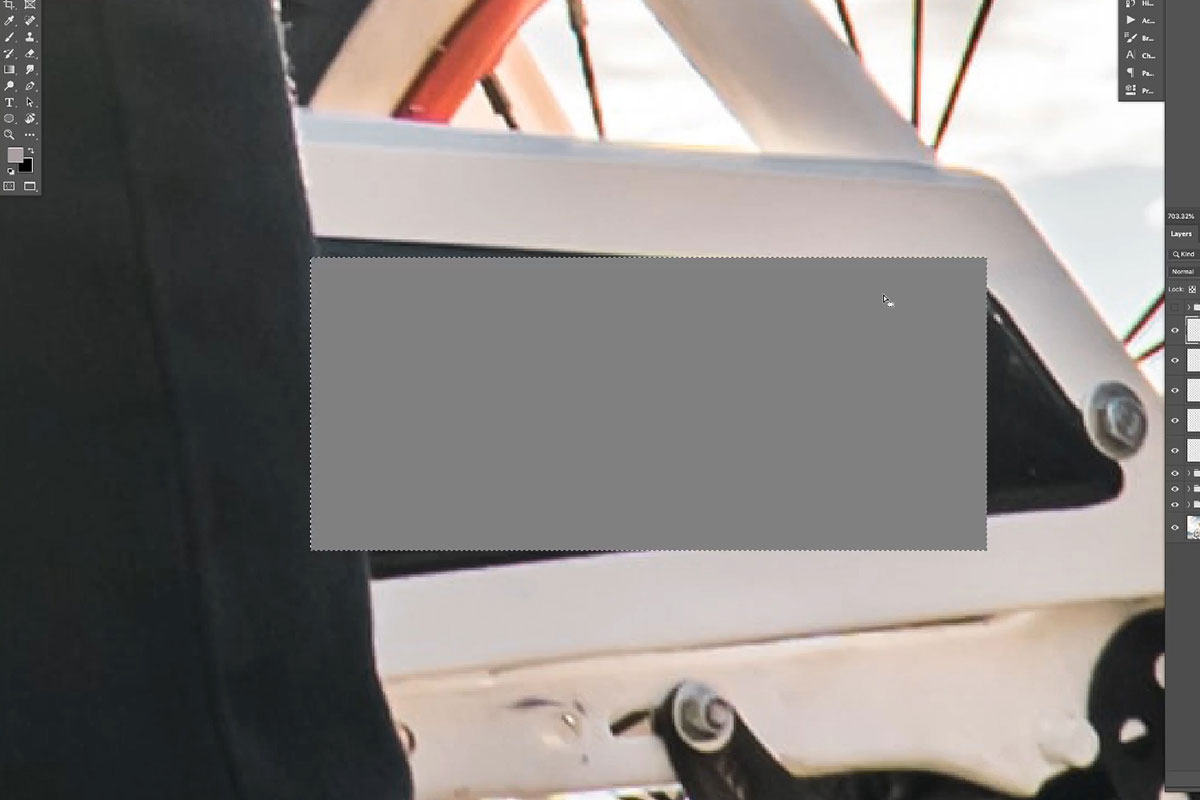
To start, you’ll need a new blank Layer. But unlike the other tools we’ve used, a Noise Filter cannot be applied to a blank Layer, so we need to fill the Layer in with something that can be easily removed after the noise has been applied. An area filled with 50% gray is the perfect option. Why? If we set the Blending Mode of the 50% gray Layer to Overlay, Photoshop will automatically hide any areas that are 50% gray. Thus, we can create a 50% gray block, use an Overlay Blending Mode to hide the color, and then apply a Noise Filter to that area.
In the example above, we did just that. We created a new Layer, used the Rectangular Marquee Tool to create a box around the area we want to add noise to, and then filled that area with 50% gray.
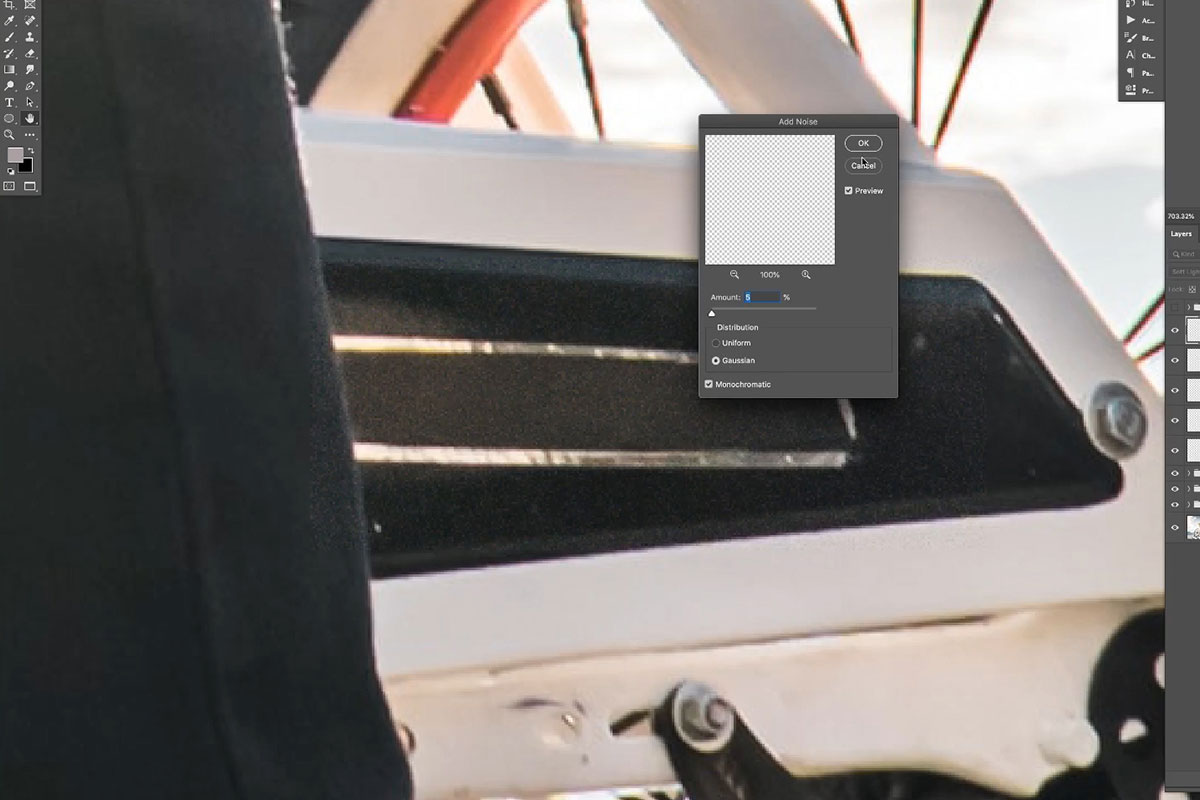
With the gray hidden, go to Filter, Noise, and Add Noise. Set the amount of noise you want, just make sure it closely matches the noise present in the original photograph.
Now let’s blend the noise in so it doesn’t look so obvious and so it is only appears where we removed a logo. Invert the Layer Mask to make the entire noise Layer invisible, then, using a soft brush, paint white on the Layer Mask over the parts of the image where you used the Spot Healing Brush or Brush Tool.
Using Selections for more Control
At this point, you know almost every trick in the book. Almost! There’s one final set of tools that can take our precision and control to a whole new level. Using Photoshops wide array of selection tools, we can carefully define areas that we want to cover and don’t want to cover up. This helps us preserve lines and edges, highlights and shadows, and protect objects and areas that we don’t want to cover up.
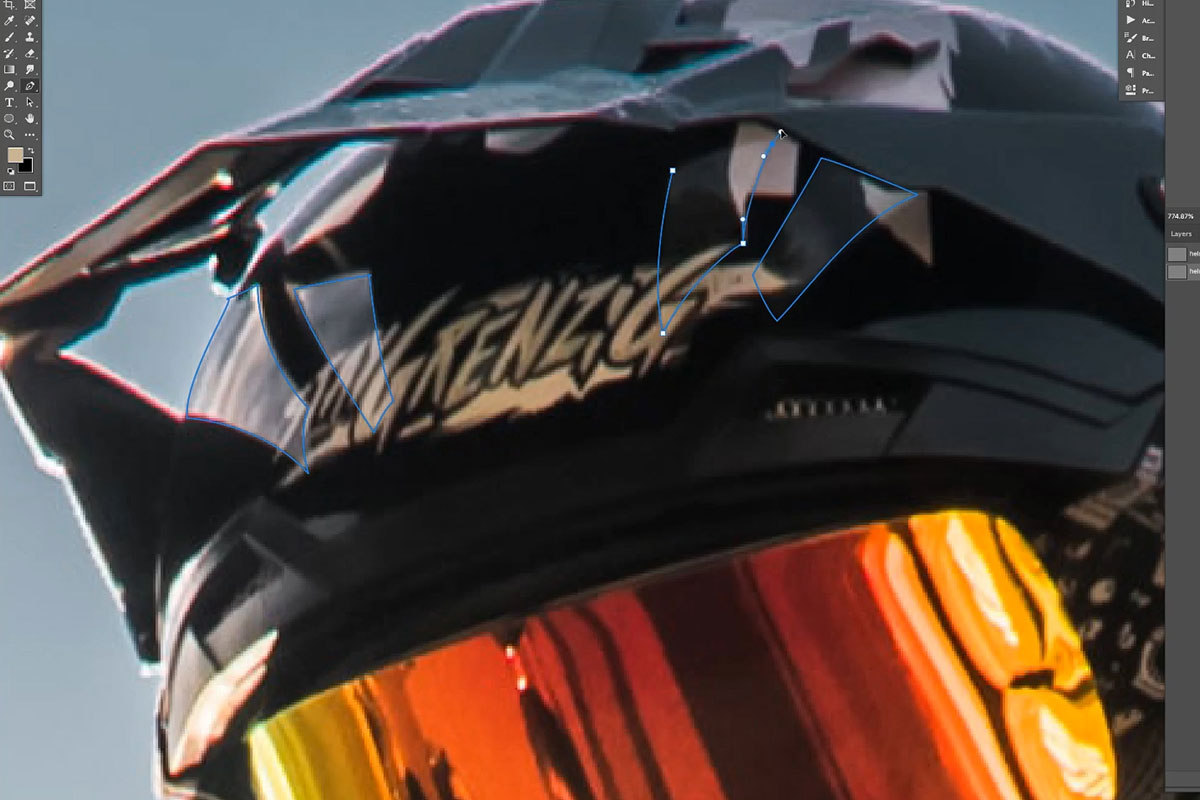
When it comes to making selections, there’s no better tool than the Pen Tool. While it takes some practice to learn (which we can certainly help you out with), it is the best way to get clean lines, edges, and curves as you trace around objects in a photo.
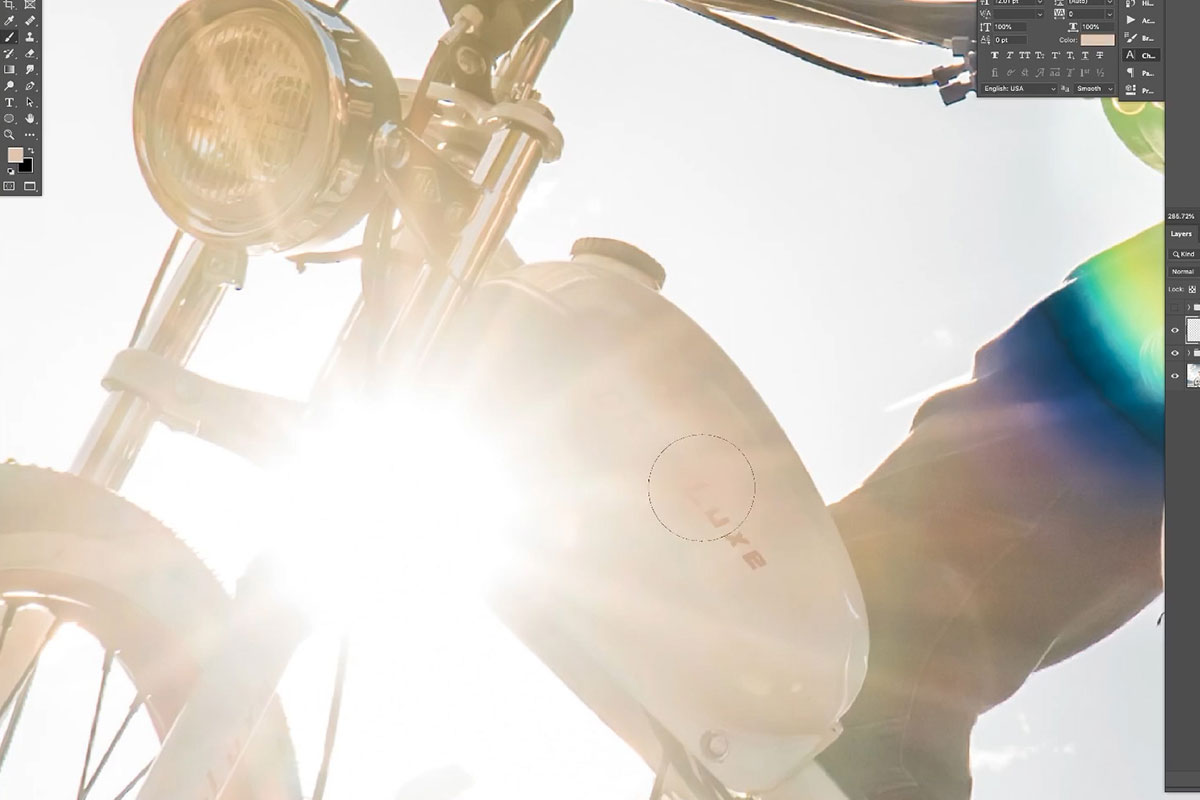
In the example above, we have a unique situation where we want to preserve the natural highlights on the helmet so that when we cover up the logo with the Brush Tool, the real reflections of light remain. Use the Pen Tool to trace around each area of highlight, trying to use as few points as possible while maintaining nice, clean curves.

Once you’ve traced each, right-click and click and select Make Selection. This will turn the Pen Tool Paths into selections that will help us define areas where we want and don’t want to paint. By default, this process will select the areas inside of the Paths we made. Since we don’t want to paint over the logo on the helmet, and not over the highlights, we need to Inverse the selection. You can do this by hitting CTRL or CMD + SHIFT + I.
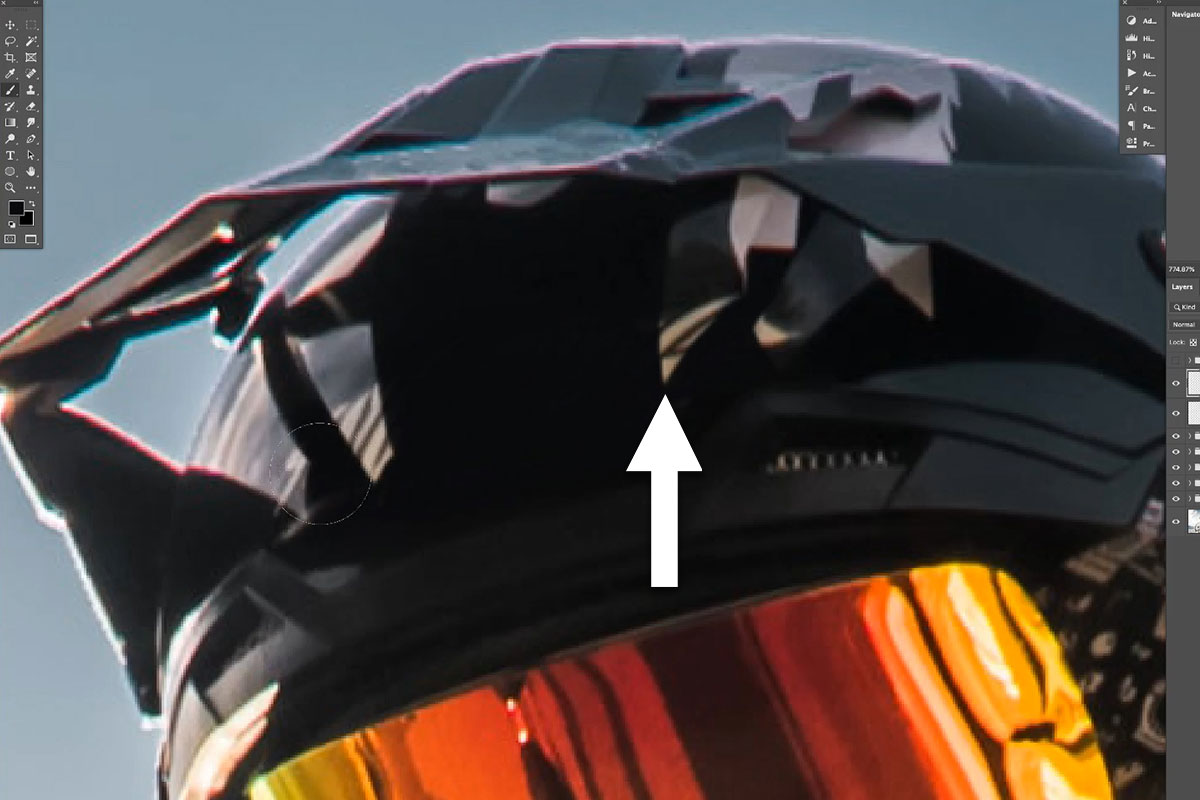
With the highlights protected and helmet area selected, we can use the Brush Tool to Sample the helmet color and then paint over the logo. Notice that the areas of reflection remain in tact! Since some of the logo is still visible in those highlight areas, you can Inverse the selection again and use some of the tools you’ve learned to remove those spots while maintaining the natural color and gradient of the highlights.

Download the Sample Image
description
Whether its power lines, street signs, or the occasional friendly photo bomb, sometimes we end up with things in our photos that we don’t want. Learn how to use the Spot Healing Brush and the Clone Stamp Tool to seamlessly remove any distractions, keeping the attention on the things that matter most.
This is Day 16 of our 30 Days of Photoshop series. Follow along with all 30 episodes as we explore the magic of Photoshop together!
Watch Next
30 Days of Photoshop

Sign up to receive email updates to keep you going, sample images to follow along, and a printable calendar to keep track of your progress!
Share
REMOVE OBJECTS & DISTRACTIONS
BEFORE
Remove Distractions–Instantly!
How to Remove Distractions
When we talk about removing distractions from photos in Photoshop, we’re really talking about covering them up. Our process involves creating new, blank Layers, and then using object removal tools to paint over distractions to hide them from view.
Photoshop has a variety of tools that use information from elsewhere in a photo and use it to cover up anything we don’t want to see. For example, let’s say you have a landscape photo that you love, but there’s a plane in the sky that’s too distracting. You just need a way to cover up the plane, pulling information from the sky and clouds around it.
The Spot Healing Brush Tool
The Spot Healing Brush should be your go-to when you start any object removal. It’s an automated tool that usually make quick work of distractions that are on a relatively simple background (like a sky!) Using our plane example, we just need to make a new layer (remember to work non-destructively), and then paint over the plane. Photoshop will automatically detect and pull in color and texture information from the surrounding sky and use it to fill in the area over the plane.
This method will help you take care of a lot of small distractions on relatively simple backgrounds. But sometimes you might have some inconsistencies in color (or blotchiness) or the background has too much detail for the Spot Healing Brush to do a realistic job.
The Clone Stamp Tool
When the Spot Healing Brush doesn’t work perfectly, the Clone Stamp Tool can save the day. Now you can still use the Spot Healing Brush to get started, clearing out any major distractions. This oftentimes will give you a great foundation through which you can switch tools to finish the job.
The Clone Stamp Tool works by having you Sample an area of an image, and then allows you to paint with that information, creating an exact copy as you do. So when the Spot Healing Brush has trouble recreating color and texture details, you can swoop in with the Clone Stamp Tool after to add those textures and details back.
Tutorial Description
No reason to wait for the orthodontist, get those braces off today!
In this tutorial, you will learn how to use the Brush Tool to remove braces in Photoshop.
Photoshop Brush Tool vs. Clone Stamp & Healing Brush
There are a lot of great “advanced” tools in Photoshop like the Clone Stamp Tool and the Healing Brush Tool that work well for removing and retouching objects.
Those tools work by sampling an area of a photo and then covering up a blemish with the sampled area. Sometimes, there is not enough information to sample or the area of a photo that needs to be retouched is very detailed. In those cases, it can be much more effective to use the Brush Tool.
It seems too simple to work, but the brush tool is actually one of the most powerful retouching tools available in Photoshop.

Quick Tip: When the Healing Brush & Clone Stamp don’t work, grab the Brush Tool.
To use the brush tool as a retouching tool, simply sample a color by pressing ALT/OPTN and clicking on a color, then paint over the blemish or object you want to remove. In this tutorial, we are removing braces that cover up teeth. Because teeth are relatively simple and don’t contain much detail, it is relatively easy to paint teeth in Photoshop.
When painting over the braces, be sure to sample colors in the highlights and shadows of the teeth and paint so they have a three-dimensional appearance.
If you need to blend colors together, use a large soft-edged brush and paint with a flow of 10%. Sample and paint colors together until everything blends in.
This may sound difficult, but with a little bit of practice, you will be retouching with the Brush Tool like a PRO.

BEFORE
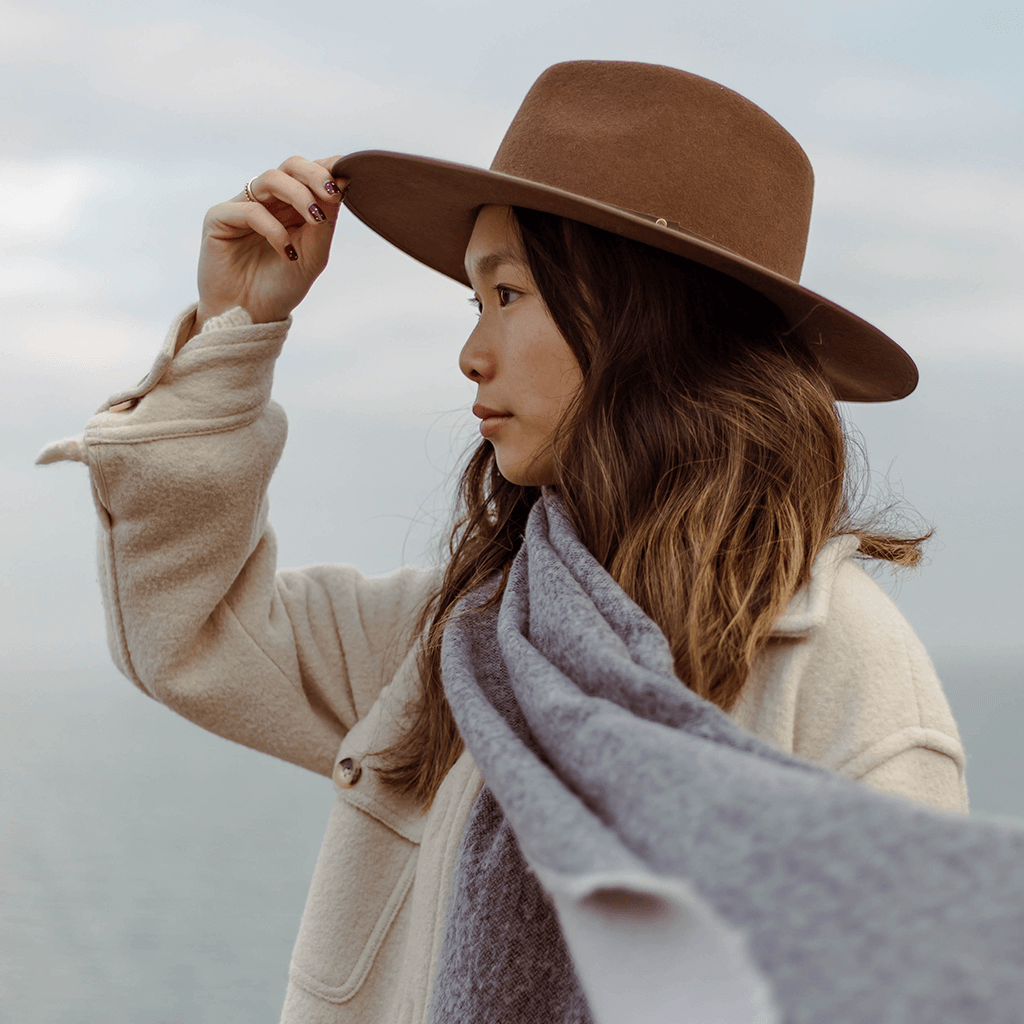
AFTER
Download Sample Images
Click the link below to download the sample images and follow along with this tutorial.
DownloadTutorial Description
Learn how to clean up any environment in a few simple steps!
In this episode, we show you how to use tools like the Brush Tool, Spot Healing Brush, Clone Stamp, and Pen Tool to remove distractions and simplify an environmental photo.
Remove Objects with the Spot Healing Brush Tool
The Spot Healing Brush Tool is perfect for removing objects from a simple background. In this example, we remove wall hooks with the Spot Healing Brush Tool. These hooks are on a white wall, making them easier to remove.
How to Clone Objects in Photoshop
In this example, two of the windows in the photo are frosted and one of them is transparent. The frosted windows look cleaner and more simple than the transparent window, so in this case, it makes sense to replace the transparent window with a frosted one.
To do this, make a selection around one of the frosted windows, then duplicate it to a new layer by pressing CTRL/CMD+J. Next, skew the window by holding CTRL/CMD and clicking on one of the corners of the layer and transforming it until the window matches the perspective in the photo. Next, create a layer mask to blend the new frosted window into the photo.
How to Retouch using the Brush Tool
You may be surprised at the versatility and power of the Brush Tool. In this example, we remove a heater from a photo using the Brush Tool. Simply hold ALT/OPTN+CLICK on the color you would like to sample (In this case it is the wall color) and paint over the object you would like to remove. If you are working on a relatively simple photo you won’t need to sample many colors, if you are working on a more complex photo, you may need to sample repeatedly.
If needed, make a selection to refine where you don’t want your brush paint to be visible. In this example, we use the Pen Tool to outline the chair and remove it from the wall layer.
![]()
![]()
BEFORE
AFTER
Download Sample Images
Click the link below to download the sample images and follow along with this tutorial.
DownloadTutorial Description
Labels and graphics on clothing can be distracting or unwanted in a photograph.
Clients will often want logos removed – especially if they are from a competing brand. Sometimes it is better to remove them completely.
Copy Texture & Patters
At times, logos are placed over textures and patterns on clothing. These textures need to be replaced when removing a logo.
To replace a texture or pattern, look for a similar pattern on another area of clothing.
Create a new layer and use the Clone Stamp Tool to sample the “good” texture and paint it onto the new layer. Be sure that “Sample – Current & Below” is checked in the settings for the Clone Stamp Tool.
Once the pattern has been duplicated to a new layer, transform it into place using CTRL/CMD+T. Try lowering the opacity of the layer to see where it will cover.
If necessary, do this multiple times from different areas of clothing to fully cover the logo.
After copying the texture from one area to another, you may need to alter it slightly. Use a Hue/Saturation adjustment layer to change color and lightness. Use a Brightness/Contrast Adjustment layer to lower contrast and darken a texture.
To make an adjustment layer only effect the layer underneath it, right-click on the adjustment layer and click on “Create Clipping Mask”
Don’t forget the Brush Tool!
When working with large patches of color, sometimes the best tool for the job is the Brush Tool. While it is not great for replicating patterns and textures, it can be used to quickly color large areas.
Start off with a small brush and remove just the logos by sampling the colors around it (ALT/OPTN+CLICK to sample). When you are done painting the smaller areas, make the brush large and soft-edged and paint in to blend the colors in with the clothing.
Remove Anything in Photoshop with the Clone Stamp Tool
-
-
Add to
favorites
-
DifficultyEasy
-
Length7.5 hours
-
Videos8
-
Software
description
If you want to learn Photoshop quickly, while picking up the best techniques, this is the perfect class for you. Learn, side-by-side with the #1 Photoshop instructor in the world, Aaron Nace.
Photoshop 101 covers nearly every tool and menu available to you in detail. This is your starting point for getting introduced to the incredible editing possibilities in Photoshop. Learn how to edit quickly, build confidence in your skills, and ensure your images come out looking great!
* This tutorial is part of the Photoshop 101-301 Bundle
THIS COURSE INCLUDES
- 8 Sample Images
- 2 RAW Images
Share
Table of Contents
-
01 - Workflow50:09m
-
02 - Layers, Layer Masks & Groups44:31m
-
03 - Every Photoshop Tool (Part 1)45:54m
-
04 - Every Photoshop Tool (Part 2)57:15m
-
05 - Every Photoshop Tool (Part 3)39:57m
-
06 - The Photoshop Menu (Part 1)1:19h
-
07 - The Photoshop Menu (Part 2)1:06h
-
08 - Colorful Portrait (Exercise 1)56:29m
Course Downloads
Learning Photoshop Starts Here.

Learn Proper Workflow
Photoshop is an expansive program and it can be difficult figuring out where to start. With so many options for editing and saving, how do you make the right choice? The workflow section helps keep you focused and moving forward with confidence.
Color Profiles Explained
Discover the many color profiles and which ones should you use. With Adobe RGB, ProPhoto RGB, sRGB and others the choice can be quite confusing. Some are best for editing while others are best for web.
Layers, Masking and Groups
Learn the best ways to properly work with layers to save time and headache. Layers are one of the primary building blocks of Photoshop. We dedicate an entire section to working with layers, masking and groups.

Define Keyboard Shortcuts
Keyboard shortcuts will greatly increase your efficiency in Photoshop. While many are preset, you can create your own shortcut for just about everything. Learn how to view all the keyboard shortcuts and then how to create your own.
Learn Typography Basics
There are many options when it comes to working with Type and the Type Tool. Leading, Kerning and Tracking all adjust letter spacing differently. See exactly how each of these fields work and how they work together.
Create Advanced Selections
Selections allow you to make changes to specific areas of your images. See how to create and combine selections using a variety of tools. Then learn how to edit and save selections to work more accurately giving you better results.

Start Here!
Photoshop 101 is the perfect place to start learning the tools and techniques in Photoshop!

Healing Vs. Clone
The healing brush and clone stamp tools can both be used to retouch minor blemishes in Photoshop. However, each tool works best in different scenarios. Learn how to use both tools to get the most out of Photoshop and your images.
Select with Quick Masks
Quick masks allow you to create custom selections expanding your options for creating and editing selections. Quick masks also allow you to use filters like blur on selections. Learn how to create quick masks and edit selections.
Intro to Filters
Photoshop includes many filters. Some are used for creative effects and others are used to enhance your images. Learn the basics about the most commonly used filters and their options.
Brush Controls and Shortcuts
The brush tool is one of the most commonly used tools in Photoshop. See how settings like size, opacity, flow and hardness all have a role in shaping your images. Learn how to quickly make changes to these settings to work more quickly and accurately.
Eraser Vs. Masks
Learn the proper techniques for removing objects in Photoshop. The eraser can be useful, but will permanently remove pixels. While layer masks allow for non-destructive editing. This tutorial explains the ins and outs of both tools giving you greater flexibility when editing your images.
Dodge and Burn
Enhance highlights and shadows using the dodge and burn tools. Photoshop makes these tools very accessible, but there are less destructive ways to accomplish the same thing. Learn how to retouch in a way that you can change at any time.
Transform, Warp and Scale
Layers often need to be moved, rotated, scaled and sometimes even warped. Learn how to properly use the transform tools in Photoshop while not destroying image data in the process.
Layer Alignment Control
See how easy aligning objects and layers can be. By using the align layers tool you can create cleaner, more structured designs. Objects, layers and layer groups can all be aligned to each other as well as the document’s artboard.
Add, Subtract and Create Selections
Learn each selection tool and their options to create more complex selections. Keyboard shortcuts can speed up how you add, subtract and intersect selections making it vital to learn how multiple selection tools to be used.
Export Perfectly for Web
Saving images properly for the web requires the understanding of colorspace and settings. Colors may appear differently in Photoshop than when placed online. Learn all the correct settings to use to ensure images display properly online.
Crop More Effectively
There are multiple ways to crop an image in Photoshop. Learn how to crop and resize your images while maintaining all of the original image information. Using the methods you learn will allow you to change the crop later without having lost any of the image.
Basic Image Adjustments
Learn basic color and exposure adjustments to enhance your images. Learn how to create and use curves, levels and hue/saturation adjustment layers. Combining these adjustment layers with your images will give your more control than you have ever had before.
Create Custom Brushes
Photoshop brushes are very powerful and often overlooked. Learn how to get the most out of the brush tool by creating your own custom brushes. Imagine painting with any shape you want!
Practice Exercise Included
Learn by doing. Follow along from start to finish editing the included sample image in Photoshop. All of the exercise files are included so you can learn and practice at the same time to make sure you will remember everything you learn.


Reviews
-
all is well But its The Most annoying thing that the video quality can’t be changed manually.It’s chamg it byits own AUTOMATICALLY😫🤬🤬
-
Fotoşoplqmayı severim
-
Thanks for this kind introduction to the world of PS! This was exactly what I wanted, not too detailed without missing anything important.
-
WOW! I just finished this tutorial and it’s great! Awesome explanation about every tool and every menu, i learnt a lot and it was so easy to follow Aaron! Thank you Phlearn for making this amazing tutorials, can´t wait to continue my phlerning journey.
-
This tutorial teaches you everything there is available in Photoshop in great detail. Now that I know what everything does and can do, I’ve started using more tools and options. My edits have never looked better!
-
very useful so far, i’m looking forward to see what’s next!
-
The most comprehensive and informative tutorial you will find on the subject of Photoshop. I highly recommend this tutorial for anyone looking to learn Photoshop or refresh their knowledge of Photoshop.
-
Think not start now because there is no alternative to this course☺️#1 course for beginners?
-
Great tutorial!
-
Love your teaching, I do have to go back a few seconds A LOT! How about a 15 second rewind button like on my TV? I also need to be able to bookmark my place since I get thrown out occasionally (not your fault.)
-
Awesome tutorial!!!
-
Very detailed and insightful content
-
Hello friends, i purchase photoshop 101 learn more the tools. This tutorials is one of the best. But i learned some stuff from free tutorials on photoshop. But i learned hair coloring and eye coloring from free tutorials so i learned some of the tools. Free tutorials eye wrinkles and many more to learned more free tutorials. Photoshop 101 is review about the tools. You can be graphic designer with phlearn the skills. So now you know how to retouch a photo some skills. Next photoshop 201 widen your skills to become PRO.
-
Awesome tutorial, it learns you soo much and allows you to get off with PS in proper way so you can build up your knowledge, so every beginner should consider buying this, and belive me, this price is a barging considering that basic courses (at least in my country) cost 150$+, nice work Phlearn!
-
If you want to learn Photoshop quickly, get this! I promise you, this is the best beginner Photoshop tutorial around! It is exciting and packed full of education.
-
These are the best way of learning Photoshop I have ever seen. I am completely new to this. Saw the things iPad pro could do, and it was down hill from there. Watching the key note speech on the new I Pad Pro, I got hooked. I have tried over the last year trying to make photos, (some, as old as 60 years and in poor shape) better. Teaching myself. I purchased Photoshop and Lightroom, and again trying to teach myself. I saw one of phlearn’s free videos on youtube, and was amazed what photoshop can do. These are great. I have learned so much, and have just started. Thank you for the great way you instruct photoshopping.


BEFORE
AFTER
Background Not Big Enough?
Have you ever really needed to extend the Background of your image, but not wanted to spend hours with the Clone Stamp tool? If so, today’s episode is for you! Learn How to Stretch Images Using Content Aware Scale!
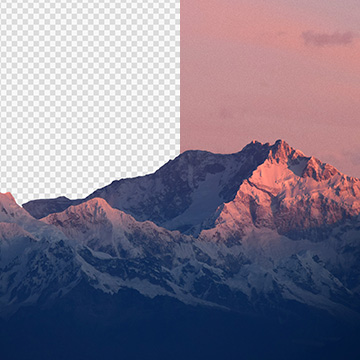
Preparation
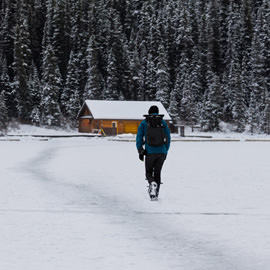
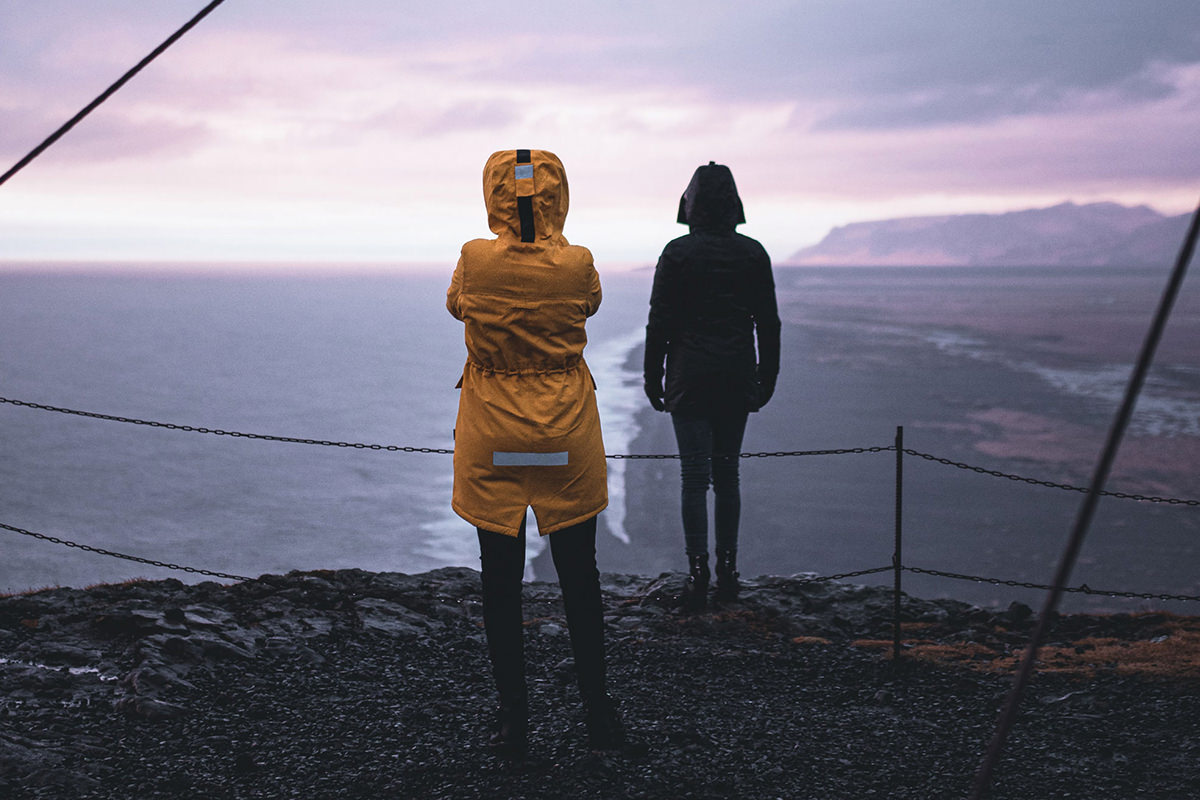
We start out with a square image that we would like to extend. It is a great example because we want to stretch out the water and sky, but not the person standing in the center. If you have a highly detailed photo that you want to stretch, the Content Aware Scale Tool will not be the best option. If it’s simple open space, however, like a sky or the ground, it will most certainly help you out! You can do this both horizontally and vertically.
Start by extending the canvas behind your image. You can do this by using the Crop Tool and just widening the background. Hold the edge and drag it to the left or right.
- TIP: Hold Alt/Opt while doing this to extend out evenly from the center.
Duplicate the background layer by holding Cmd + J. To test out how incorrect the photo will look with the normal Transform Tool, you can press Cmd + T and Stretch the image out to the new width. Yuck!! It will not look good at all. This is where Content Aware Scale comes in!
Content Aware Scale
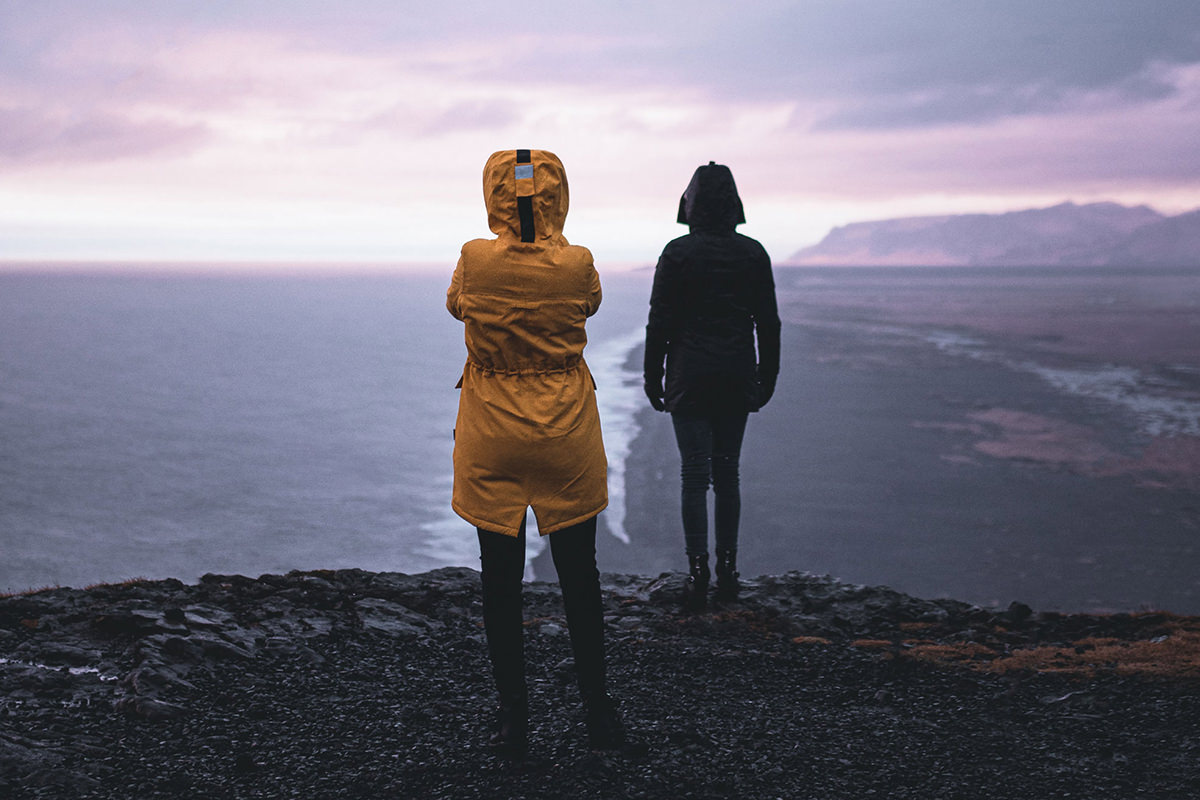
Go to Edit – Content Aware Scale. Now, you can drag the edges of the images outwards and the most important information will stay intact (human figure and the pier) while the more simple information (sky and water) will be extended to hit the new borders. It creates a much more natural look than the previous example!
Protect Your Important Information!
You might notice that when you used the Content Aware Scale Tool, there were parts of your image that were warped or slanted a bit. To truly make sure the items you don’t want to stretch stay protected, it will just take a few extra steps.
- Make a selection of the object you would like to “protect.” In this case, it is the man and the pier.
- Load this selection as a Channel. To do this go to the Channels tab, and create a new channel. Your objects should still be selected!
- You will see a completely black Screen with marching ants around your objects. Hold Shift + Delete and select Use – White. Now, your objects will be white on a black Background.
- Go back to your regular layers tab. Go to Edit – Content Aware Scale, and select your Alpha 1 Channel under the Protect drop down menu.
- Scale the image just as you did before! The objects you chose to “protect” should not move, and you will have a more successful final image.
As you can see in our example, the Before and After images are only different in their cropped Size. The goal is to have the end image look completely natural, and not give away the secret that you’ve stretched it out!
- TIP: Sometimes you just can’t scale as much as you’d like. A helpful hint is to Scale it halfway, stop, and then start over and Scale it the rest of the way.
nice, I’ve never used the clone stamp tool, but now I see all sorts of uses for it! Transparent Background
Great tutorial👍🏿I’ve never used the clone stamp tool, but now I see all sorts of uses for it!