

Download Assets
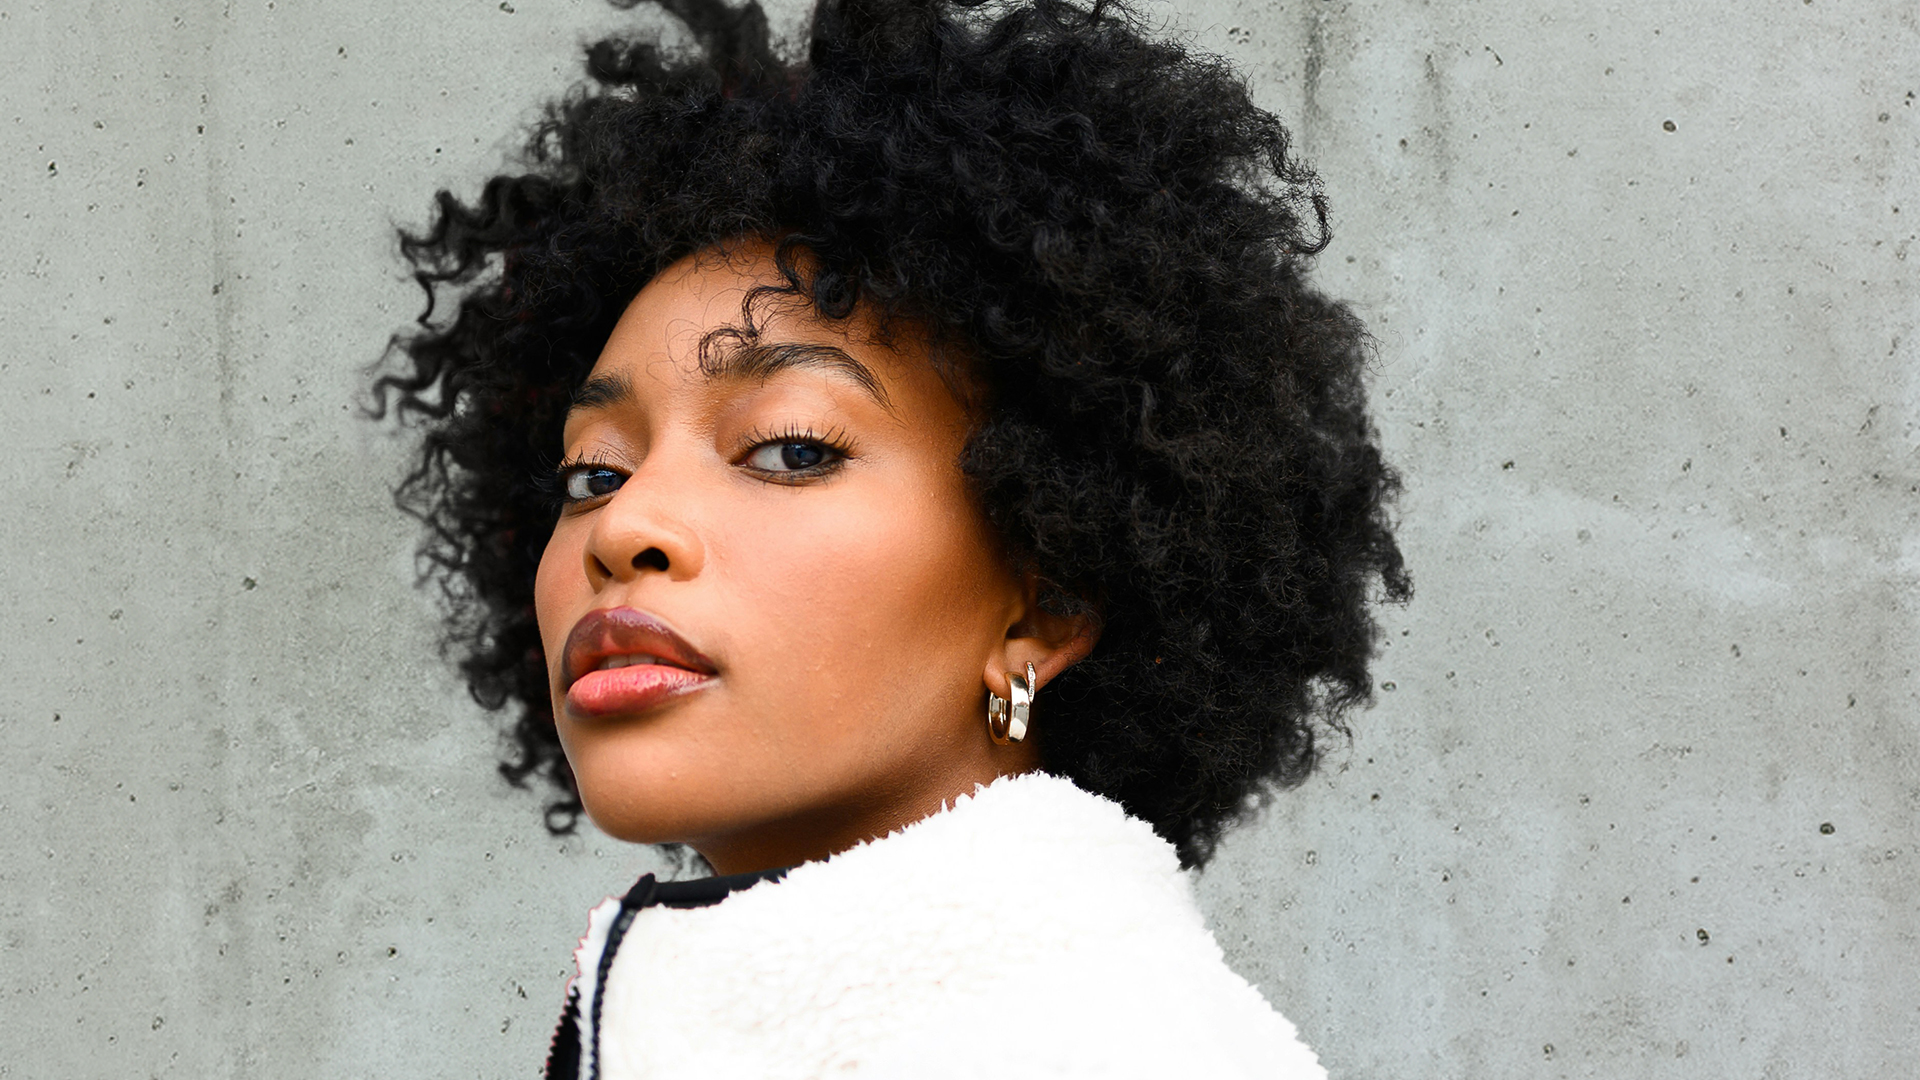
This tutorial includes 1 sample image, 1 sample PSD and 1 PDF guide. Downloads are free with a PHLEARN account.
- Download the sample images and PSDs from every free tutorial on PHLEARN
- New free tutorials published every week
- One free account — sign up once, then download anything
Free PDF Guide · 4 Pages
This Tutorial as a Step-by-Step PDF
The 4-page guide walks through Remove Background, a Generative Fill concrete wall, a little Feather in Select and Mask, bringing hair back with Select > Color Range at Fuzziness 100, a clipped layer set to Color that repaints the red fringe, and the Clone Stamp on Current and Below for the fleece edge. Keep it next to your keyboard.
description
Select Subject and refine edges in Photoshop is a five-step job, and the order is what makes it work: put the new background in before you judge a single edge.
Learn how to effortlessly isolate subjects in Photoshop! In this tutorial we’ll show you how to select subject and refine the edges, to get perfect cutouts in no time. Plus, discover simple techniques to seamlessly blend your subjects into new backgrounds.
Enjoying This Free Tutorial?
We publish a new free tutorial every week, each one with sample images and PSDs you can download and follow along with. Sign up and they land straight in your inbox, along with early word on sales, events and subscriber-only offers.
Artist Credit
- Jeffery Erhunse
Images sourced from Unsplash.
How to Select Subjects and Refine Edges in Photoshop
Quick answer
How to select a subject and refine the edges
The practice files and the free PDF guide are in the download section below.
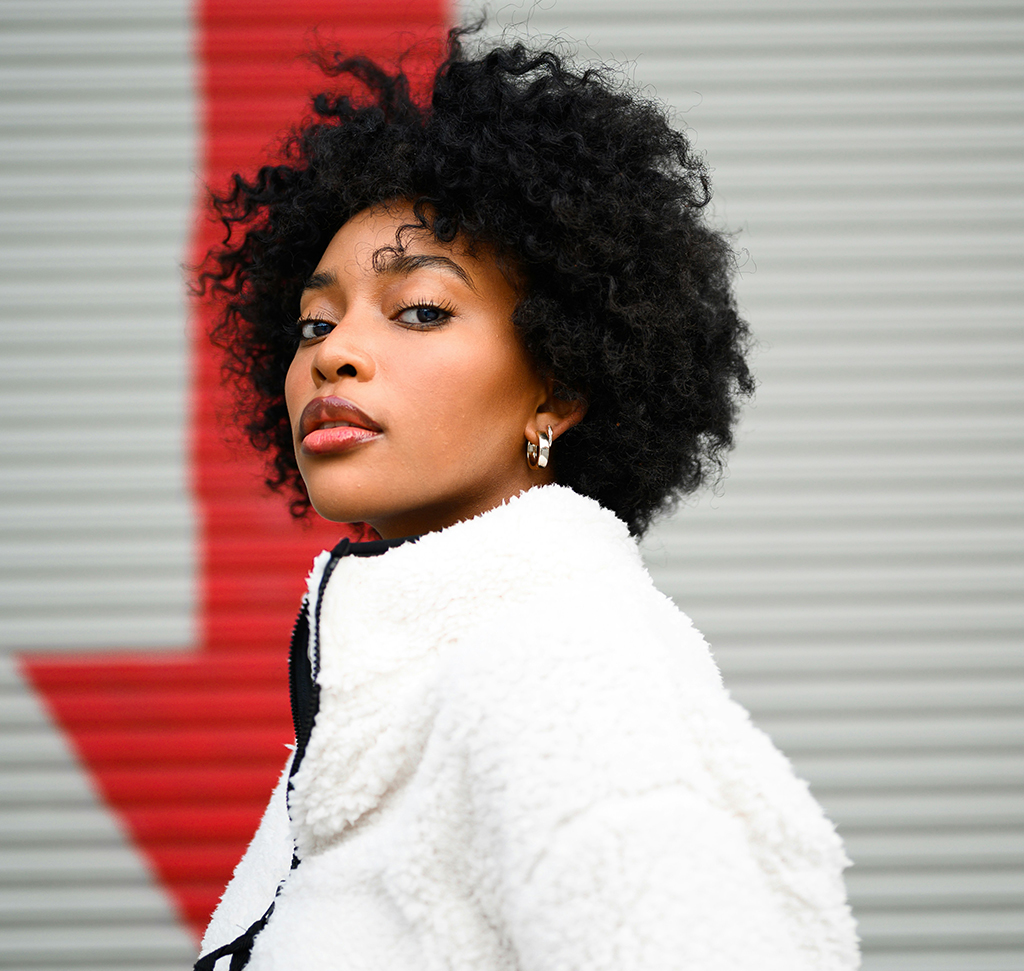
Select Subject will cut a person out in a second. The part nobody warns you about arrives immediately afterward: put that cutout on a new background and the edges glow with color from the old one. Hair is the worst offender — every strand carries a halo of whatever was behind it.
No automatic tool fixes this, because the colored pixels are genuinely part of the hair. The strands are thin enough that the original background bled into them when the photograph was taken. This tutorial covers the refinement passes that deal with it, and one technique in particular that removes the fringe without destroying the detail.
Step 1: Start With the Automatic Selection
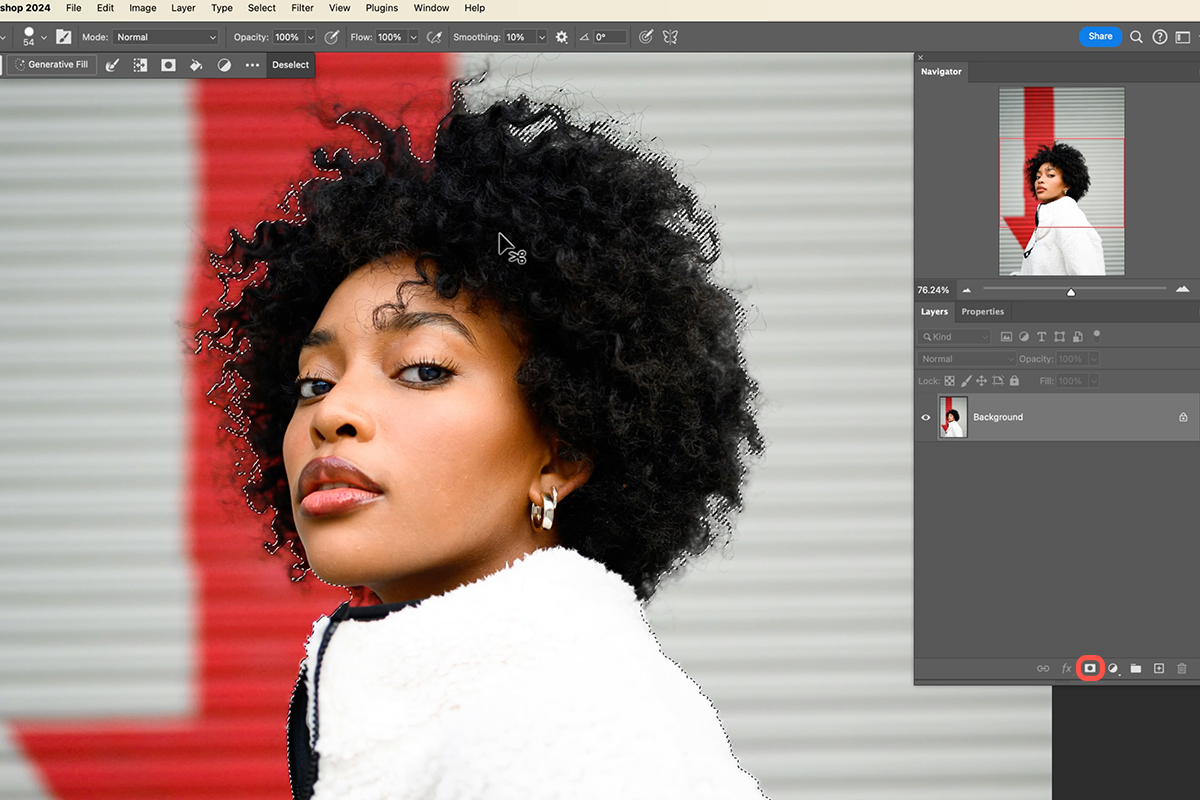
Use Select Subject, or the Remove Background button in the contextual task bar. Either gives you a masked subject in one click, and both are a perfectly good starting point — the refinement is where the work is.
Keep it as a layer mask rather than a deleted background. Everything below depends on being able to paint that mask back and forth.
Step 2: Put the New Background In First
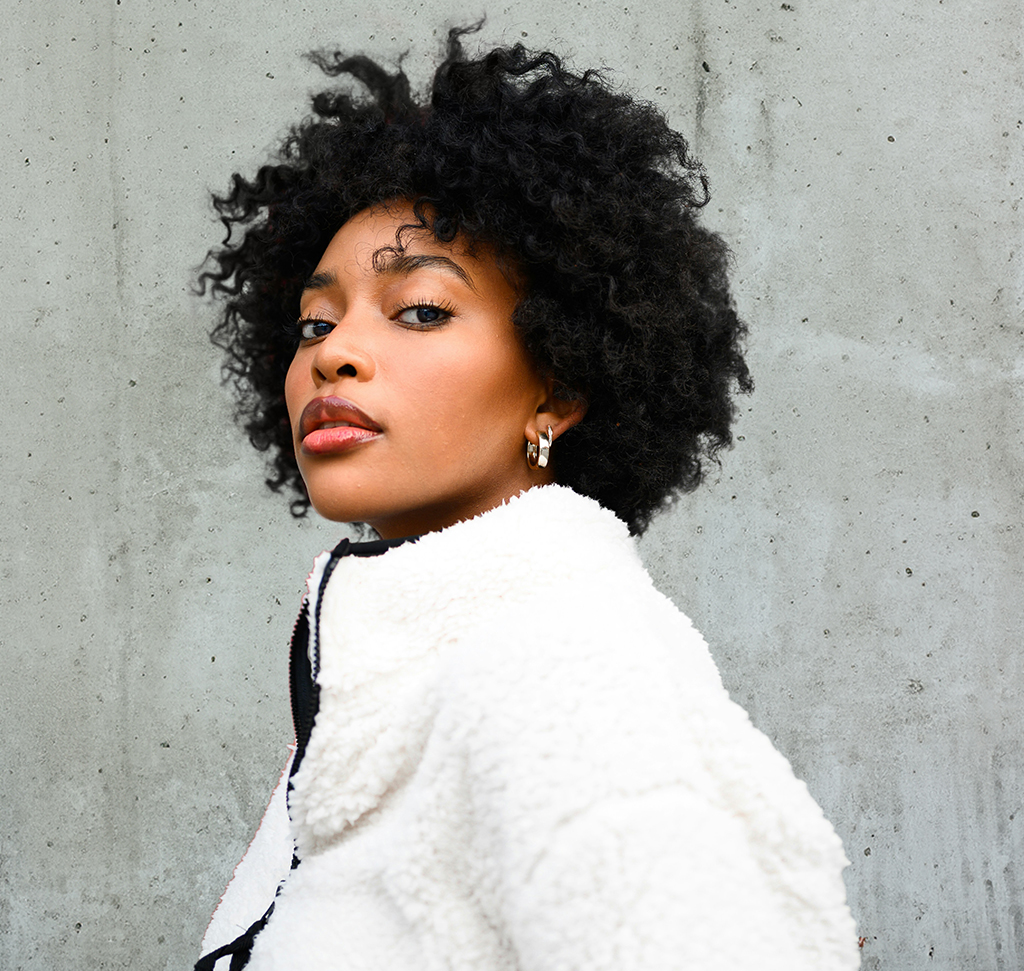
This feels out of order, and it is deliberate. Add a new layer beneath the subject and fill it with your replacement background — a color, an image, or something built with Generative Fill.
The reason is simple: you cannot see edge problems against a checkerboard. Color fringing, a hard cutout line, missing hair — all of it is invisible until there is something behind the subject to contrast against. Judging a mask in isolation is guesswork.
Choose a background that differs in tone from the original, too. If the old background was dark and the new one is dark, the fringe hides until someone views it on a better screen.
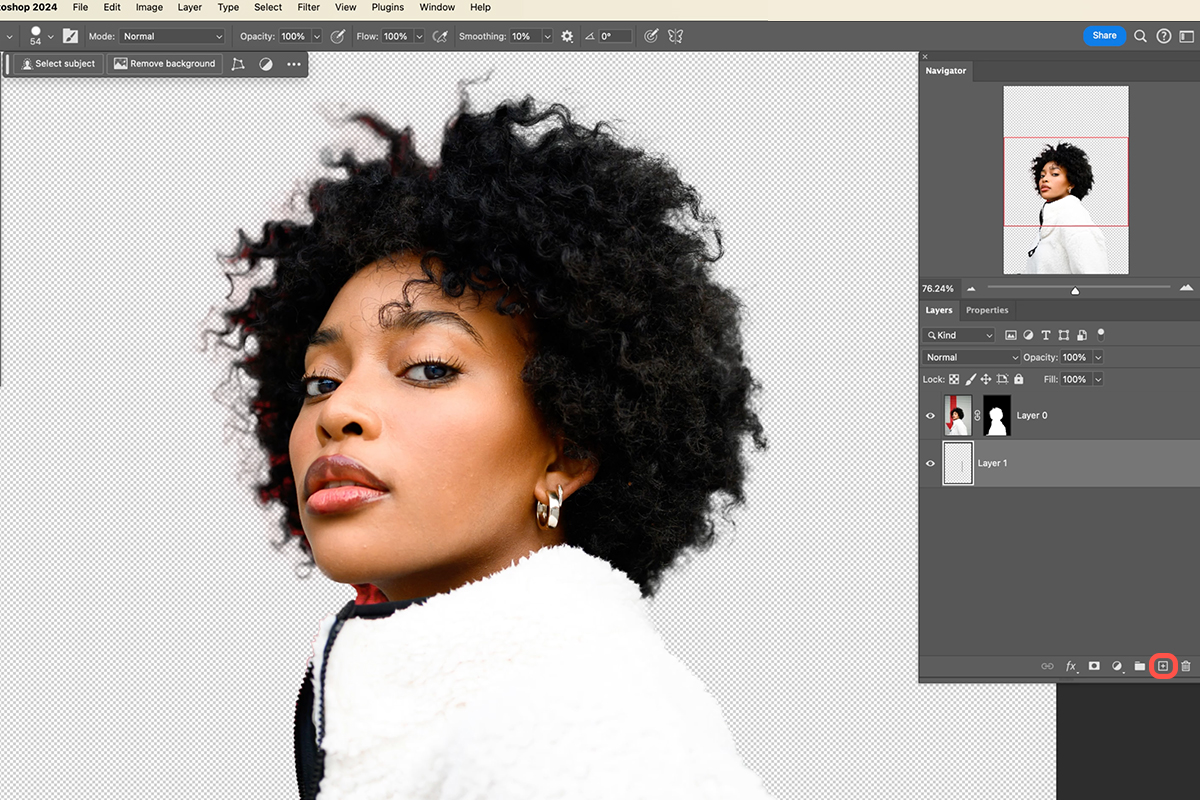
Step 3: Soften the Edge
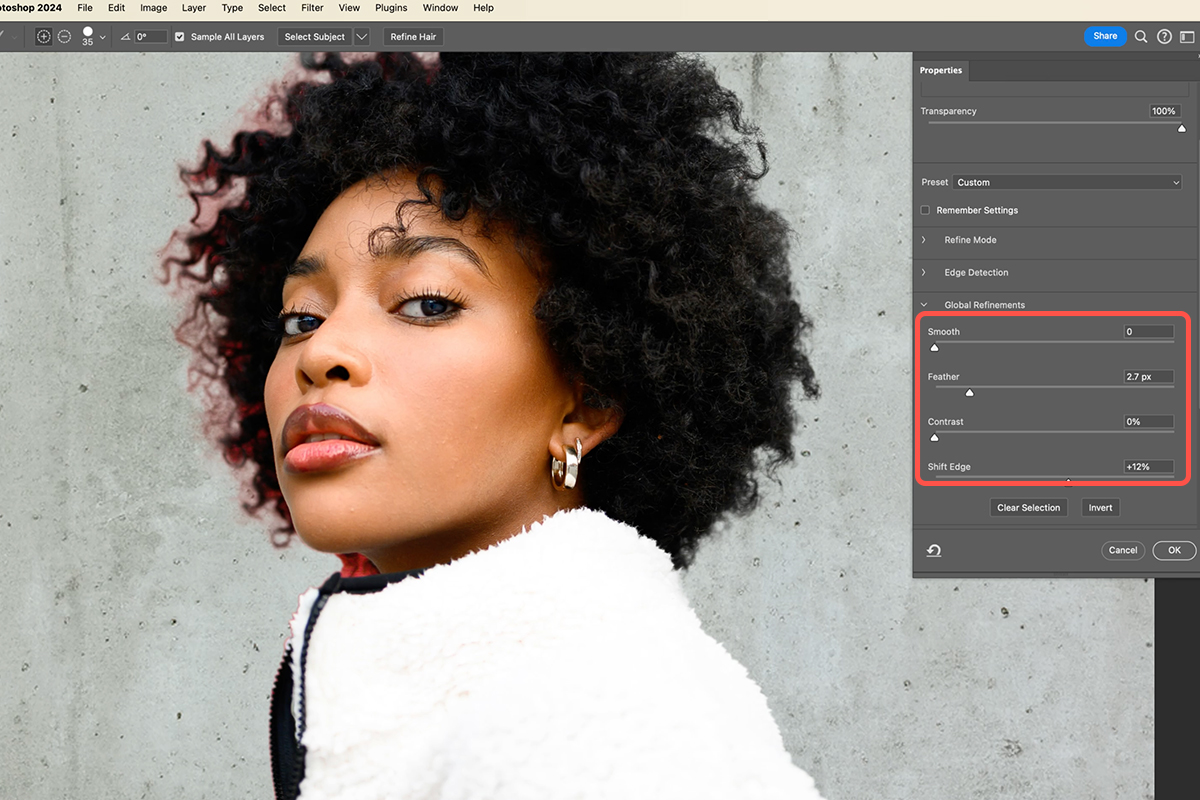
Go to Select, then Select and Mask, and work in the Global Refinements section.
Feather
A small amount — often less than a pixel, rarely more than two — takes the hard mathematical edge off the cutout. Automatic selections produce a boundary that is too clean, and a photograph does not have edges like that.
Shift Edge
This moves the whole boundary inward or outward. Pulling it in slightly is the standard first move against fringing, because it simply excludes the outermost contaminated pixels.
It is a blunt instrument, though. Pull too far and you start eating into genuine detail, and on hair that means losing the strands that make the cutout believable. Use it to take the worst off, not to solve the problem.
Step 4: Bring the Hair Back
Automatic selections almost always lose fine strands. Rather than painting them by hand, use the tonal difference between the hair and its surroundings.
-
Go to Select, then Color Range
Click on the hair and raise Fuzziness until the strands are picked up.
-
Press Ctrl or Cmd + H to hide the selection outline
The selection stays active — the marching ants just stop obscuring what you are doing.
-
Paint white on the subject’s layer mask
With the selection constraining you, painting reveals the hair detail that the automatic mask discarded.
-
Press Ctrl or Cmd + D to deselect
Then check the result at 100%.
There is more on this approach in our tutorial on cutting out hair and fuzzy edges, which covers the channels method in more depth.
Step 5: Remove the Color Fringe
This is the technique worth the price of admission, and it solves the problem the other steps only reduce.
The fringed pixels are real hair — they just have the wrong color in them. So instead of hiding or darkening them, repaint only their color and leave everything else intact.
-
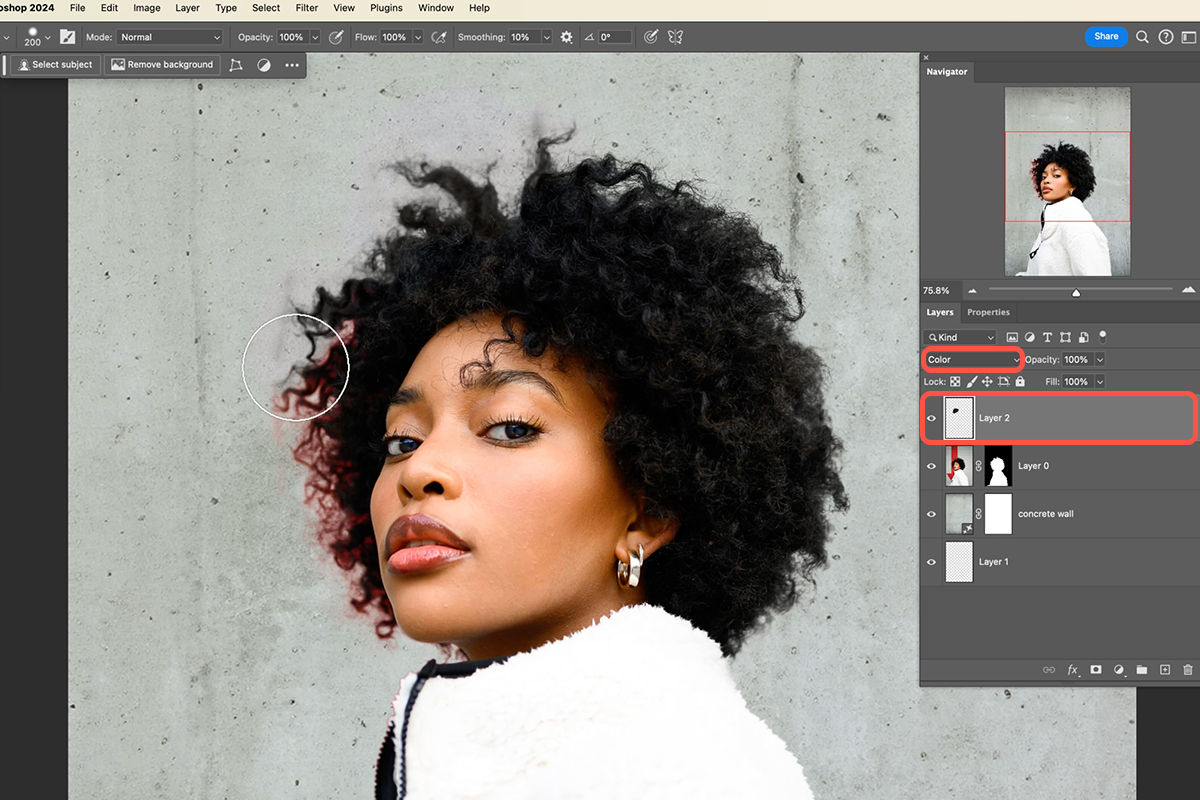
Add a new layer above the subject
Clip it to the subject with Alt + Ctrl + G, or Option + Cmd + G on Mac, so it can only affect that layer.
-
Set the layer’s blend mode to Color
This is the whole trick. Color mode applies hue and saturation while leaving the underlying luminosity completely untouched.
-
Sample a clean hair color
Press B for the Brush, then hold Alt or Option and click an area of hair well inside the subject, away from any contamination.
-
Paint over the fringed edges
The colored halo is replaced by correct hair color — and because only hue changed, every individual strand and every variation in brightness survives exactly as it was.
Why this beats the alternatives
Erasing the fringe removes the hair along with it. Darkening it flattens the strands into a solid mass. Pulling Shift Edge further in trims away the detail you were trying to keep.
Painting in Color mode is the only approach that changes what is wrong — the color — while preserving what is right. Once you have used it on a cutout, it is difficult to go back to anything else.
Keep it on its own clipped layer rather than painting onto the subject. If you overshoot, you erase from that layer instead of undoing work on the image.
Step 6: Blend the Texture
One more pass finishes the job. Where the edge still does not sit convincingly — usually where hair meets the new background at the outline — add another clipped layer, press S for the Clone Stamp, and set Sample to Current and Below.
Sample hair texture from inside the subject and clone it outward across the boundary. This carries genuine strand detail into the transition, so the edge stops reading as a cut line and starts reading as hair.
Why the Order Matters
Each pass depends on the one before it. The background goes in first so problems are visible. Global refinements take off the worst of the fringe so there is less to repaint. The hair is recovered before the fringe is treated, because recovering strands afterward would reintroduce contaminated pixels. The Color layer fixes what remains. The Clone Stamp blends what is left.
Work through them in that sequence and each step has less to do than the last. Jump straight to the detailed work and you will find yourself redoing it after every earlier adjustment.
It is also worth saying that no automatic tool gets you here. Select Subject does eighty percent of a cutout in a second, and the remaining twenty percent — which is all anybody actually notices — is this.
Quick Reference: Keys, Menus and Settings
- Cut out the subjectRemove Background, or Select Subject plus the layer mask icon
- New backgroundNew layer below the subject, Select > All, Generative Fill: “concrete wall”
- Soften the edgeSelect > Select and Mask > Global Refinements: a little Feather, go easy on Shift Edge
- Recover the hairSelect > Color Range, Selection Preview: Grayscale, Fuzziness 100; Cmd/Ctrl + H hides the edges, B paints white on the mask, Cmd/Ctrl + D deselects
- Recolor the fringeNew layer, Alt/Option-click the hair to sample, blend mode Color, clip with Alt/Option + Cmd/Ctrl + G
- Blend the edgeSecond clipped layer, S, Sample: Current and Below, Alt/Option-click inside and clone out to the edge

Free Downloads
Follow Along on the Same Photo
Get the portrait to cut out, the finished PSD with the refined mask and the clipped fringe layers, and the 4-page PDF guide. Free with a PHLEARN account.
Refining Selection Edges: Common Questions
What’s the quickest way to cut a person out in Photoshop?
Click Remove Background. It selects the subject and adds a layer mask in one button. The longer way is Select Subject, then the layer mask icon.
Why put the new background in before refining the edge?
Fringing, hard edges and missing hair are hard to see on a checkerboard. In the video a new layer goes under the subject, then Select > All and Generative Fill with “concrete wall” make the backdrop.
How do I soften a cutout edge that looks too hard?
Click the layer mask, go to Select > Select and Mask and open Global Refinements. A little Feather is enough to make the edge soft, like the fleece sweater in the video.
Should I pull Shift Edge in to remove the color fringe?
Only lightly. Going way in gets rid of the red but the cutout stops looking good. The video leaves it alone or shifts it out a little and fixes the color afterward.
How do I bring back hair that the selection cut off?
Shift-click the mask to disable it, click the photo layer and go to Select > Color Range. Click the hair, set Fuzziness to 100, click OK, then paint white on the mask with the Brush (B).
How do I hide the marching ants without losing the selection?
Press Cmd/Ctrl + H, and choose Hide Extras if Photoshop asks the first time. The selection stays active; press Cmd/Ctrl + D to deselect when you are done.
How do I remove color fringing from hair after a cutout?
Make a new layer, hold Alt/Option with the Brush to sample the hair, and set the layer’s blend mode to Color. Clip it to the subject and paint over the fringe. Hue also works but brings in some saturation.
Why is my Color layer tinting the background too?
It isn’t clipped. Go to Layer > Create Clipping Mask or press Alt/Option + Cmd/Ctrl + G, and it only shows where the subject is visible.
Why does the Clone Stamp paint nothing on my new layer?
Sample is set to Current Layer and the layer is empty. Set it to Current and Below, Alt/Option-click inside the subject and clone out to the edge.
Are the sample files free?
Yes, with a free PHLEARN account. You get 1 sample image, 1 sample PSD and 1 PDF guide: the portrait, the finished cutout file and a 4-page step-by-step guide.
From the Magazine View all
Stories, interviews and guides for photographers, new every week.
 EditingHow to Color Grade Photos in Photoshop and LightroomCorrect the photo first, then put color in the shadows, midtones and highlights. Aaron Nace on the order, the tools and skin.
 BusinessHow to Compete With AI: Give Your Clients MoreEveryone has the same tools now, and your clients know it. The way to compete is to give them more.
 EditingLightCraft vs Lightroom: I Edited the Same RAW Files in BothThe free clone on the same RAW files: what matches, what breaks and who should switch.
Master Photoshop, Lightroom and Photography
Join PHLEARN PRO for $12.99 a month, or $99.99 a year (save 36%). Cancel anytime, with a 100% money-back guarantee.





