

description
Learn how to use Adobe Camera Raw to add premium color grading presets for stunning results. In this tutorial we’ll show you how to turn your image into a Smart Object, explore different cinematic and seasonal presets, and even adjust how strong the effect is.
Enjoying This Free Tutorial?
We publish a new free tutorial every week, each one with sample images and PSDs you can download and follow along with. Sign up and they land straight in your inbox, along with early word on sales, events and subscriber-only offers.
Image Source


How to Use Color Grading Presets in Adobe Camera Raw
Photoshop’s largest collection of color presets is not in Photoshop’s own panels — it is inside the Camera Raw filter, and a lot of people never open it. There are more grading presets there than anywhere else in the application, they preview live as you hover, and every one has a strength slider.
That combination makes it the fastest way to grade an image, and a useful one even when you intend to grade by hand, because seeing twenty directions in thirty seconds is a better starting point than a blank panel.
If you would rather build a grade yourself from the color wheels, see how to color grade photos in Adobe Camera Raw. This tutorial is about the preset library.
Convert to a Smart Object First
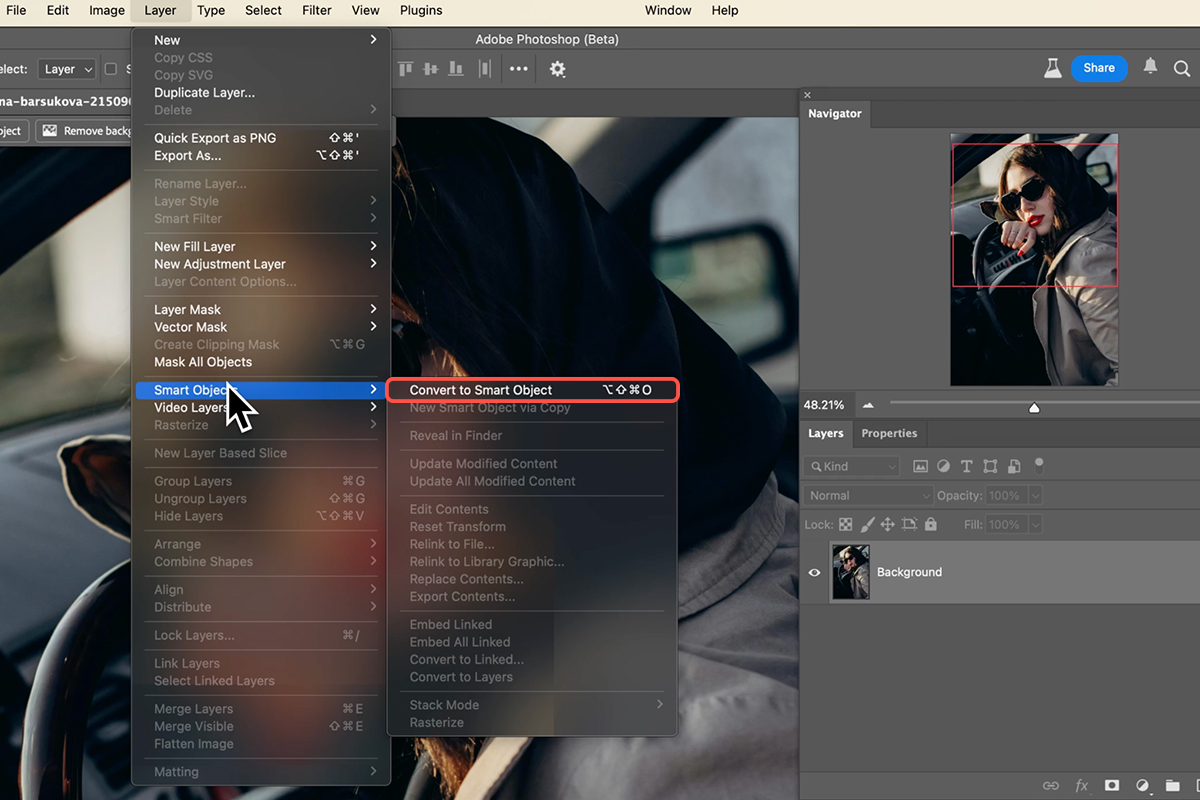
Do this before opening any filter. Select the background layer and go to Layer → Smart Objects → Convert to Smart Object. Check for the badge on the layer thumbnail.
Applied to a normal layer, Camera Raw bakes into the pixels permanently. Applied to a Smart Object it becomes a Smart Filter — re-openable with every setting intact, and switchable off.
For preset work this matters more than usual, because choosing a grade is inherently something you second-guess. Without a Smart Object, changing your mind means undoing back past whatever else you have done since.
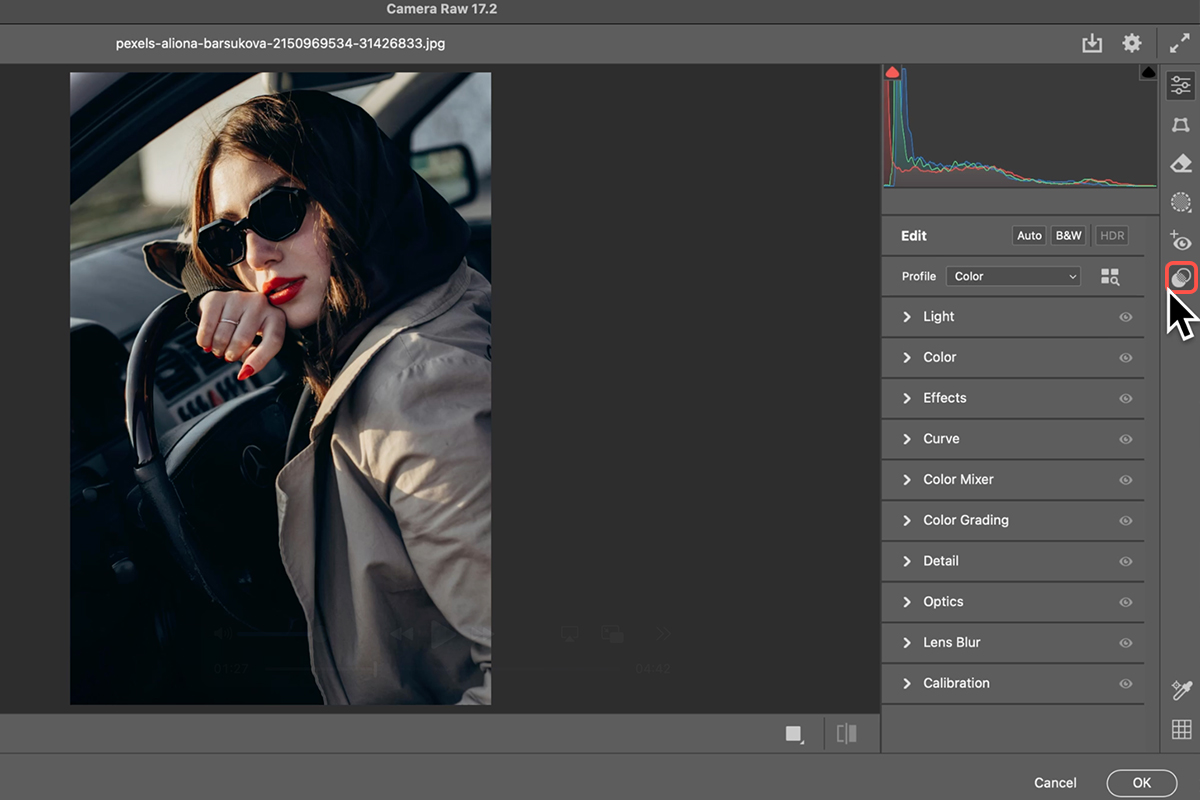
Then go to Filter → Camera Raw Filter.
Find the Presets
The Presets panel is on the right-hand side of the Camera Raw window. Open it and the list is organized into groups.
The portrait presets at the top are adaptive — they detect the subject and apply changes selectively, so something like Polish Portrait affects the person rather than the whole frame.
The color grades are further down, under headings like Seasons and Styles, with Cinematic among the most useful for photographic work. This is the part worth exploring.
Hover, Do Not Click
Hovering over a preset previews it on your actual image, full size, without applying anything. Move down the list and the image updates continuously.
This is what makes the panel worth using. You are not imagining what a grade might do from its name — you are seeing it on your photograph, and you can run through an entire category in well under a minute. Click only when something is worth keeping.
Dial the Strength Back
Once a preset is applied, an Amount slider appears at the top of the panel. Drag left to reduce it.
Use it on almost everything. Presets are built to read clearly in a thumbnail list, which means most are stronger than you want on a real image. At full strength a grade announces itself; at 40 or 50 percent it does its job without being the first thing anyone notices.
This also rescues presets you would otherwise dismiss. A grade that looks far too heavy at 100 percent is frequently excellent at 30 — so judge them reduced, not as they arrive.
Why This Beats Starting From Scratch
The hard part of color grading is usually not execution. It is knowing what you want.
Faced with empty color wheels, most people move sliders semi-randomly until something looks acceptable. Working from presets inverts that: you see a range of finished directions on your own image, pick one that is close, and adjust from there.
It is also a way to learn. Apply a preset, then open Color Grading and look at where it put the wheels. Seeing that a cinematic look means specific opposing moves in the shadows and highlights teaches the underlying logic faster than any explanation of it.
Come Back and Change It
Click OK and the grade applies as a Smart Filter under your layer. Toggle its visibility to compare against the original.
To change it, double-click Camera Raw Filter in the Layers panel. The dialog reopens with everything as you left it — pick a different preset, adjust the Amount, click OK, and the image updates.
Nothing is committed. A grade chosen today can be swapped a week later on a file you have since done other work to.
More Free Coloring Tutorials
If this was useful, these go further in the same direction:
- How to Color Grade in Photoshop using Camera Raw — grading from the Camera Raw panel.
- How to Color Correct a Photo in Photoshop — the correction pass that comes first.
- How to Color Grade a Photo in Photoshop — the creative pass that follows.
- Curves vs Levels in Photoshop — the two tools underneath most tonal work.
- Creative Coloring with Gradient Maps — remapping tones to colors of your choosing.
Keep Going From There
A preset is a starting point, not a finish. Once one is applied you still have every Camera Raw control — adjust the Color Grading wheels it set, correct exposure, add grain or vignetting.
You can also stack additional Smart Filters on the same layer, each independently toggleable and re-editable.

The Short Version
Convert to a Smart Object. Filter → Camera Raw Filter. Open Presets and scroll to the Seasons and Styles groups. Hover to preview on your own image, click when something works, then pull the Amount slider down — usually well down. Click OK, and double-click the Smart Filter any time you want to reconsider.
Two things carry most of the value: hovering rather than clicking, and reducing the strength of whatever you choose.







Enjoying This Free Tutorial? Go Further with PRO.
Unlock Full Sample Files, PSDs, and Hundreds of Masterclasses!

Download full project assets, original PSDs, and RAW images for every lesson
Unlimited access to our complete library of PRO Photoshop & Lightroom courses
Instant 4K Ultra HD streaming on all devices, anytime, anywhere
Full access to our entire library of Photoshop Actions, Presets, and LUTs
Flexible monthly and annual membership plans
Cancel anytime with zero hassle or commitments