Essential Photoshop Tools & Techniques: Free Tutorials
The tools every Photoshop user should know, taught free: layers, masks, selections, the Pen Tool, blend modes, Smart Objects, Camera Raw, and the healing and removal tools. More than 110 free video tutorials from Aaron Nace, each one focused on a single tool and how to use it well.
What You’ll Learn
Photoshop has hundreds of tools and you need about a dozen. This category is the free, one-tool-at-a-time guide to those dozen, plus the techniques that combine them.
- Layers and masks. Layer masks, clipping masks, adjustment layers, and groups, the structure every non-destructive edit is built on.
- Selections. The Quick Selection and Object Selection tools, Select Subject, the Pen Tool, Channels, and refining edges.
- Healing and removal. Spot Healing, the Remove Tool, Clone Stamp, and Content-Aware Fill, and which to reach for.
- Blend modes and Smart Objects. What each blend mode is for, Blend If, and why Smart Objects should hold almost everything.
- Camera Raw and adjustments. Curves, Levels, Hue/Saturation, and the Camera Raw filter as the fastest way to correct a photo inside Photoshop.
Where to Start
These tutorials are the reference version of what 30 Days of Photoshop teaches in sequence, so if you want the tools in order, start there and come back here when a specific tool needs more attention. The full free-and-PRO version of this category, with the simple-to-advanced progressions, is at Tools & Techniques.
Free and PRO Tutorials
Free tutorials are complete lessons, not previews. PRO tutorials go deeper and longer, and they include the sample images, RAW files, actions, and presets used in the lesson so you can follow along on the exact same file. A PHLEARN PRO membership unlocks every PRO tutorial on the site, including all of the ones in this category.
Frequently Asked Questions
What are the most important tools in Photoshop?
Layers and layer masks, the selection tools, Curves, the healing and removal tools, and Smart Objects. Learn those well and most other tools become optional. Each has its own tutorial here.
What is the difference between a layer mask and erasing?
Erasing deletes pixels permanently. A layer mask hides them, so you can bring them back or refine the edge later. Every professional workflow uses masks; the mask tutorials here explain why.
Are these tutorials for the current version of Photoshop?
The core tools have not changed in years, so older tutorials still apply. Where a tool has been updated, such as the Remove Tool and the AI selection tools, there is a newer tutorial in this category.
Where to Go Next
Once the tools are familiar, apply them: Photo Editing for correction, Retouching for portraits, and Compositing for combining images. The Photoshop Basics collection is the gentler introduction if this page feels like too much at once.
Learn the Tools in Order
30 Days of Photoshop teaches these tools one short lesson at a time, in the order they build on each other.
On This Page
PHLEARN PRO
Every PRO tutorial in this category, with sample and RAW files, plus the full PRO library.

In today’s episode, learn how to use amazing Lighting Effects in Photoshop! Watch and learn as we Transform a flat piece of art into a textured, 3-D masterpiece!

Learn How to Use the Vanishing Point Filter in Photoshop! Trust us, it will take all of your perspective troubles away!
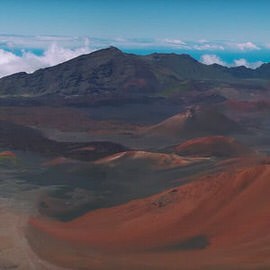
Not only do we show you how to create a panorama in Photoshop, we also give you some expert tips on shooting those panoramic images David J. Crewe lends us his knowledge as we give you six amazing tips.

In today’s episode, learn the ins and outs of the Transform Tool, and use that knowledge to apply any image to an iPhone!

When are flares appropriate in photos? Why can’t you customize the Photoshop Lens Flare Filters?? In today’s episode, we show you the best way to use Lens Flares in Photoshop and answer those burning questions!
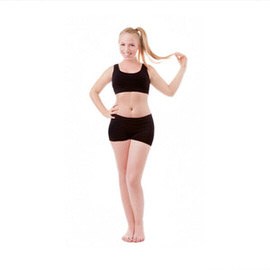
Altering a model’s Body Proportions is a very controversial topic. In today’s episode, we show you some techniques to get a great transformed Body without pushing it too far.

Explore artistic options and learn how quickly you can accomplish them with a simple Blending Mode change!

As long you you have an area in your image to sample, using the patch Tool should be very easy to do. In today’s episode, we’ll show you how to use the amazing Patch Tool in Photoshop!

In today’s episode, we give you the gift of facial Hair! Whether for fun or for professional Retouching, creating Hair can always come in handy.

Use the Pen Tool to create custom shapes and accurately cut objects out of their backgrounds!
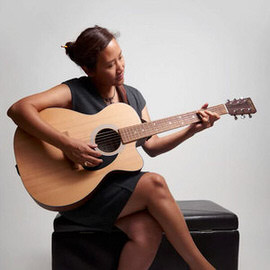
The white Background has become a standard in the photography world and for good reasons. You can pick up a white seamless background for less than $100, turning any space into a photo studio.

Photoshop Actions are created by manually performing a series of steps and recording them in an ATN file. You can replay those steps on any image by hitting the play button in the action dialog.

The Liquify Tool is one of the most powerful image editing Tools in Photoshop. It will allow you to “push and pull” pixels any way you’d like.

Learn how to properly save and export your images so they display perfectly on the Web and allow for easy changes later.
We have found that learning a few Tools will allow you to do 90% of your Photo Editing. Here’s what they are!
These are the proper settings and preferences to get Photoshop working well.

In today’s episode we will show you how to use the new blur gallery in Photoshop cc 2014.

We will show you the amazing power of focus area selections in Photoshop cc 2014 as well as new Type Tools. We are also throwing in one of our old favorites – Content Aware Scale with Skin Tone Protection.

The Clone Stamp Tool is one of the most important Tools that Photoshop has to offer. It allows you to copy areas of an image and is very useful for getting rid of distractions or skin blemishes.

In this episode we show you how to master the motion blur in Photoshop using these techniques and give some Insights on how to make Motion Blurs look real.

In this episode we cover a special technique we created to help blur the edges of a photo while keeping your subject in focus. Prepare to learn about drawing attention to your subject using radial focus blur!

In today’s episode we learn how to create Light rays and dust particles using a custom Brush in Photoshop. The key to creating “dust” is to make particles that seem completely random.
Sample Images Included

In this episode we show you how to unlock the secrets to the Lens Flare in Photoshop, getting around the limitation of the Filter.

More than any other Tool that we have at our disposal the liquify Tool has always been met with a special degree of ire. Liquify has been dubbed a great evil that has beset the foundations of society’s self esteem…

Learn a Simple Technique for adding textures to your images. We are using multiple textures combined together to create the final effect.
Sample Images Included

Rob Woodcox took over Phlearn this week and started editing images with Curves. He will show you his process of refining, and Styling the image to achieve the look he was going for.
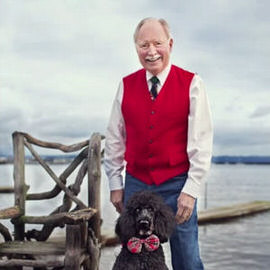
In this tutorial we show you how to use the Pen Tool to cut out your subject, and then do some work to recovery detail in the sky.

Learning how to create custom Brushes in Photoshop is a skill that will benefit many images. In this tutorial, we show you how to make a selection around a bird and promote it onto a new document in order to create the Brush.
Sample Images Included

In today’s episode we create a custom Brush that looks like dirt and show you how to configure it perfectly. We then save the Brush and load it into the Clone Stamp tool to finish the job. The resulting effect is seamless and fun!

Adding a gradient Color Tone to an image can help with it’s Depth and help Draw the viewers eyes towards your intended point of focus. You’ll see how as we take you through a few curves, a little Pen Tool Action and just one Levels Adjustment Layer.

In this episode we show you how to create a custom Brush that creates dust anywhere you want it. All you have to do it paint over the area you would like the dust and erase the rest!
Sample Images Included