
Download Assets
Download Assets
This tutorial includes 2 sample RAW files. Downloads are free with a PHLEARN account.
- Free sample files with every tutorial on PHLEARN
- New tutorials published every week
- Unlimited downloads with your free PHLEARN account
Watch the Full Series
description
An HDR merge exists because your eyes handle a far wider range of brightness than any sensor. Photograph a room with a window and you get a good interior or a good view, never both.
On Day 11 of 30 Days of Lightroom Classic we bracket exposures in camera, merge them with Photo Merge, and cover Auto Align, deghosting and why the result is still a fully editable RAW.
This is Day 11 of our 30 Days of Lightroom Classic series. Follow along with all 30 episodes as we explore the magic of Lightroom together!
Continue Watching 30 Days of Lightroom Classic
JOIN 30 DAYS OF LIGHTROOM (FOR FREE!)
Ready to jump in? Sign up and we’ll email you a printable calendar and daily class schedule so you can get started right away!
Image Source


HDR Is About Range, Not the Look It Got Famous For
Your eyes handle a far wider range of brightness than any camera sensor. Stand in a room with a window and you can see both the furniture and the view outside. Photograph it and you get one or the other — a correct interior with a blown-out window, or a good view with the room in darkness.
HDR solves that by combining several exposures of the same scene into one file that holds detail across the whole range. Day 11 covers what to do in camera, and the two-minute merge in Lightroom Classic.
The Part That Happens in Camera
Lightroom can only combine information you actually captured, so this starts before you sit down to edit.
You need at least two frames of the same scene at different exposures — typically one underexposed, one correctly exposed and one overexposed. You can dial that in by hand, but nearly every modern camera has bracketed exposure in its menus, which fires the sequence automatically. Cameras vary in what they offer; some will shoot up to nine frames across three stops.
Use a tripod if you have one. The frames get aligned and merged, so the less the camera moves between them the better the result. Without one, brace yourself properly and shoot the burst quickly — Lightroom can correct small misalignments, but it is doing repair work rather than assembly.
What You Are Starting With
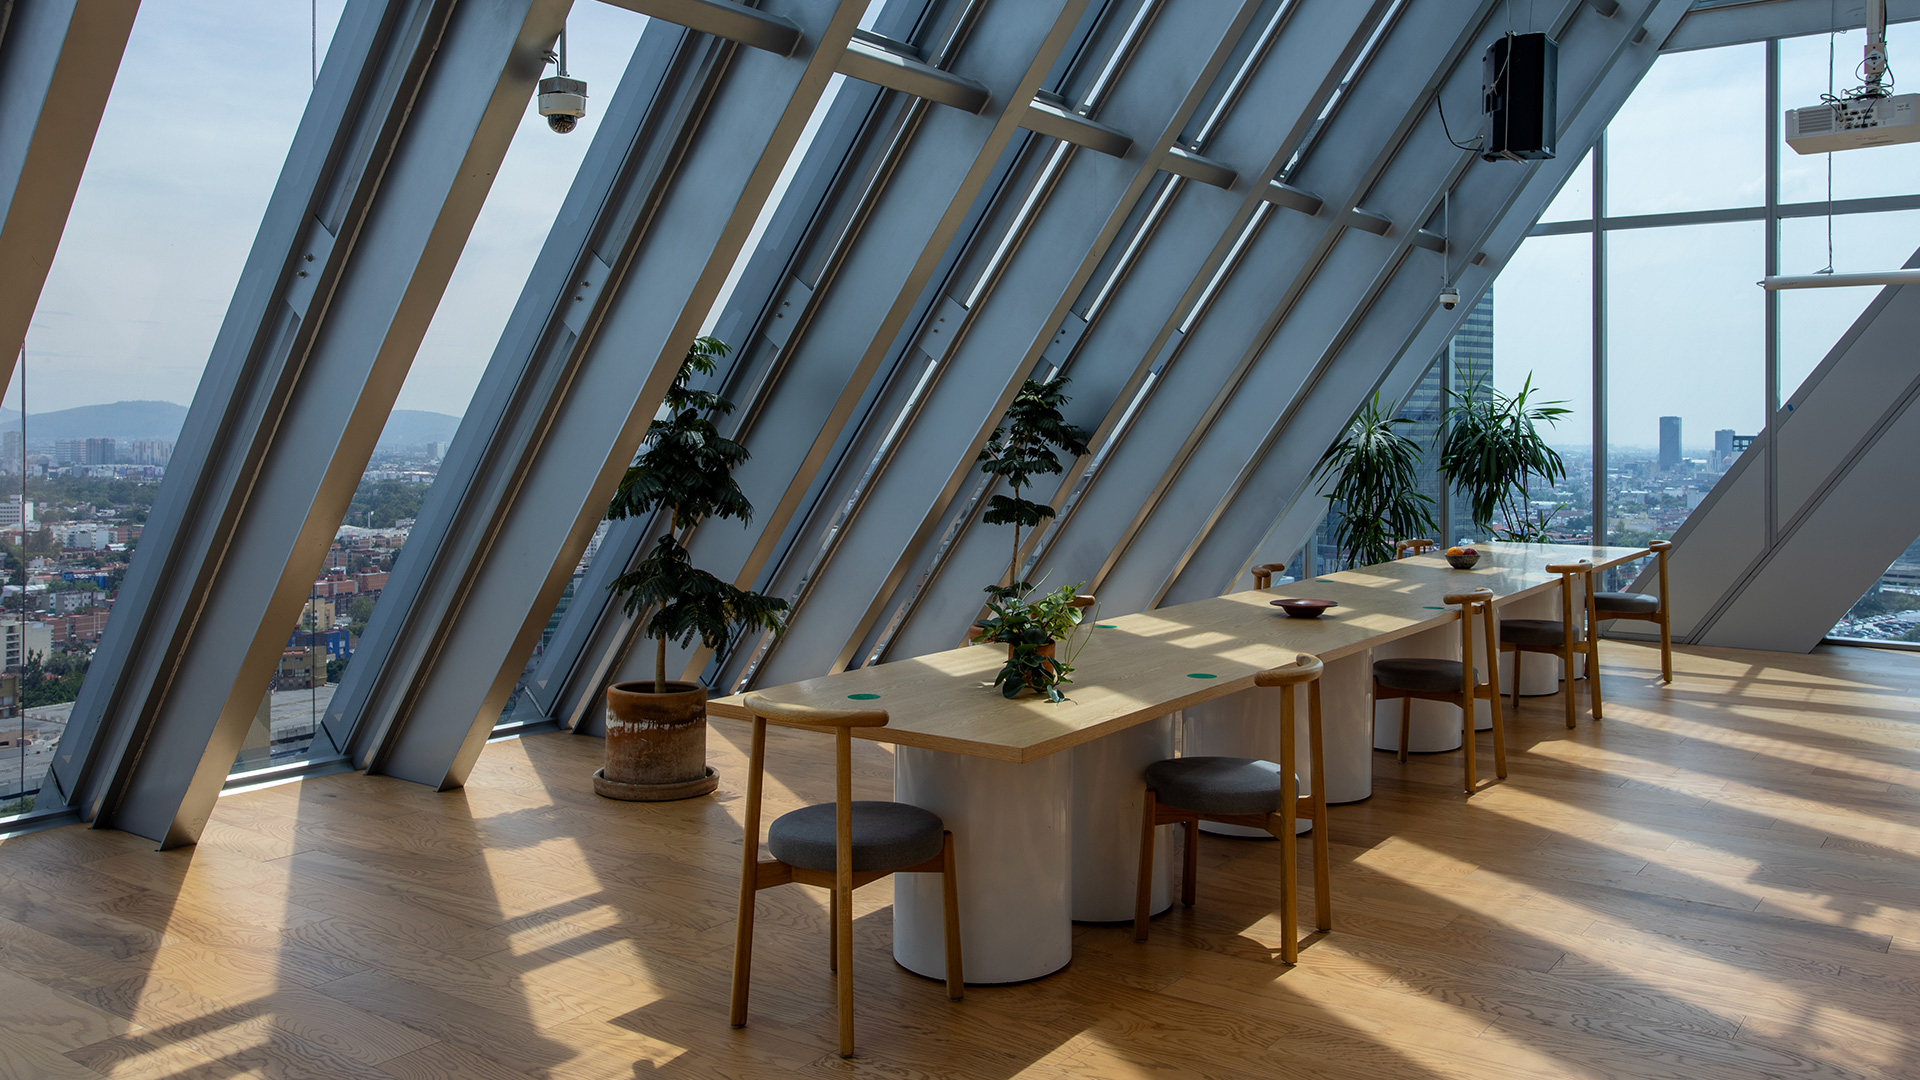
In the example here there are two RAW files of the same interior. The darker frame holds the sky and the buildings through the window but the room is a silhouette. The brighter frame has a perfectly exposed room and a white rectangle where the window should be.
Neither is usable. Between them they contain everything the scene had.
Merging to HDR
-
Select your bracketed frames
Shift-click them in the filmstrip or Grid view. Two is enough; more is fine.
-
Right-click and choose Photo Merge > HDR
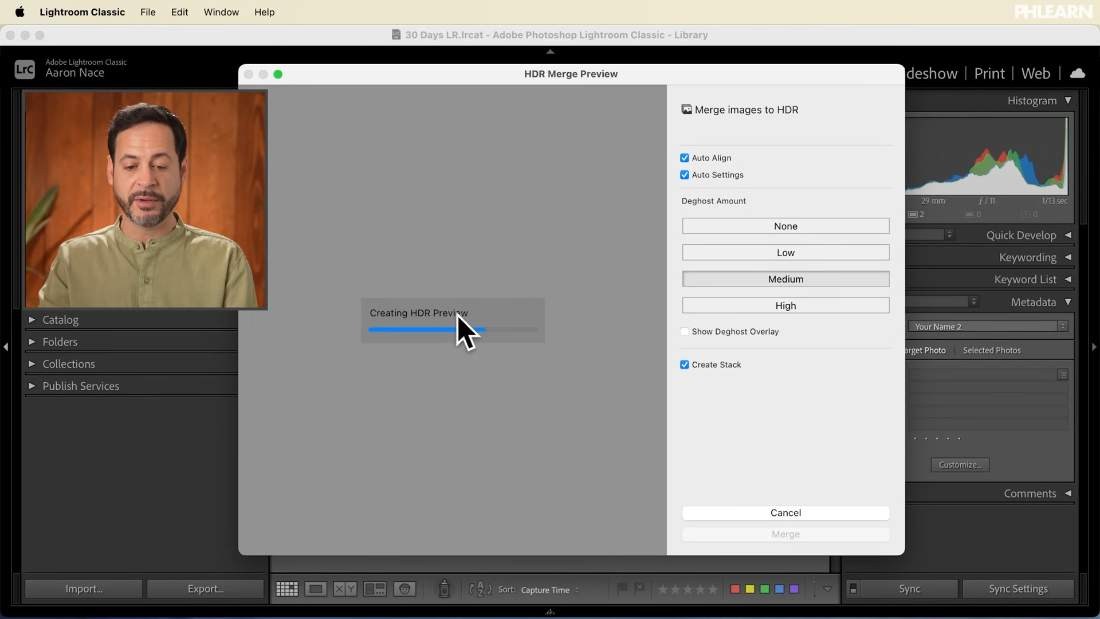
The HDR Merge Preview window opens with a live preview already built.
-
Set the options
Covered below — the defaults are close to right.
-
Click Merge
Processing runs in the background and the finished file appears in your catalog.
Auto Align and Auto Settings
Leave both on. Auto Align compensates for any movement between frames, which matters even on a tripod. Auto Settings applies a sensible starting tone curve to the merged file — you can change every one of those sliders afterwards, so there is no cost to letting it try.
Deghost
This is the option worth understanding. If something moved between your frames — leaves in the wind, a person shifting, water — that element sits in a slightly different place in each one, and naively blending them produces a translucent double image. Ghosting.
Deghosting tells Lightroom to pick one frame as the truth for those moving areas rather than averaging them. Medium is a good default. None is fine for a genuinely static scene; High is for obvious movement and can occasionally introduce artefacts of its own.
Create Stack
Tick it. Lightroom groups the merged file together with the source frames in your Grid view, collapsed into one thumbnail. Without it you have three loose files and no indication which belong together — and the originals are worth keeping.
What You Get Back

The result is a DNG — a RAW file, not a JPEG. That matters more than it sounds. Every bit of latitude you would expect from a RAW is still there, on top of the extra range gained from merging, so the merged file takes editing better than either original did.
Open it in Develop and the sliders are wherever Auto Settings put them. Adjust freely from there. In practice a merged HDR needs less work than a single exposure, because the hard problem — detail at both ends — is already solved.
The old reputation of HDR as garish and over-cooked came from software that tone-mapped aggressively by default. This does not do that. If your result looks artificial, it is because of what you did in the Basic panel afterwards, not the merge.
Seeing What You Gained
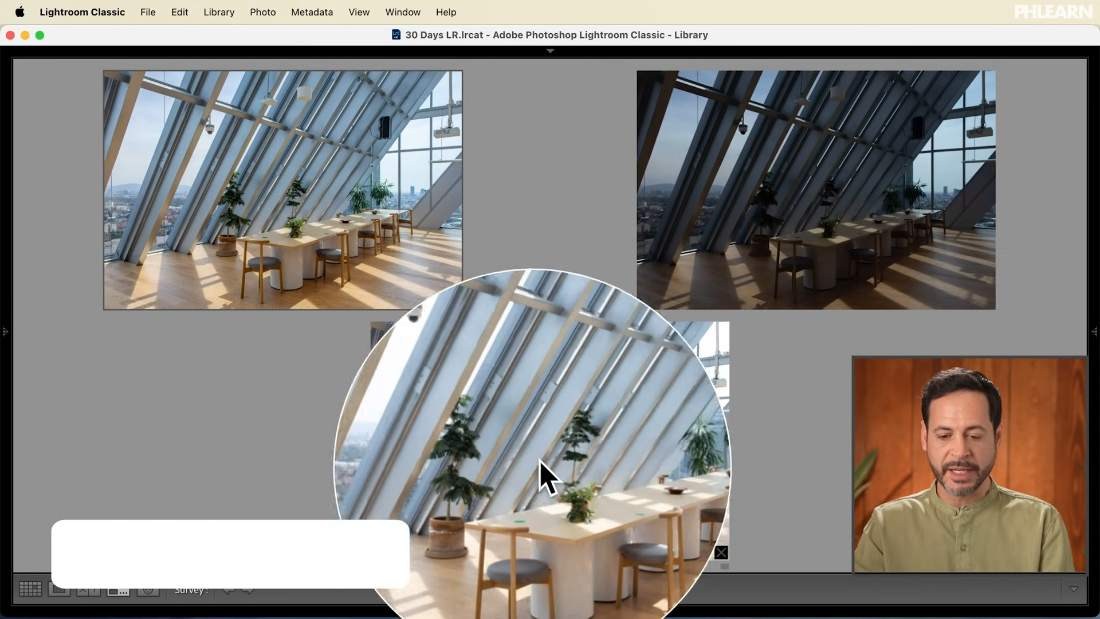
Select all three files, press N for Survey view and Shift + Tab to clear the panels. The two originals sit beside the merge and the comparison is immediate: one frame with a window and no room, one with a room and no window, one with both.
When This Is Worth Doing
Landscapes. Bright sky against darker land is the classic case, and bracketing costs nothing in the field.
Architecture and interiors. Any room with a window is a high dynamic range scene, and the difference is dramatic.
People, carefully. Possible if your subject holds genuinely still, but they usually do not. Deghosting helps; a single well-exposed RAW is often the safer choice.
Where This Usually Goes Wrong
Bracketing too narrowly. Frames a third of a stop apart add nothing. You want a real spread — one clearly dark, one clearly bright.
Skipping Create Stack. Three unlabelled files per scene turns into a mess within a shoot.
Deghosting set to None on a windy day. The translucent double-images are hard to fix afterwards.
Over-editing the merge. The point is natural detail everywhere. Cranking Clarity and Shadows afterwards recreates exactly the look HDR is unfairly known for.
Take It From Here
HDR is one of the few techniques where nearly all the work is in the shooting. Bracket whenever a scene has bright and dark areas you care about — it costs a couple of extra frames and gives you an option you cannot create later.
Tomorrow we look at saving your edits for reuse: how to create presets in Lightroom Classic.
Quick Reference: Keys, Menus and Settings
- Select the bracketsShift-click the frames in the filmstrip or Grid view
- MergeRight-click > Photo Merge > HDR
- Merge optionsAuto Align and Auto Settings on, Deghost Amount: Medium, Create Stack on, then Merge
- See the originalsClick the stack on the thumbnail to open it; the merge is saved as an HDR DNG
- Fine-tuneDevelop module, Basic panel: Exposure, Highlights, Shadows
- CompareSelect all three, N for Survey view, Shift + Tab to hide the panels
Shoot the brackets on a tripod if you can; Auto Align only fixes small movement.
Free Downloads
Follow Along on the Same RAW Files
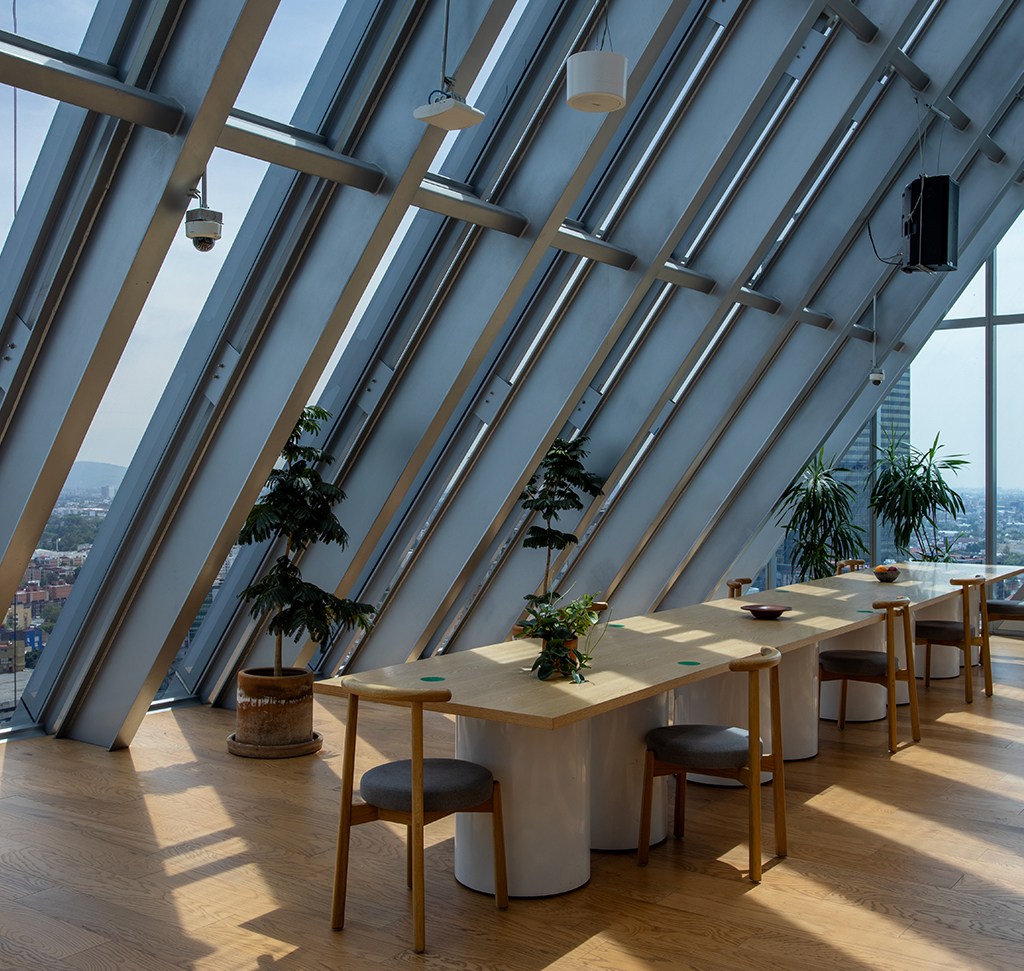
Get the 2 bracketed RAW files of the same interior, one dark for the window and one bright for the room, ready to merge. Free with a PHLEARN account.
HDR in Lightroom: Common Questions
What is an HDR photo?
It is several exposures of the same scene combined into one image. The merge keeps detail in the highlights, midtones and shadows, so a bright sky and a dark room can both look right.
How many photos do I need to merge an HDR?
Two is enough, as long as they are different exposures of the same scene. The tutorial merges two RAW files, and you can merge more; Aaron has merged as many as nine.
How do I shoot bracketed exposures?
Take one frame underexposed, one properly exposed and one overexposed. You can change the exposure by hand, or turn on bracketed exposure in your camera’s settings to fire the sequence automatically.
Do I need a tripod for HDR?
A tripod helps because the frames have to line up. Without one, hold the camera very still and shoot quickly; Auto Align corrects small movement between frames.
How do I merge photos to HDR in Lightroom Classic?
Shift-click the bracketed frames, right-click and choose Photo Merge > HDR. Check the options in the HDR Merge Preview window and click Merge.
What does Deghost do in HDR Merge?
If something moved between frames, like a tree in the wind, it sits in a different place in each one and blends into a faint double image. Deghost picks one version for those areas. Medium is a good default.
What does Create Stack do?
It groups the merged HDR with your original frames under one thumbnail in the Library. Click the stack to open it and see all of them.
What kind of file does HDR Merge create?
A DNG with HDR in its name, which is a RAW file. Open it in the Develop module and adjust Exposure, Highlights and Shadows like any RAW photo; the Auto Settings values are only a starting point.
Can I use HDR for photos of people?
It is harder because people move between frames. It works if your subject stays very still. Landscapes and architecture are where bracketing pays off most.
Are the sample files free?
Yes, with a free PHLEARN account. You get 2 sample RAW files: two bracketed exposures of the same interior, one dark and one bright.
Master Photoshop, Lightroom and Photography
Join PHLEARN PRO for $12.99 a month or $99.99 a year. Cancel anytime, with a 100% money-back guarantee.





