

description
Dropping a pattern on a shirt and scaling it down never looks like fabric. Aaron masks the pattern to the shirt’s exact outline with the Pen tool, warps it around the body and its folds with Liquify’s Forward Warp and Freeze Mask, then clips two copies of the original shirt on top, one set to Multiply for shadow and one to Screen for highlight, so the print picks up the garment’s real lighting.
Enjoying This Free Tutorial?
We publish a new free tutorial every week, each one with sample images and PSDs you can download and follow along with. Sign up and they land straight in your inbox, along with early word on sales, events and subscriber-only offers.
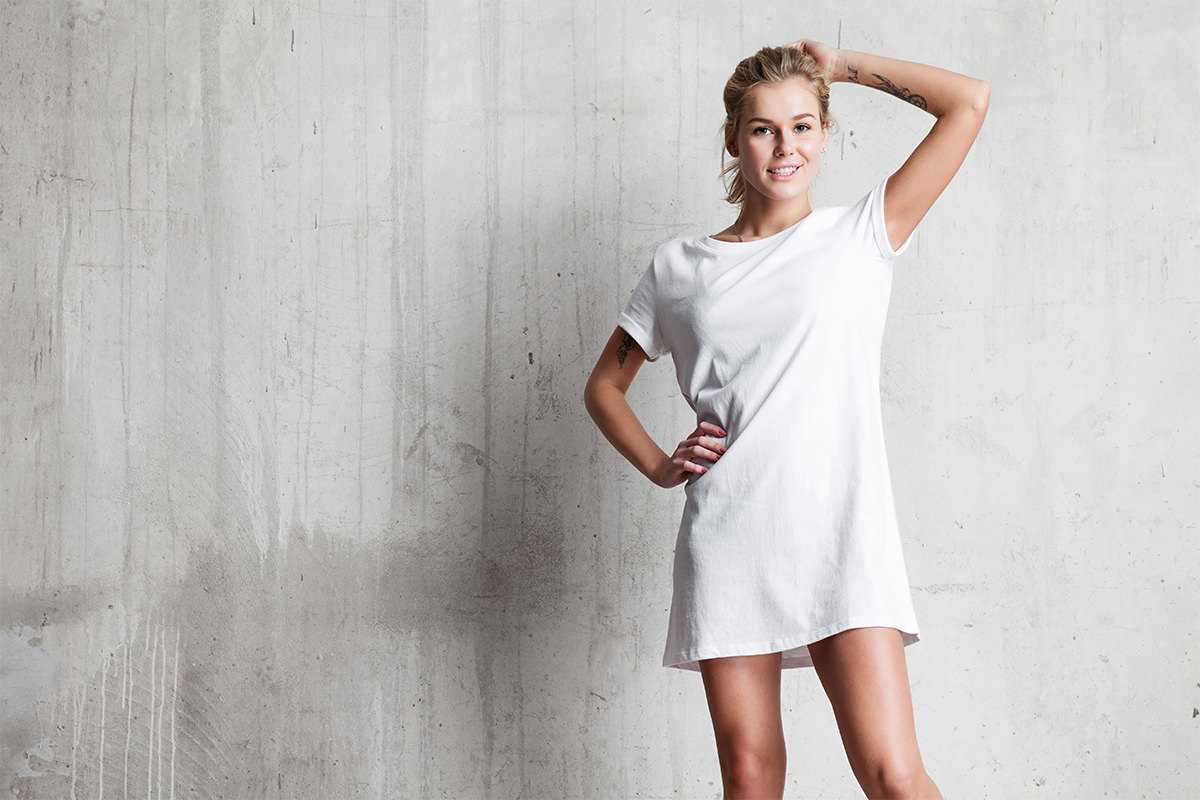
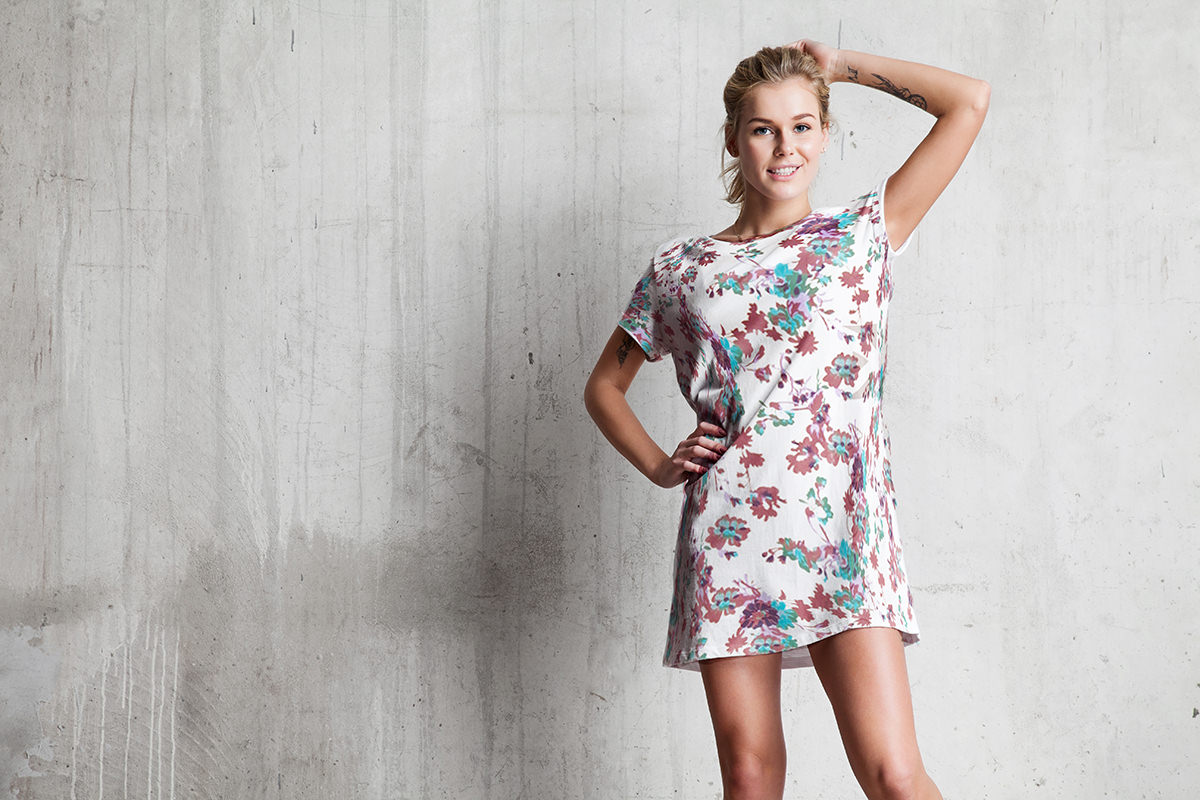
Wrapping a flat pattern around a piece of clothing so it actually looks like part of the fabric takes more than just placing it on top and scaling it down. This tutorial masks a pattern to a shirt’s exact shape with the Pen tool, uses Liquify to warp it around the fabric’s folds and wrinkles, then blends in shadows and highlights lifted from the original shirt to make the pattern look genuinely woven into the clothing.
Bringing In and Scaling the Pattern Onto the Subject
Dragging the pattern onto the subject photo and scaling it a bit larger than the clothing it will cover leaves enough room to work with once it’s warped into place.
-
Drag the Pattern Onto the Subject Image
Use the Move tool, hold Shift, and drag the pattern image onto the subject’s document.
-
Invert the Pattern’s Colors if Needed
Press Cmd/Ctrl+I to invert the pattern’s colors if the original fabric’s tone doesn’t suit the clothing, such as dark fabric against a light shirt.
-
Scale the Pattern Larger Than Needed
Press Cmd/Ctrl+T and scale the pattern so it’s a bit larger than the area of clothing it will cover, rotating it into a natural position.
Repeating a Smaller Pattern by Duplicating and Aligning It
Duplicating the pattern layer and aligning repeating elements, like matching flowers in a print, extends a smaller pattern across a larger area of clothing.
-
Duplicate the Pattern Layer
Press Cmd/Ctrl+J to duplicate the pattern layer.
-
Lower Opacity to Align Repeats
Lower the duplicate’s opacity temporarily and drag it until matching elements from the pattern line up with the layer beneath.
-
Restore Full Opacity
Bring the opacity back to 100% once the repeated pattern is aligned.
Masking the Pattern to the Shirt With the Pen Tool
Tracing the shirt’s exact outline with the Pen tool and loading that path as a selection restricts the pattern so it only shows up where the actual clothing is.
-
Add an Inverted Black Layer Mask
Add a layer mask to the pattern layer, then press Cmd/Ctrl+I to invert it to black so the pattern is hidden everywhere by default.
-
Trace the Shirt’s Outline
Press P for the Pen tool and click and drag to follow the shirt’s outline, including areas like the collar.
-
Adjust Points as Needed
Hold Cmd/Ctrl and click and drag any point on the path to refine the outline as it’s built.
-
Convert the Path to a Feathered Selection
Right-click the finished path, choose Make Selection, and set a small feather radius such as 0.5 pixels for a natural edge.
-
Fill the Mask With White
With the selection active, click the layer mask, press Shift+Delete, and fill it with white so the pattern becomes visible only on the shirt.
Why the Pen Tool Beats a Rough Brush Selection Here
A quick selection painted freehand with the Brush tool works fine for rough mockup purposes, but its edges won’t follow the clothing’s actual contours precisely. Tracing the shirt with the Pen tool instead produces a clean, accurate outline that holds up even when the pattern needs to look convincingly integrated rather than just roughly placed.
Warping the Pattern to Wrap Around the Clothing With Liquify
The Liquify filter’s Forward Warp tool, used with Show Backdrop enabled, pushes the flat pattern to follow the actual curves and contours of the clothing beneath it.
-
Open the Liquify Filter
Go to Filter > Liquify to open the filter on the masked pattern layer.
-
Enable Show Backdrop
Check Show Image and Show Backdrop, and set the backdrop to the background layer so the clothing underneath is visible for reference.
-
Set the Backdrop to Behind
Choose Behind for how the backdrop displays, and lower its opacity slightly to see both the pattern and the clothing clearly.
-
Push the Fabric Inward From the Edges
Use the Forward Warp tool with a large brush, clicking from outside the clothing’s edge and dragging inward so the pattern appears to wrap around the fabric.
-
Adjust Pressure for Subtler or Stronger Warps
Lower the tool’s pressure for a subtler push, or raise it for a stronger effect, depending on how much the fabric needs to curve.
Creating Realistic Folds With the Freeze Mask
The Freeze Mask tool protects part of the pattern from being affected by further warping, which makes it possible to simulate fabric folding under itself at a wrinkle.
-
Paint a Freeze Mask Over One Side of a Wrinkle
Select the Freeze Mask tool and paint over the area on one side of a visible wrinkle to protect it from further warping.
-
Erase Freeze Mask Where Needed
Use the Freeze Mask’s eraser to remove protection from any area that was covered by mistake.
-
Push the Unprotected Side Under the Fold
With the Forward Warp tool, pull the fabric on the unprotected side downward, making it look like it disappears under the frozen fold and reappears on the other side.
-
Pull One Side Down and the Other Up
For a fold or crease, pull the fabric down on one side and up on the other so the pattern appears to curve around the fold, then click OK to apply the transformation.
Why a Freeze Mask Is Necessary for Convincing Folds
Without protecting part of the fabric, pushing the pattern to simulate a fold would drag the entire area along with it, leaving no visible break where the fabric is supposed to tuck under itself. Freezing one side first means only the unprotected area moves, creating the illusion of the fabric passing underneath a fold rather than just bending as one continuous surface.
Adding Shadow Detail From the Original Shirt
Changing the pattern layer’s blend mode to Multiply, then clipping a copy of the original shirt set to the same blend mode on top, brings the shirt’s own shadow detail through the new pattern.
-
Change the Pattern Layer to Multiply
Change the transformed pattern layer’s blend mode from Normal to Multiply and lower its opacity slightly, such as to around 90%.
-
Duplicate the Background Layer
Duplicate the original background layer and move the copy to the very top of the layer stack.
-
Set the Copy to Multiply
Change this duplicate’s blend mode to Multiply so the original shirt’s shadow detail becomes visible.
-
Clip the Shadow Layer to the Pattern
Right-click the duplicate and choose Create Clipping Mask so the shadow detail only shows where the pattern layer is visible.
-
Adjust Opacity to Taste
Lower the clipped shadow layer’s opacity to control how strong the added shadow detail looks.
Why Screen and Multiply Work as a Pair Here
Multiply only ever darkens whatever it’s layered over, which recovers shadow detail but can’t add anything to the brightest areas of the shirt. Screen does the opposite, lightening whatever it touches, so pairing a Multiply-blended shadow layer with a Screen-blended highlight layer recovers both ends of the original shirt’s tonal range instead of just one.
Adding Highlight Detail With a Screen Blend Mode
A second clipped copy of the original shirt, set to Screen instead of Multiply, brings back the shirt’s highlight detail, with a Levels adjustment darkening it so it only shows in the brightest areas.
-
Duplicate the Background Layer Again
Duplicate the original background layer a second time and move it to the top of the stack.
-
Clip This Layer to the Pattern
Right-click and choose Create Clipping Mask so this layer is also restricted to the pattern’s visible area.
-
Change the Blend Mode to Screen
Change this layer’s blend mode from Normal to Screen to bring the shirt’s highlight detail through.
-
Darken the Layer With Levels
Press Cmd/Ctrl+L, and drag the shadows input slider to the right until the layer only shows through on the brightest highlight areas.
-
Fine-Tune Opacity for Character
Adjust this layer’s opacity slightly to control how much highlight character comes through in the final result.
More Free Photoshop Tutorials
To build on the masking and blending techniques used here, check out these free tutorials:
- How to Select Subjects and Refine Edges in Photoshop
- Three Ways to Use Blend If in Photoshop
- Curves vs Levels in Photoshop: What the Difference Actually Is
Why This Approach Works
Masking the pattern to the shirt’s exact shape with the Pen tool is what keeps it confined to the clothing rather than floating loosely on top of it. Liquify’s Forward Warp and Freeze Mask tools are what let a flat, rectangular pattern follow the actual curves, folds, and wrinkles of real fabric instead of sitting on it like a flat sticker. Layering in Multiply and Screen copies of the original shirt is what finally sells the illusion, since real fabric always has its own shadow and highlight detail that a flat pattern alone can never fully replicate on its own.
Final Thoughts
This approach won’t produce something that’s a hundred percent indistinguishable from an actual photographed garment, since accounting for every fold and stretch in real fabric is genuinely difficult to fake perfectly. For visualization purposes, though, like testing a design or building swatches for an online store, this combination of Pen tool masking, Liquify warping, and blended shadows and highlights gets remarkably close, and the same workflow applies to any pattern and any piece of clothing.
New Free Tutorials View All »












Enjoying This Free Tutorial? Go Further with PRO.
Unlock Full Sample Files, PSDs, and Hundreds of Masterclasses!

Download full project assets, original PSDs, and RAW images for every lesson
Unlimited access to our complete library of PRO Photoshop & Lightroom courses
Instant 4K Ultra HD streaming on all devices, anytime, anywhere
Full access to our entire library of Photoshop Actions, Presets, and LUTs
Flexible monthly and annual membership plans
Cancel anytime with zero hassle or commitments