
Download Assets
This tutorial includes sample images and 1 grd file. Downloads are free with a PHLEARN account.
- Free sample files with every tutorial on PHLEARN
- New tutorials published every week
- Unlimited downloads with your free PHLEARN account
description
A sun glow only convinces when it behaves like light rather than paint. This Quick Tip imports the free PHLEARN sun flare gradient, applies it as a Gradient Fill layer in Screen blend mode so its bright areas brighten the photo and its dark areas do nothing, then edits the gradient own colour stops so the glow reads as warm sunlight instead of plain white.
Enjoying This Free Tutorial?
We publish a new free tutorial every week, each one with sample images and PSDs you can download and follow along with. Sign up and they land straight in your inbox, along with early word on sales, events and subscriber-only offers.
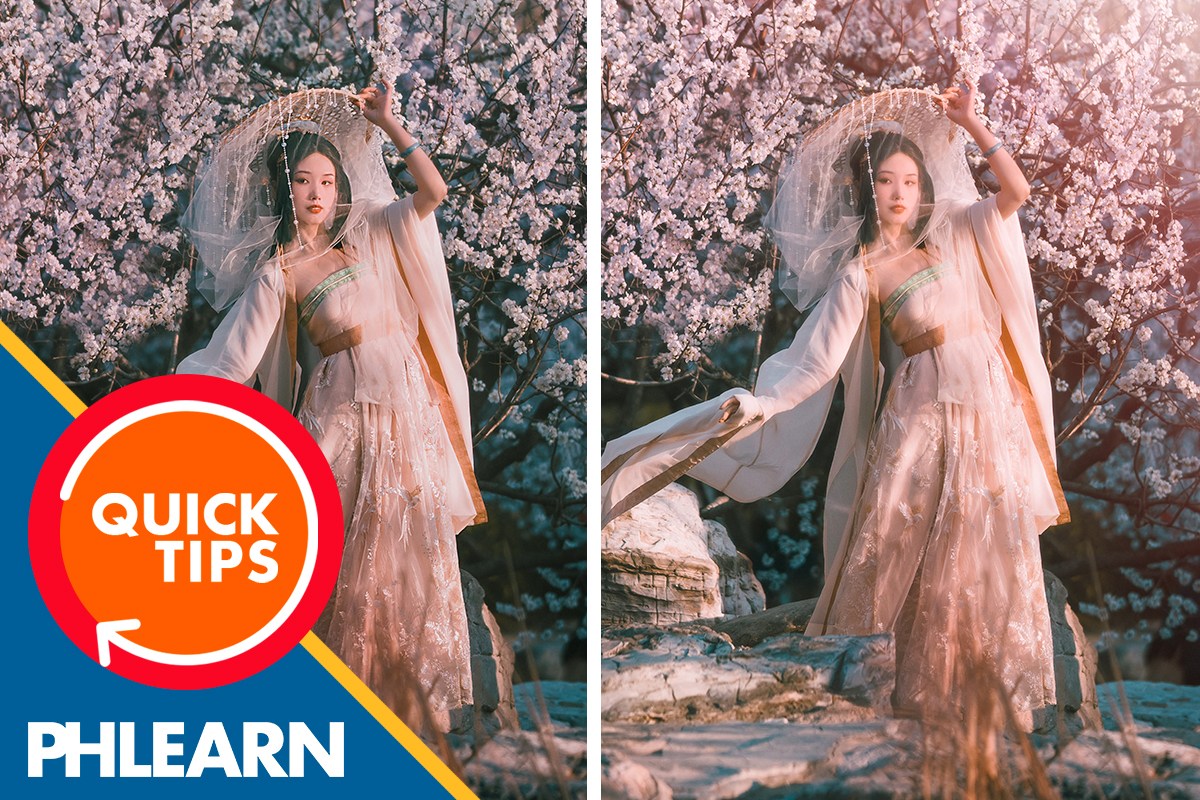
How to Create a Sun Glow Effect in Photoshop
This Quick Tip builds a warm sun glow using a Gradient Fill layer set to Screen mode, tuning the gradient’s own color stops so the glow reads as warm sunlight rather than a plain white highlight.
Importing the PHLEARN Sun Flare Gradient
The free PHLEARN gradient preset included with this tutorial’s download is imported into Photoshop’s gradient list first, giving a ready-made starting point for the glow shape instead of building one entirely from scratch.
Applying It in Screen Blend Mode
The gradient is applied as a Gradient Fill layer with its blend mode set to Screen, which lets the gradient’s lighter areas brighten the photo underneath while its darker areas have little to no effect, rather than covering the image with a flat, opaque shape.
Why Screen Instead of Normal
Left on Normal blend mode, the gradient would sit on top of the photo as a solid shape and hide whatever’s underneath; Screen mode is what turns it into something that behaves like added light instead.
Repositioning the Glow
Double-clicking the Gradient Fill layer’s thumbnail reopens its settings, where the glow can be moved and scaled to sit exactly where the light source should appear in the frame.
Removing Unwanted Transparency
Inside the Gradient Editor, dragging away the white square above the gradient bar removes a transparency stop from the gradient, so that part of the glow stops fading out and holds its color and opacity fully.
Setting Up a White-to-Black Base
The gradient’s color bar is set with white on the left end and black on the right, establishing a simple bright-to-dark base that the glow’s actual color will be built on top of.
Why Start This Simple
A plain white-to-black gradient gives a clean brightness curve to work from, so any color added afterward blends smoothly across the glow instead of clashing with an already-complex starting gradient.
Adding a Dark Color Near the Black End
Clicking near the black end of the gradient bar adds a new color stop there, set to a dark color, so the outer edge of the glow fades into a warm shadow tone instead of pure black.
Adding a Light Color Near the White End
A second new stop is added near the white end and set to a light, warm color, giving the brightest core of the glow an actual sunlight color rather than plain white.
Two Stops, One Warm Gradient
Together, the dark stop near black and the light stop near white turn the plain grayscale base into a gradient that reads as warm light fading into shadow, rather than a simple brightness gradient.
Rotating and Repositioning the Finished Glow
Back in the Gradient Fill dialog, the finished glow is rotated and moved into its final position, aiming its brightest point toward where the sun would realistically be sitting in the scene.
More Free Photoshop Tutorials
- Create a Lens Flare Effect in Photoshop
- How to Create a Glow Effect in Photoshop
- How to Add a Gradient in Photoshop
Why This Technique Works
Screen blend mode is what lets a gradient behave like light instead of paint, brightening the photo underneath wherever the gradient is light and doing nothing wherever it’s dark. Customizing the gradient’s own color stops, rather than leaving it grayscale, is what turns that brightening effect into something that reads specifically as warm sunlight instead of a generic white glow.
Final Thoughts
A Screen-mode Gradient Fill, built from a simple white-to-black base and then warmed up with a dark stop near black and a light stop near white, is a flexible way to add a realistic sun glow to a photo, one that can be rotated, moved, and rescaled to match wherever the light needs to sit in the frame.
Related Tutorials
From the Magazine View all
Stories, interviews and guides for photographers, new every week.
 EditingLightCraft vs Lightroom: I Edited the Same RAW Files in BothThe free clone on the same RAW files: what matches, what breaks and who should switch.
 InspirationRare Historical Photos: 13 of the Rarest Pictures Ever TakenFrom the earliest surviving picture of a person to the last passenger pigeon: who took each one and why it survives.
 EditingArtCraft: Photoshop Cloned by AI in Two Weeks. Is It Legal?ArtCraft cloned Photoshop and Lightroom with AI and gave them away. Any good? Legal? Safe?
Master Photoshop, Lightroom and Photography
Join PHLEARN PRO for $12.99 a month, or $99.99 a year (save 36%). Cancel anytime, with a 30-day money-back guarantee.