

Download Assets
Download Assets
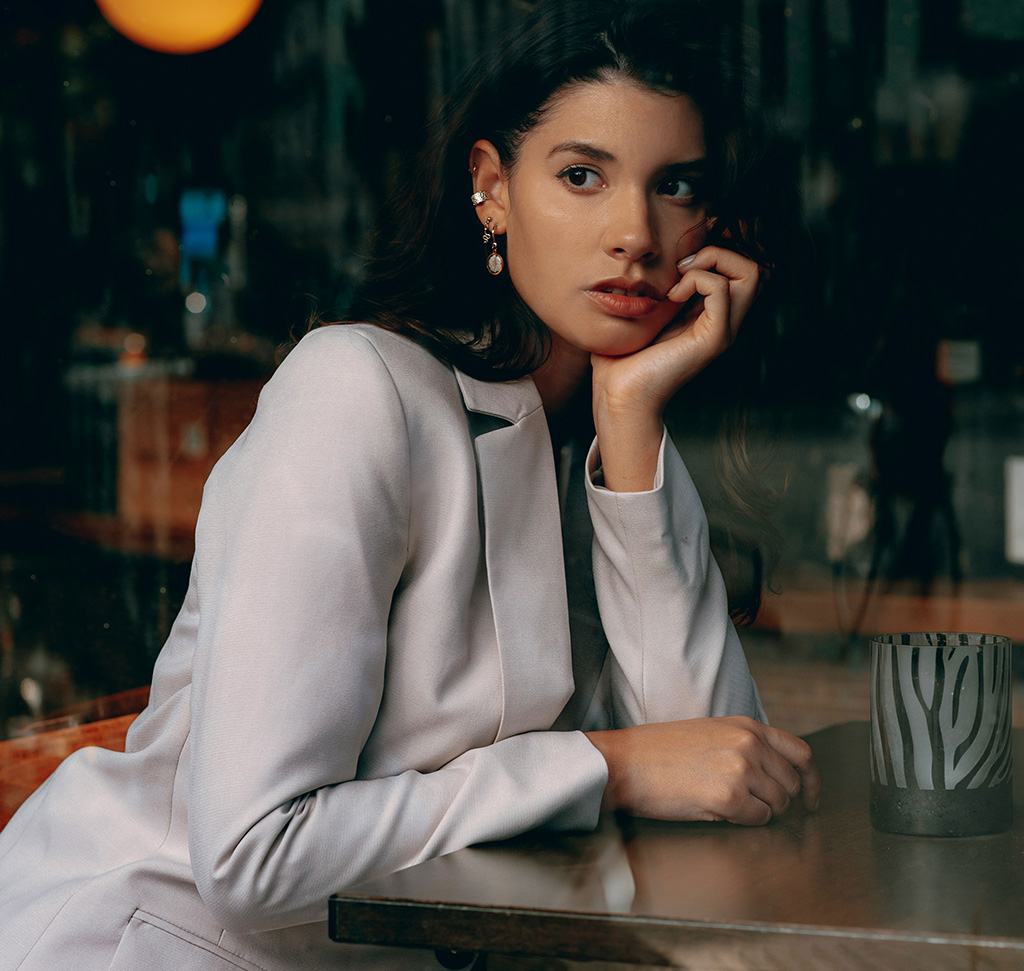
This tutorial includes 1 sample image, 1 sample PSD, and the frequency separation action in 8-bit and 16-bit versions. Downloads are free with a PHLEARN account.
- Download the sample images and PSDs from every free tutorial on PHLEARN
- New free tutorials published every week
- One free account — sign up once, then download anything
Watch the Full Series
30 Days of Photoshop · 2025 EditionOur most-watched series, updated for 2025 — watch all 30 free
description
Skin retouching fails the same way for almost everyone: it works, and then the skin looks like plastic — because the tool smoothed the colour and the texture together, and once the pores are gone they are gone.
Frequency separation puts texture on one layer and colour on another, so you can blend skin tones on the colour layer while every pore above stays untouched. Heal the blemishes first, run the action, then paint on a blank layer in between at very low flow. The free download includes the action.
This is Day 24 of 30 Days of Photoshop, 2025 Edition — our most-watched series, rebuilt from the ground up for today’s tools.
Continue Watching 30 Days of Photoshop
JOIN 30 DAYS OF PHOTOSHOP (FOR FREE!)
Ready to jump in? Sign up and we’ll email you a printable calendar and daily class schedule so you can get started right away!
Image Source
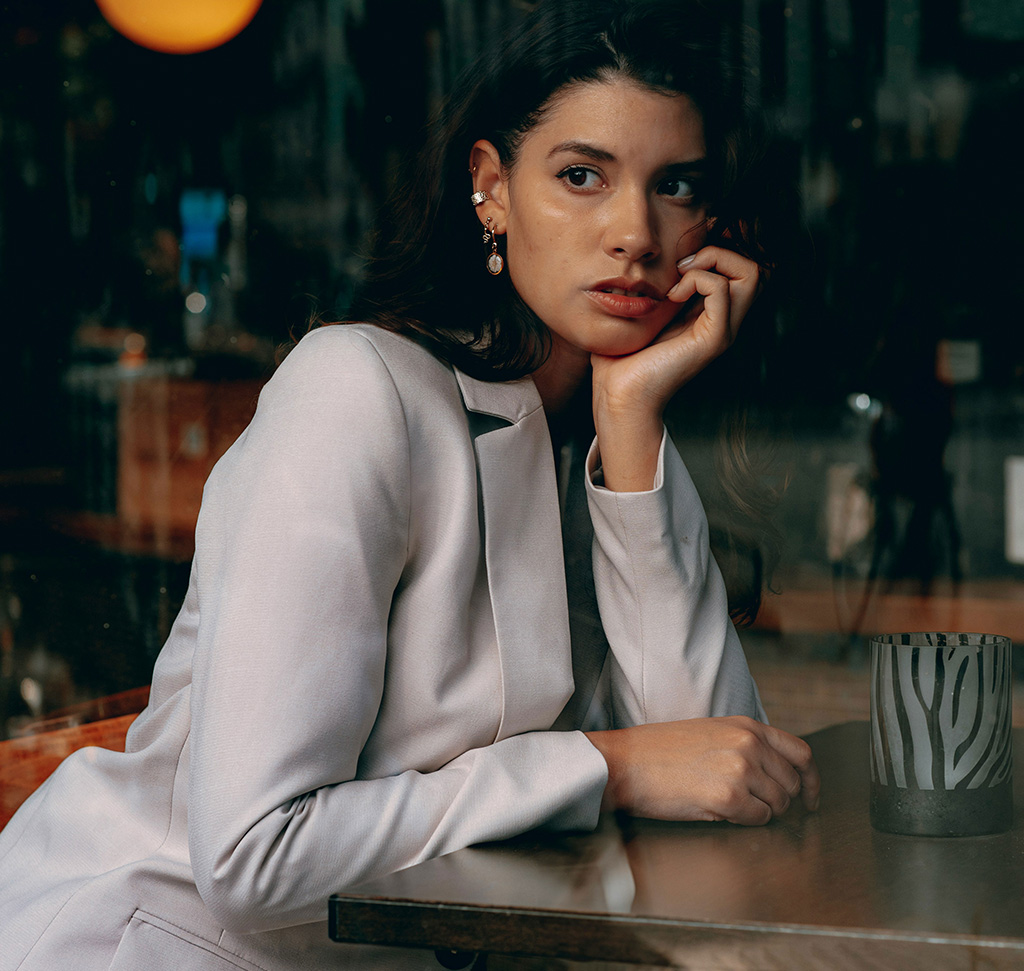

Blend Skin Tones Without Touching the Texture
Most skin retouching fails in the same way: it works, and then the skin looks like plastic. That happens because the tool you reached for smoothed the colour and the texture together, and once the pores are gone there is no getting them back.
Frequency separation splits those two things onto separate layers — texture on one, colour and tone on the other — so you can blend skin tones on the colour layer while the pores, hairs and fine detail above stay completely untouched. That separation is the whole trick, and everything below is how to use it without overdoing it.
Why Separate Texture From Color
Blur Destroys the Wrong Thing
Blurring skin removes blotchiness, but it removes pores at the same rate. Separation lets you take one without the other.
Uneven Colour Is What Reads as “Bad Skin”
Most of what looks wrong in a portrait isn’t texture at all — it’s patches of red, sallow yellow, a shadow under one cheek. Fix the colour and the skin looks better while still looking like skin.
Blemishes Come Off Before Any of This
Individual spots and scratches are a separate job, done first, with a healing tool. Trying to paint them away on the colour layer just spreads them.
Clear the Individual Blemishes First
-
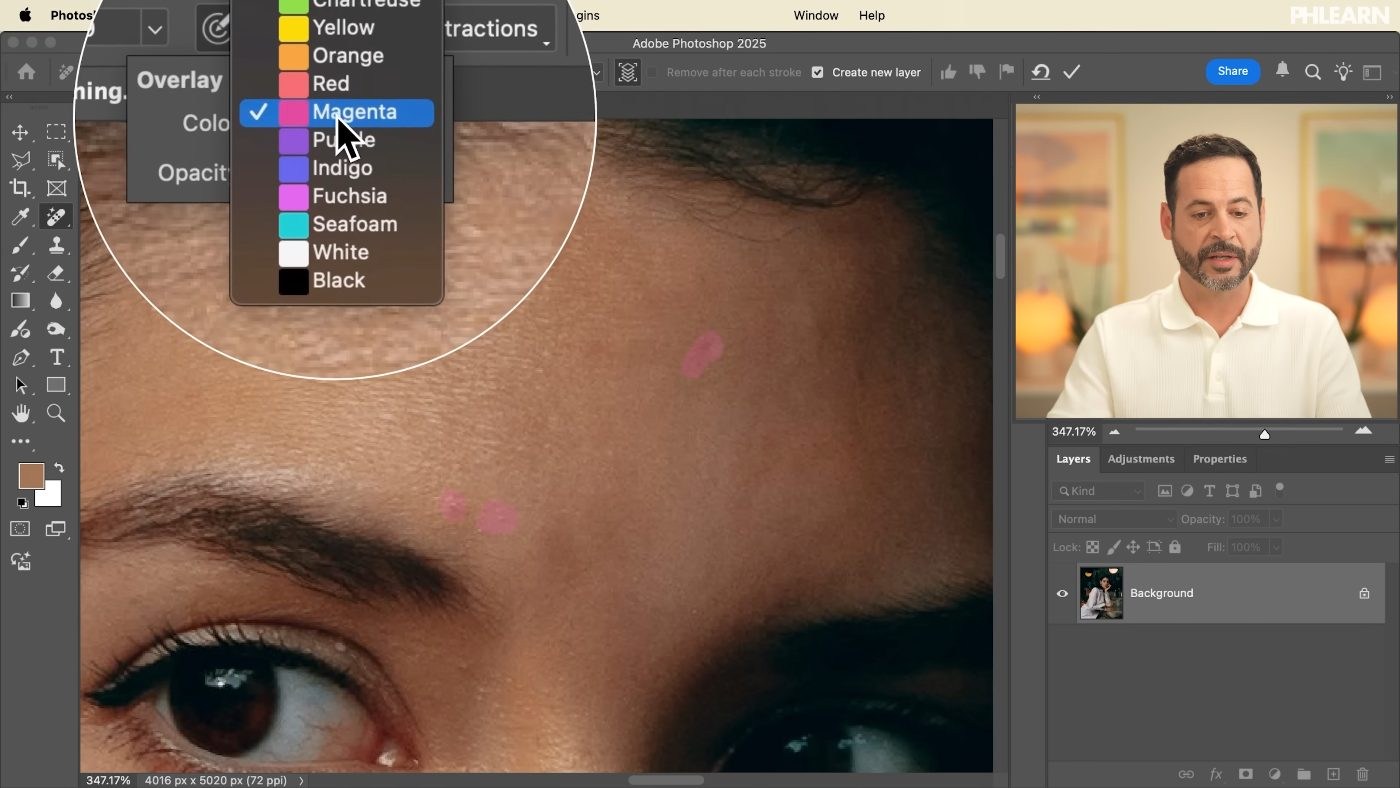
Select the Spot Healing Brush and Check Two Boxes
J for the tool. In the options bar, tick Sample All Layers / “create a new layer” so the work stays off your original, and untick “Remove after each stroke”.
-
Paint Over Every Blemish, Then Apply Once
Mark all the spots, scars and scrapes first and commit them together with Enter or the checkmark. Doing the whole face in one pass rather than one spot at a time gives cleaner results and is considerably faster.
Run the Frequency Separation Action
-
Check Whether Your File Is 8-Bit or 16-Bit
Image > Mode. JPEGs are usually 8-bit, raw files 16-bit. This matters — frequency separation uses different maths for each, and running the wrong version produces visible artefacts rather than a subtle error.
-
Load the Matching Action and Press Play
Window > Actions, load the correct version, run it. The free download with this tutorial includes the action, so there’s nothing to build by hand.
-
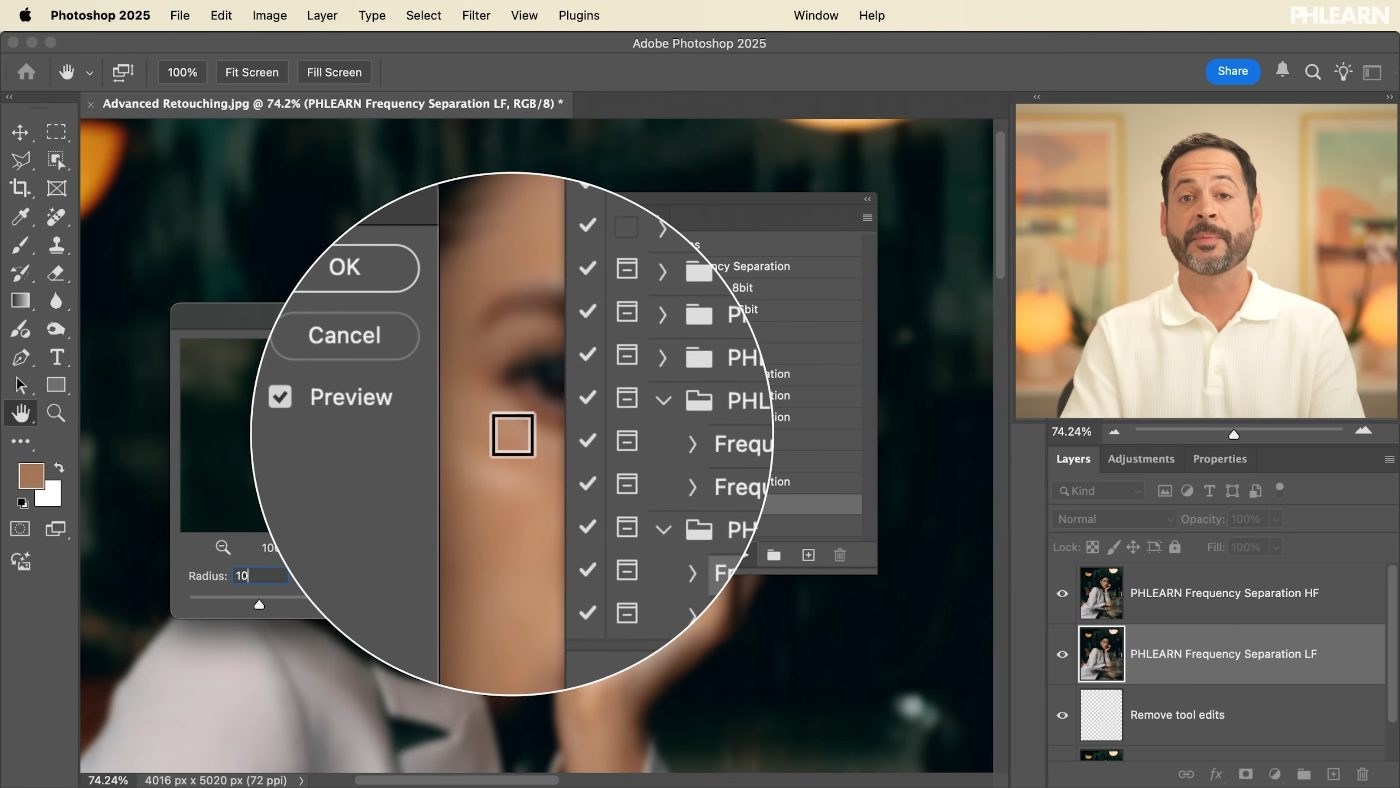
Set the Blur Radius Until the Fine Detail Disappears
The action asks you to blur the skin texture. Push the radius up until you can no longer see pores — that’s the point where texture has fully moved to the other layer. Too low and texture stays behind on the colour layer, and blending it will smear.
Blend the Tones on a Layer of Their Own
-
Add a Blank Layer Between the Texture and Colour Layers
This is the part that makes the workflow safe. Painting on a new layer in the middle means the colour layer itself is never altered, so any pass can be erased or faded later without rerunning anything.
-
Take the Brush and Drop the Flow Right Down
B, then set Flow to around 10% with a pressure-sensitive tablet, or 1–3% with a mouse or trackpad. Low flow is not a preference here — it’s what lets colour build up gradually instead of arriving as a patch.
-
Alt/Option-Click to Sample, Then Paint Across the Uneven Area
Sample a piece of skin whose tone you want, then brush over the area next to it. The texture layer above keeps every pore intact, so the skin evens out without going soft.

-
Fade or Erase Anything That Went Too Far
Lower the blend layer’s opacity, or take the Eraser (E) to individual areas. Because it’s a separate layer, nothing is permanent.
Where Skin Retouching Goes Wrong
The Flow Was Too High
The single most common mistake. High flow drops a flat patch of colour that reads instantly as retouching.
The Blur Radius Was Too Low
Texture stayed on the colour layer, so painting smears it. Push the radius until the pores genuinely vanish.
Painting Directly on the Colour Layer
It works, and then you can’t undo one bad pass without redoing all of them. Always use a blank layer in between.
Blemishes Left for the Blending Stage
A spot has hard edges and its own texture. Heal it first, or you’ll spend far longer trying to paint around it.
Every Variation Removed
Real skin is not one colour. Perfectly uniform tone looks like a mannequin, even with the texture intact.
The Hard Part Is Knowing When to Stop
Frequency separation is powerful enough that it’s easy to keep going. The skin gets more even, then more even again, and somewhere in there the person stops looking like themselves. Nothing in the technique tells you where that line is.
A useful discipline: work at 100% zoom for the blending, then step back to fit-on-screen regularly. Almost every over-retouched portrait was made by someone who never zoomed out. What you’re aiming for when you blend skin tones is skin that no longer distracts — not skin anyone would describe as flawless. Starting with the basics is worth doing before reaching for this.
Retouch One Portrait Today
Open a portrait and heal the individual blemishes first with the Spot Healing Brush on its own layer. Check the bit depth, load the matching frequency separation action from the free download, and set the blur radius until the pores disappear. Add a blank layer between texture and colour, drop the brush flow to 10% or lower, Alt/Option-sample good skin and paint gently across the uneven areas — then zoom out and check you haven’t gone too far. For the full professional workflow, our PRO course Advanced Portrait Retouching in Photoshop is the next step, and the Beauty & Fashion Retouching Learning Path teaches beauty and fashion retouching in order.
Quick Reference: Keys, Menus and Settings
- Clear blemishesRemove tool (J) with Create New Layer on and Remove After Each Stroke off; Enter to apply
- Move aroundHold Space and drag
- Check bit depthImage > Mode: 8-bit for JPEGs, 16-bit for raw
- Run the actionWindow > Actions, panel menu > Load Actions, press play; blur until the skin detail is gone
- Blend tonesNew layer between the two, B, Flow 10% (tablet) or 1 to 3% (mouse); Alt/Option-click to sample
- Pull it backE for the Eraser at about 10% flow, or lower the layer opacity
Free Downloads
Follow Along on the Same Photo
Get the portrait, a layered PSD with the frequency separation already built, and the free action in 8-bit and 16-bit versions. Free with a PHLEARN account.
Frequency Separation Retouching: Common Questions
What does frequency separation actually do?
It splits the photo into two layers: texture and detail on top, color and tone underneath. Anything you paint between them still has the original skin texture over it.
Why does my retouched skin look like plastic?
Blurring skin removes blotchy color and pores at the same rate. Frequency separation lets you even out the color while the pores stay on their own layer, untouched.
Should I remove blemishes before frequency separation?
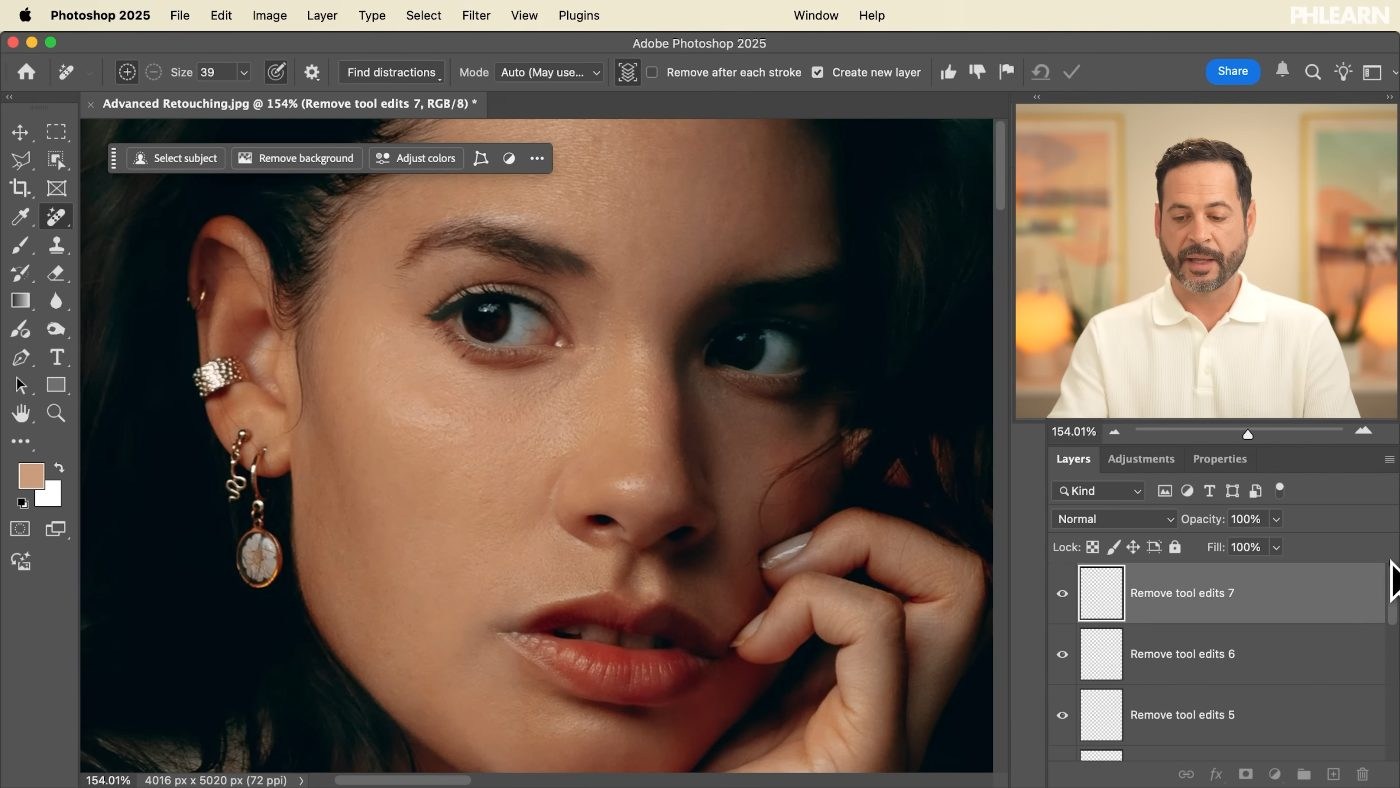
Yes. Use the Remove tool with Create New Layer checked and Remove After Each Stroke unchecked, paint over every spot, then press Enter. Anything you notice later can be removed the same way on a new layer.
Do I need the 8-bit or the 16-bit action?
Check Image > Mode. JPEGs are usually 8-bit and raw files 16-bit. Running the wrong version produces visible artifacts.
How do I load the frequency separation action?
Go to Window > Actions, open the panel menu and choose Load Actions. Pick the action from the download, select the 8-bit or 16-bit version and press play.
What blur radius should I use?
Raise it until you can no longer see detail in the skin. On the sample image that was about 10 pixels. Too low, and texture stays on the color layer and smears when you paint.
What brush flow should I use to blend skin tones?
About 10% with a pressure-sensitive tablet, or 1 to 3% with a mouse or trackpad. Hold Alt/Option to sample good skin, then paint gently over the uneven area.
Why paint on a new layer between the texture and color layers?
The color layer itself never changes, so any pass can be undone later. Erase too-strong areas with the Eraser (E) at low flow, or lower the layer’s opacity.
Should I blend skin zoomed in or zoomed out?
Blending the overall tone works well a little farther zoomed out, since you are fixing how one color transitions into another, not single pores. Check the skin both zoomed in and zoomed out before you call it done.
Are the sample files free?
Yes, with a free PHLEARN account. You get 1 sample image, 1 sample PSD, and the frequency separation action in 8-bit and 16-bit versions. The PSD has the separation already built so you can see how the layers stack.
Master Photoshop, Lightroom and Photography
Join PHLEARN PRO for $12.99 a month or $99.99 a year. Cancel anytime, with a 100% money-back guarantee.





