

Download Assets
This tutorial includes 1 sample image, 1 sample PSD and 1 PDF guide. Downloads are free with a PHLEARN account.
- Download the sample images and PSDs from every free tutorial on PHLEARN
- New free tutorials published every week
- One free account — sign up once, then download anything
Free PDF Guide · 4 Pages
This Tutorial as a Step-by-Step PDF
The guide walks through the Clone Stamp with Sample set to Current & Below and Alt/Option-click sampling, the Spot Healing Brush and its repeating patterns, Generative Fill with the Selection Brush Tool, a table of the four test removals, and which tool to pick if you want to avoid the AI label. Keep it next to your keyboard.
description
Generative Fill vs Clone Stamp vs Spot Healing Brush: three Photoshop tools remove an unwanted object, and they go about it in completely different ways. The Clone Stamp copies pixels you point at. The Spot Healing Brush searches the rest of your image and blends in whatever fits. Generative Fill sends the area off to the cloud and invents something new to put there.
This tutorial runs the same removal through all three, showing where each one succeeds, where it visibly breaks down, and why the two traditional tools matter more now than they did a year ago — social platforms tag images as AI even when the edit was tiny, and neither of them leaves anything to flag.
Enjoying This Free Tutorial?
We publish a new free tutorial every week, each one with sample images and PSDs you can download and follow along with. Sign up and they land straight in your inbox, along with early word on sales, events and subscriber-only offers.
Image Source


Generative Fill vs Clone Stamp vs Spot Healing Brush
Three tools in Photoshop remove an unwanted object from a photo, and they do it in three fundamentally different ways. The Clone Stamp copies pixels you choose. The Spot Healing Brush searches the rest of your image and blends in what it finds. Generative Fill sends the area to the cloud and invents something new to put there.
Knowing which to reach for used to be a question of speed and skill. It has quietly become a question of labelling too, and that is worth understanding before you pick.
Why This Comparison Matters Now
Social platforms increasingly tag images as AI-generated, and the tag can be triggered by using an AI tool at all — not by how much of the picture it touched. Remove one small object from an otherwise straight photograph with Generative Fill and the whole image can end up labeled, which a lot of photographers and retouchers object to on work that is overwhelmingly their own.
The Clone Stamp and the Spot Healing Brush use no AI whatsoever. They are the same tools people relied on for years before generative tools existed, they still work, and they leave nothing for a detector to flag. That is the practical reason to keep them sharp, and it is why a comparison that would have looked purely nostalgic two years ago is genuinely useful now.
The Clone Stamp: Total Control, Total Manual Labor
The Clone Stamp is the oldest approach and the most literal: you pick a source area, and it paints an exact copy of that area wherever you brush. Nothing is analyzed, blended or invented. What you sample is what you get.
-
Work on a New Layer
Add an empty layer above your background so the original stays untouched and you can throw the work away without consequence.
-
Set Sampling Correctly
Select the Clone Stamp Tool (Keyboard Shortcut “S”) and, in the options bar, set Sample to Current & Below. Without this the tool only looks at your empty layer and paints nothing.
-
Set a Source Point
Hold Alt on PC (Option on Mac) and click the area you want to copy from. That sets the source; the crosshair moves with your brush as you paint.
-
Paint, and Re-Sample Often
Brush over the object to cover it. Then set a new source and carry on — sampling from one spot for too long produces a visible repeated patch. Re-sampling frequently is most of the craft here. A full walkthrough of the Clone Stamp covers brush settings and blending in more detail.

Where the Clone Stamp Still Wins
It is unmatched when you need an exact copy of something specific — rebuilding a straight edge, extending a railing, matching a texture you can point at. Because you choose the source, you decide precisely what goes into the gap, and a careful job is genuinely undetectable.
The cost is time. Removing a person standing against a pillar, a floor and a chair means reconstructing each of those surfaces separately, sampling and painting each one in turn. It is completely achievable — this is how retouching worked for years — but on anything complex it is slow, and slowness is the whole reason the other two tools exist. Removing distractions with the Clone Stamp shows the method applied end to end.
The Spot Healing Brush: Fast, and Still Not AI
The Spot Healing Brush removes the sampling step entirely. You paint over what you want gone, and Photoshop searches the surrounding image for material that fits, then blends it into the hole for you. When it arrived this was a genuinely advanced piece of software, and it is worth being clear that it involves no generative AI at all.
-
Add Another New Layer
Keep each tool on its own layer. It makes comparing results trivial and lets you discard one approach without losing another.
-
Paint Over the Object
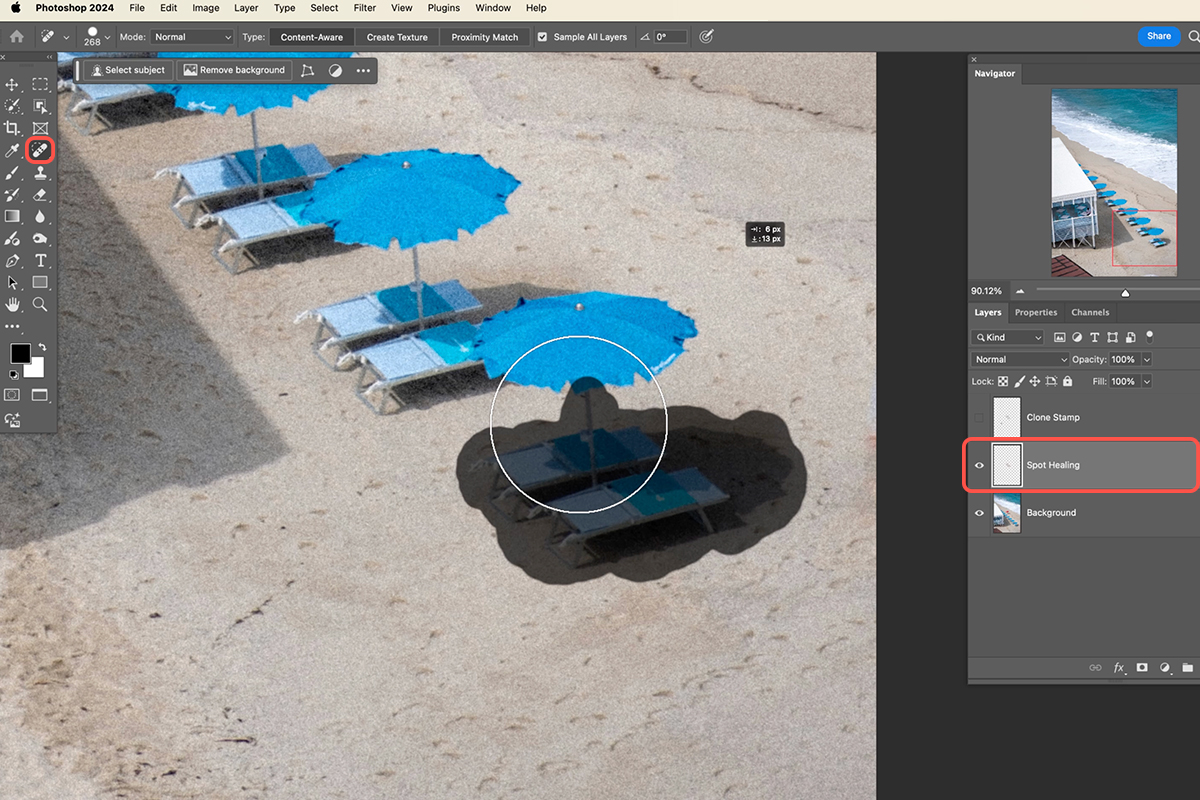
Select the Spot Healing Brush and brush across whatever you want removed. There is no source point to set — release the mouse and Photoshop fills the area from what surrounds it.
-
Go Back Over Any Repeats
On larger areas you will sometimes see the same patch of texture appear several times. Painting over those spots again usually reshuffles them into something less obviously duplicated.
What It Cannot Do
The limitation is structural, not a matter of settings: the Spot Healing Brush can only borrow from pixels that already exist in your image. It cannot invent anything. Ask it to remove a simple object sitting on an even background — an umbrella against sand — and it does an excellent job in seconds. Ask it to remove a person sitting at a table and it has no concept of what a chair looks like, so it stretches nearby material across the gap and produces something that is plausible at a glance and nonsensical on inspection.
That is the honest dividing line between this tool and the next one. If the missing area can be filled with material that exists elsewhere in the frame, the Spot Healing Brush is fast and convincing. If the area needs an object that was never photographed, it cannot help. PHLEARN PRO members can go deeper in Generative Fill vs Clone Stamp vs Spot Healing Brush, and a direct comparison of the Clone Stamp and the Healing Brush is worth reading alongside this.
Generative Fill: Inventing What Was Never There
Generative Fill works on a different principle again. Your selection is sent to the cloud, processed, and returned filled with content that was generated for that specific gap. Nothing is copied from your photo, which is exactly why it succeeds where the other two struggle.
-
Paint a Selection
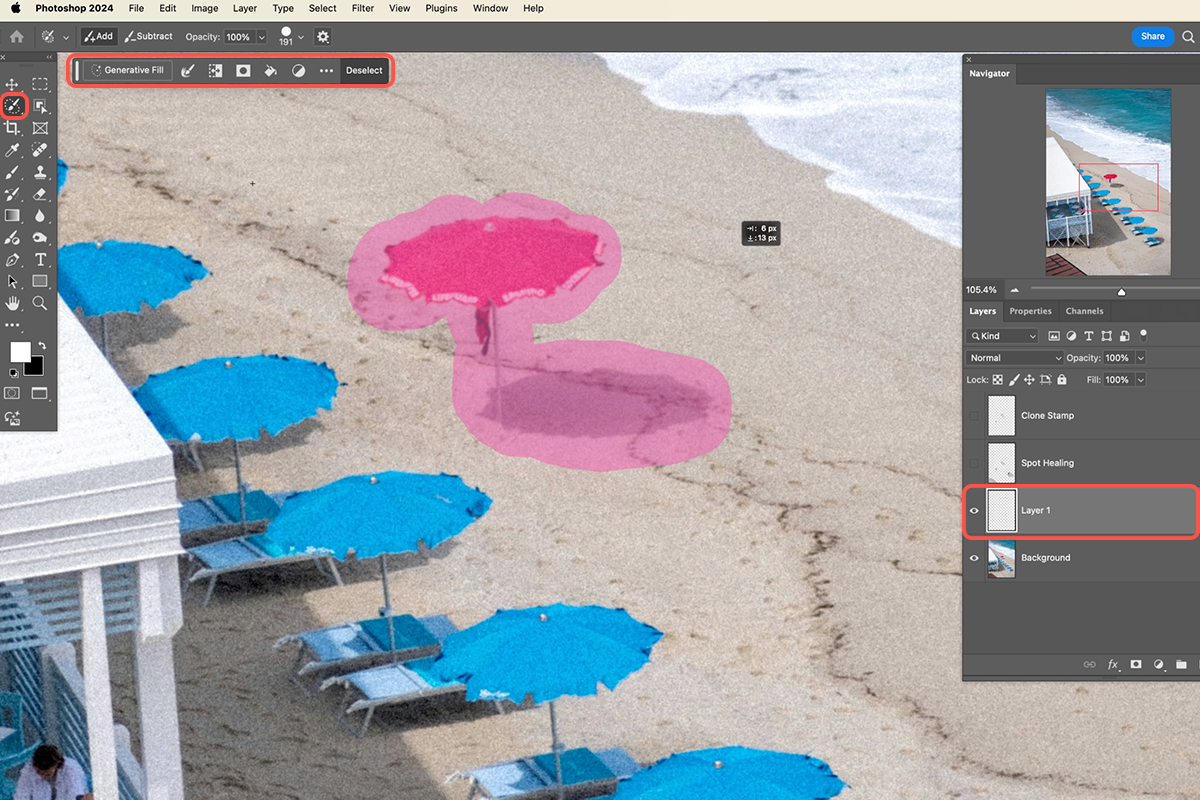
The Selection Brush Tool, grouped with the lasso tools, pairs particularly well with this — you simply paint over the object and the selected area shows as a pink overlay. The Selection Brush Tool is a much quicker way to make this kind of rough selection than a lasso.
-
Include the Shadow
Extend the selection to cover any shadow the object casts. Leaving it behind is the most common reason a generative removal looks wrong — the object goes, its shadow stays, and the eye catches it immediately.
-
Click Generative Fill, Then Generate
Leave the prompt empty for a straight removal. The selection goes off to be processed and comes back filled a few seconds later.
-
Choose From the Variations
Several options come back in the Properties panel. Cycle through them and keep the one that reads best — and because each is newly generated, none of them can produce the repeating-texture problem the other two tools suffer from. The Generative Fill Enhance feature covers pushing the output quality further.
Why It Handles the Hard Cases
Because it is not restricted to what is already in frame, it can produce things the photograph never contained — the missing part of a seat behind someone you removed, a stretch of background where a whole building stood. Both are impossible for the other two tools by definition, and Generative Fill produces them convincingly with almost no skill required from you. That is genuinely the point: the difficulty has moved from your hand to the model.
Generative Fill vs Clone Stamp vs Spot Healing Brush, Compared
Run the same removal three times and the differences are stark. On a simple object against an even background, all three succeed — the Clone Stamp takes the longest, the Spot Healing Brush is quickest, and Generative Fill is effortless. The gap only opens on difficult work.
Ask each to remove a person seated among furniture and the Clone Stamp gets there through sheer patience, rebuilding every surface by hand. The Spot Healing Brush produces something immediately but structurally confused, because it is stretching existing material over a shape it does not understand. Generative Fill invents the furniture that should be behind the person and does it in seconds. The tools are not better or worse than one another so much as suited to different kinds of gap.
Which Tool Should You Actually Use?
The honest answer depends far less on the image than on whether you mind the AI label.
If You Want to Avoid the AI Label
Lead with the Spot Healing Brush. It will handle the large majority of everyday removals — litter, blemishes, signage, a stray object on a clean background — quickly and without flagging anything. Then bring in the Clone Stamp for cleanup: the repeated textures, the edge the healing brush smeared, the one area that needs an exact copy rather than a blend. That pairing is the workflow, and between them they cover an enormous amount of ground with no AI anywhere in the file. Content-Aware Fill and the Remove Tool sit in similar territory and are worth knowing too.
If the Label Does Not Bother You
Use Generative Fill, particularly with the Selection Brush. If you are new to Photoshop, this is the recommendation without qualification — it is dramatically easier than learning to clone convincingly, and on complex removals it produces better results than either traditional tool. PRO members can see the whole generative toolset in context in How Generative Fill Selections Work in Photoshop.
Where People Go Wrong
Three mistakes account for most disappointing results. The first is forgetting to set the Clone Stamp’s Sample to Current & Below when working on an empty layer — the tool appears broken because it is faithfully copying nothing. The second is leaving shadows behind: every one of these tools removes exactly what you tell it to, and an orphaned shadow is more obvious than the object was. The third is working directly on the background layer, which throws away your ability to compare approaches or undo one of them cleanly a day later.
There is a fourth worth naming. Reaching for Generative Fill by reflex on a job the Spot Healing Brush would have finished in two seconds costs you a round trip to the cloud, and potentially an AI tag on an image that barely needed touching.
What Actually Separates These Tools
Strip away the interfaces and the difference is where the replacement pixels come from. The Clone Stamp takes them from a spot you point at. The Spot Healing Brush takes them from somewhere in the same image, chosen for you. Generative Fill does not take them from anywhere — it makes them.
That single distinction predicts every strength and failure you will meet. It explains why cloning is slow but exact, why healing is fast until the gap needs something the photo does not contain, and why generative results can look right in situations where nothing in the frame could have filled the space. Once you think of it that way, choosing between them stops being a matter of habit and becomes a straightforward question: does this gap need a copy, a blend, or an invention?
Keep All Three Within Reach
None of these tools has replaced the others, and the arrival of generative editing has not made the older ones obsolete — if anything it has given them a second purpose, as the way to retouch without leaving an AI fingerprint on the file.
A good habit is to try them in order of increasing intervention: heal first, clone where healing frays, and generate only when the gap genuinely needs something new. You will spend less time waiting, keep more images clear of AI labelling, and end up with a much better instinct for which of the three any given problem actually calls for.
For object removal and cleanup taught in order, our PRO Object Removal & Cleanup Learning Path is where to go next.
Quick Reference: Keys, Menus and Settings
- One layer per toolNew layer icon in the Layers panel; double-click the name to label it
- Clone StampS; options bar > Sample: Current & Below
- Set the sourceAlt/Option-click, then paint; sample again often
- Spot Healing BrushPaint over the object and let go; paint over repeats a second time
- Generative FillSelection Brush Tool (with the Lasso tools), paint the object and its shadow, Generative Fill > Generate
- Pick and compareChoose a variation in the Properties panel; group the layers to toggle the whole pass
Free Downloads
Follow Along on the Same Photo
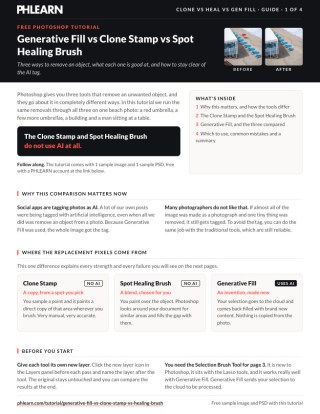
Get the beach photo used for all three tools, the sample PSD and the 4-page PDF guide that compares every removal side by side. Free with a PHLEARN account.
Removing Objects in Photoshop: Common Questions
What’s the difference between the Clone Stamp, Spot Healing Brush and Generative Fill?
Where the new pixels come from. The Clone Stamp copies a spot you sample, the Spot Healing Brush blends in similar areas Photoshop finds in the photo, and Generative Fill sends your selection to the cloud and makes brand new content.
Which tools won’t get my photo tagged as AI?
The Clone Stamp and the Spot Healing Brush don’t use AI at all. Social apps can tag a whole image as AI when Generative Fill was used, even to remove one small object.
Why does the Clone Stamp paint nothing on my new layer?
Set Sample to Current & Below in the options bar. Otherwise it only samples the empty layer and copies nothing.
How do I use the Clone Stamp Tool?
Press S, Alt/Option-click the area you want to copy from, then paint over the object. Sample a few different places as you go to keep from getting repeating patterns.
How does the Spot Healing Brush work?
Choose it and paint over the object; there is no sample point to set. When you let go, Photoshop finds similar areas in the document and fills the gap automatically.
Why does the Spot Healing Brush leave repeating patterns?
On a large area like a building, it can reuse the same patch several times. Paint over those spots a second time to get rid of them.
Why can’t the Spot Healing Brush remove a person at a table?
It can only reuse what’s already in the photo, so it can’t invent the chair behind someone. On the umbrella over lounge chairs it put in more umbrella instead of a seat.
How do I remove something with Generative Fill?
Use the Selection Brush Tool, grouped with the Lasso tools, and paint over the whole object and its shadow. Click Generative Fill, then Generate, and check the variations in the Properties panel, since it can invent things you didn’t ask for.
Which tool should I use?
To avoid the AI label, start with the Spot Healing Brush and clean up with the Clone Stamp. If the label doesn’t bother you, Generative Fill with the Selection Brush is by far the easiest, especially for beginners.
Are the sample files free?
Yes, with a free PHLEARN account. You get 1 sample image, 1 sample PSD and 1 PDF guide: the beach photo, the sample PSD and a 4-page guide comparing the three tools.
Master Photoshop, Lightroom and Photography
Join PHLEARN PRO for $12.99 a month or $99.99 a year. Cancel anytime, with a 100% money-back guarantee.





