

Download Sample Images
description
When you’re looking for the perfect preset but can’t seem to find it, try making your own! Lightroom Classic makes it easy to create custom presets which help you edit faster and allow you to share your unique style with the world.
Follow along as we create a vintage film look and then turn it into a brand new Lightroom Preset. We also show you how to import presets and then make additional color and exposure adjustments so that they work flawlessly with any photo.
Speaking of presets, have you tried our free sample 10-pack? Use them to color your photos today!
If you’re ready to take a deep-dive into everything Lightroom Classic has to offer, try our PRO tutorial The Beginner’s Guide to Lightroom Classic!
Enjoying This Free Tutorial?
We publish a new free tutorial every week, each one with sample images and PSDs you can download and follow along with. Sign up and they land straight in your inbox, along with early word on sales, events and subscriber-only offers.
Free Lightroom Preset Sample 10 Pack
Lightroom Presets are a great way to quickly add style and charm to your photos. Try our custom-made PHLEARN Lightroom Presets with our free sample 10 pack of some our favorite bright and beautiful looks!
Watch Next
This episode is part of our FREE Intro to Lightroom Classic series.
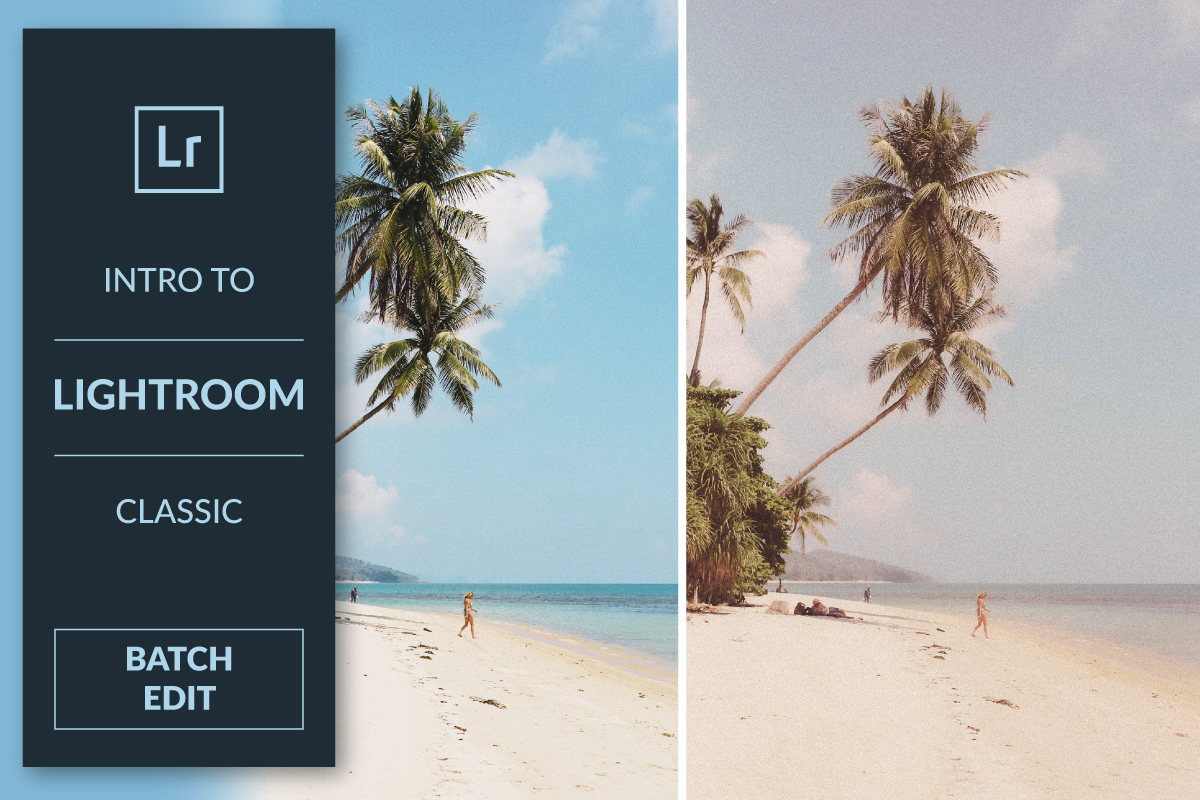

CREATE YOUR OWN LIGHTROOM PRESETS
Record an Edit Once, Replay It Forever
Almost every adjustment Lightroom Classic can make is recordable. Build a look you like, save it as a preset, and from then on it’s a single click — or a hover, since Lightroom previews presets live as your cursor passes over them.
That’s useful for consistency across a shoot, and it’s genuinely valuable for client work: the same set of images delivered in three or four distinct looks costs you almost nothing once the presets exist.
This is part six of our free Intro to Lightroom Classic series. We’ll build a faded vintage film look from scratch, save it as a preset, apply it across a set, then export it to share and import a pack from elsewhere.
Building the Look First
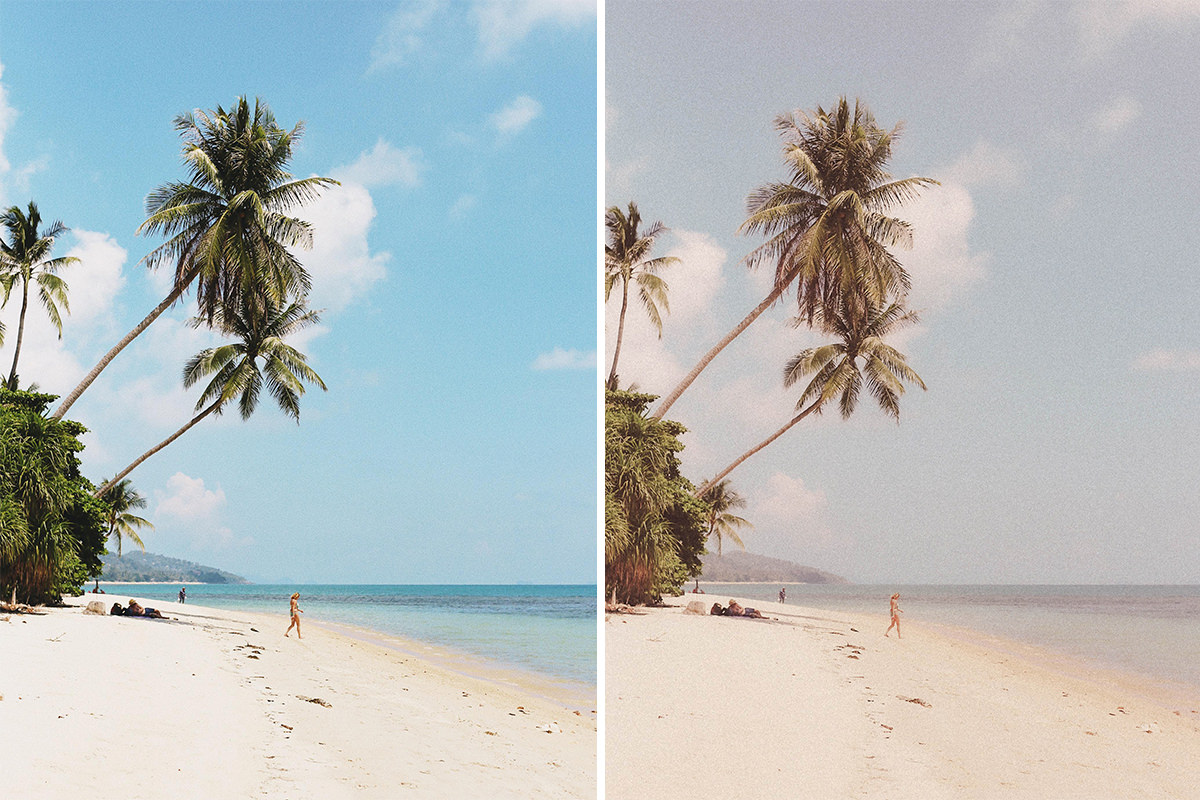
A preset is only a recording of an edit, so the edit has to come first. Here’s the vintage film look, built in the Develop module.
-
Lower the Contrast
This is what makes an image read as aged. Film that’s been sitting in a drawer for thirty years has lifted blacks and softened whites, and Contrast is the fastest way to that.
-
Pull Texture and Clarity down
Negative values take fine detail and midtone crispness away, giving a slightly soft, not-quite-in-focus quality. Vintage lenses were not sharp.
-
Reduce Vibrance
Old film stock fades. Dropping Vibrance rather than Saturation keeps skin tones from going grey while the rest of the palette softens.
-
Lift the Shadows and pull the Highlights down
This compresses the tonal range from both ends — the flatter, gentler contrast curve you get off real film.
-
Add warmth with Split Toning
Raise the Saturation slider first so you can see what you’re doing, then choose a warm hue for the highlights and a red for the shadows. This is what stops the image reading as simply “faded” and starts it reading as “film.”
-
Finish with Grain
Down in the Effects panel. Zoom in to judge it — grain is invisible at fit-to-screen and overdone the moment you can see it clearly at 100%.
Step back through the History panel to the imported state and the difference is stark: a flat straight-out-of-camera frame against something with a real point of view. The goal is a look that’s distinct without being overdone.
Saving It as a Preset
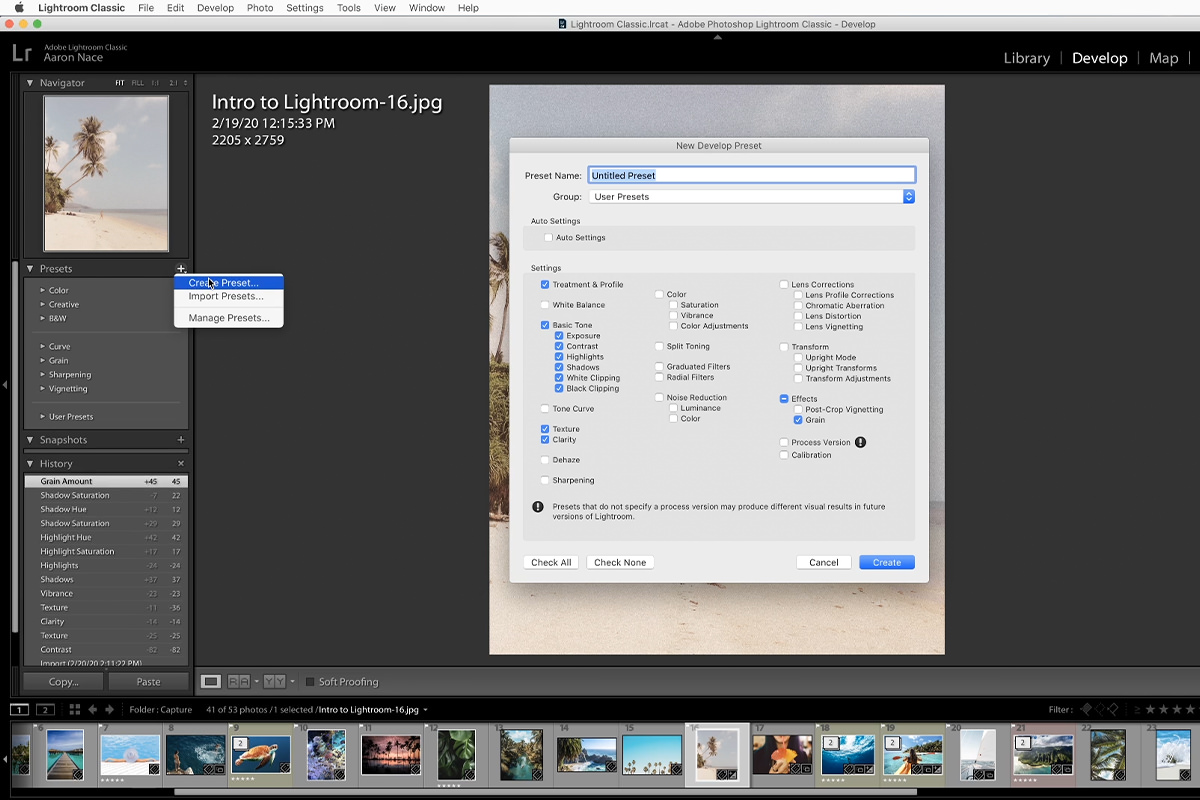
Make sure you’re in the Develop module — the preset controls aren’t available from the Library.
-
Click the plus on the Presets panel
Left sidebar, then Create Preset.
-
Name it and put it in a group
Give it something descriptive — “Vintage Film” — and create a new group for your own presets so they don’t get lost among imported packs.
-
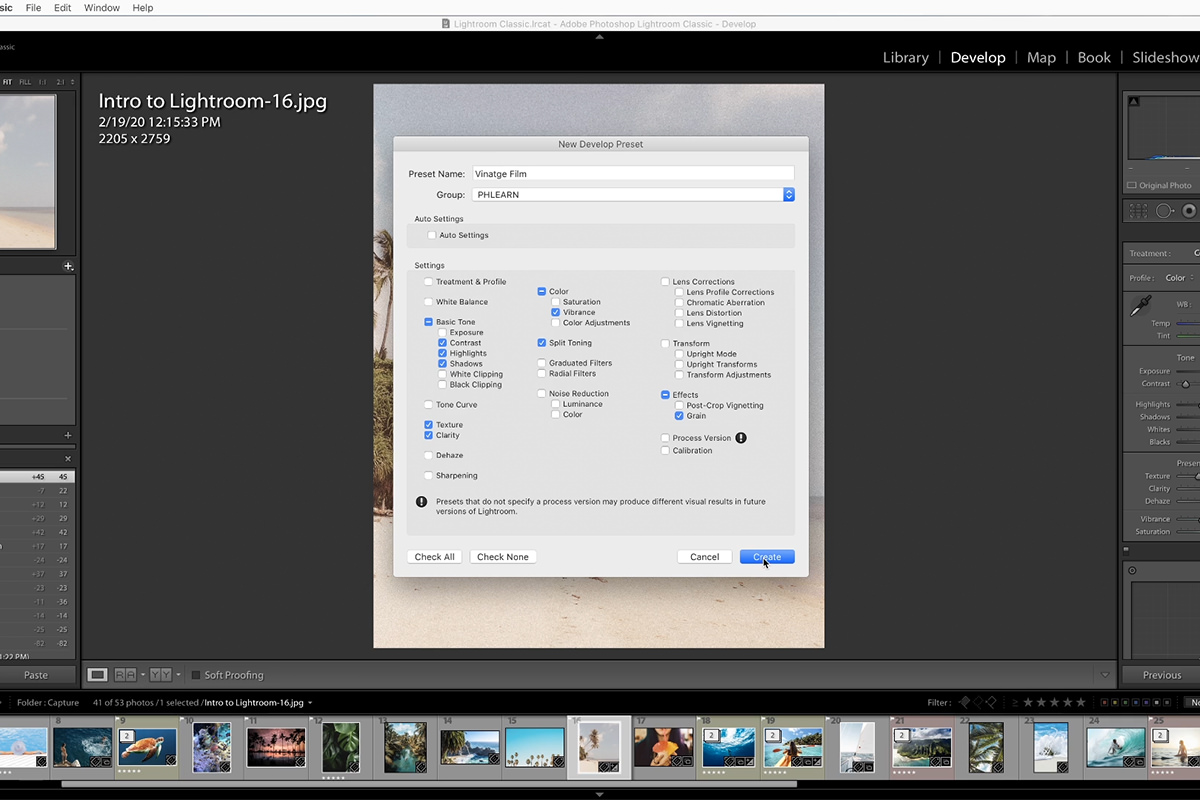
Click Check None
Same rule as batch syncing, and it matters just as much here.
-
Tick only what you changed
Contrast, Highlights, Shadows, Texture and Clarity, Vibrance, Split Toning, Grain. Nothing else.
-
Create
It appears under your group, ready to use.
Why Check All is the wrong choice
It’s tempting, and it quietly ruins presets. White Balance is the clearest example. Include it and your preset forces every photo to the colour temperature of the one image you built it on — a look designed on a warm indoor frame will wreck a shaded outdoor one. A preset should carry your style, not that photograph’s specific corrections. Ticking only what you deliberately changed is what makes it portable.
Applying It to Other Photos
Open another image in the Develop module and hover over your preset in the sidebar. The image previews the look live as you hover — you don’t have to click anything to see it. Click to commit.
To run through a set quickly, work in the Develop module with the filmstrip visible along the bottom. Click each thumbnail to load it, click the preset, move on. A dozen images take a few seconds and the whole run comes back visibly more cohesive.
A preset is a starting point, not a contract. Everything it applied is still just slider positions, so if one photo doesn’t want the grain, scroll to Effects and turn it off — the rest of the look stays exactly as it was.
Exporting a Preset to Share
Presets are small files, easy to hand to a second machine or a collaborator.
In the Develop module, right-click your preset group in the sidebar and choose Export Group, then pick somewhere to save it. That’s the whole process. You can export a single preset the same way.
Importing a Preset Pack
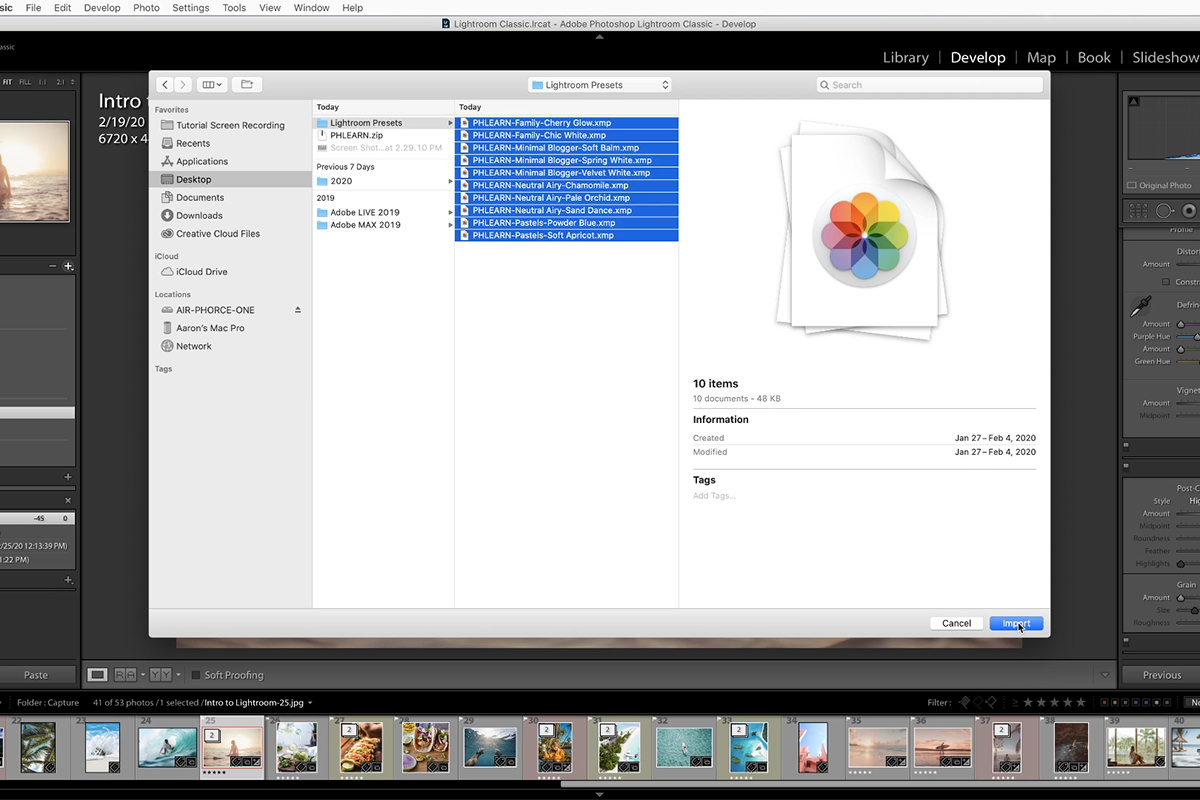
Bringing presets in is the same operation in reverse.
-
Open the Presets panel in the Develop module
The left sidebar again — this doesn’t work from the Library.
-
Click the plus and choose Import Presets
Navigate to the preset files you downloaded.
-
Select them all and import
Shift-click to grab the whole set. Lightroom sorts them into their own groups automatically, so a multi-pack download stays organised rather than dumping fifty presets into one list.
Our free sample 10-pack is a good set to practise on, and the full preset library is included with PHLEARN PRO.
Finding the Right Preset for the Photo

This is the part people miss. No preset works on every image, and that isn’t a flaw — a look built around deep blues does something completely different to a golden-hour frame than it does to an overcast one.
The hover preview is the tool for this. Run your cursor slowly down the preset list and watch the photo change. It takes seconds and it’s far more reliable than picking by name. A pastel set might be perfect for one frame and lifeless on the next; the vibrant one you’d have skipped turns out to be the winner.
Think of a preset library as a set of options to audition against each photograph, not a shortcut that removes the choosing.
Where Presets Go Wrong
Including White Balance and Exposure
The most common mistake, and worth repeating. These are corrections specific to one photograph, not style. Bake them in and the preset only ever works on images shot in the same light.
Trying to build a preset in the Library module
The Presets panel lives in Develop. If you can’t find the plus icon, check which module you’re in.
Building a look on an unrepresentative frame
A preset designed on your single most dramatic image tends to fall apart on ordinary ones. Build it on something typical of the shoot, then test it on the extremes.
Applying and never adjusting
A preset gets you most of the way, not all of it. Expect to nudge exposure per image afterwards — that’s the workflow working, not failing.
Continue the Intro to Lightroom Classic Series
Each part builds on the last:
- How to Import & Organize Photos in Lightroom Classic — importing, copyright metadata and a folder structure that lasts.
- How to Filter & Favorite Images in Lightroom Classic — the three-round culling workflow.
- How to Edit Photos in Lightroom Classic — the Develop module sliders, in the right order.
- Advanced Photo Editing in Lightroom Classic — local adjustments and range masking.
- How to Batch Edit Photos in Lightroom Classic — sync settings and virtual copies.
- How to Export Photos in Lightroom Classic — export presets, sizing for the web, and watermarked client proofs.
For the program end to end, The Beginner’s Guide to Lightroom Classic covers considerably more ground.
Build a Library of Your Own Looks
The real payoff isn’t any single preset — it’s that after a year of saving the looks you keep gravitating toward, you have a personal library that makes your work recognisable. That consistency is most of what people mean when they talk about a photographer having a style.
Next time you finish an edit you’re pleased with, save it before you move on. Six months from now that’s a click.







Enjoying This Free Tutorial? Go Further with PRO.
Unlock Full Sample Files, PSDs, and Hundreds of Masterclasses!

Download full project assets, original PSDs, and RAW images for every lesson
Unlimited access to our complete library of PRO Photoshop & Lightroom courses
Instant 4K Ultra HD streaming on all devices, anytime, anywhere
Full access to our entire library of Photoshop Actions, Presets, and LUTs
Flexible monthly and annual membership plans
Cancel anytime with zero hassle or commitments