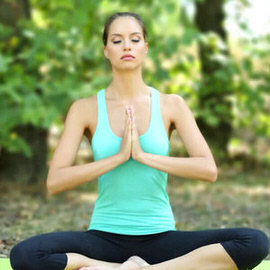
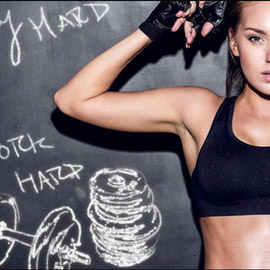
Altering a model’s Body Proportions is a very controversial topic. In today’s episode, we show you some techniques to get a great transformed Body without pushing it too far.
We compiled a list of photography gear perfect for any traveler. The gear includes both professional and budget items. The budget gear will definitely get the job done, but it is good to know what the professionals use also.
Follow along as we demonstrate how to composite intricate details, use Blending Modes, color tone, and create perfect cutouts with Refine Mask.
Photoshop | Compositing | Medium | 2 hours | 5 videos
6 Sample Images | 1 Photoshop Brush | 6 Custom Textures
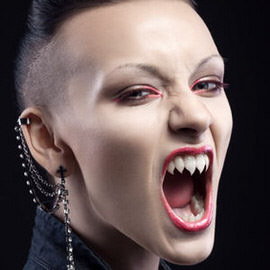
Are you ready for our fourth and final Halloween episode?? Learn how to shape teeth into sharp fangs to give your images some real “bite!”
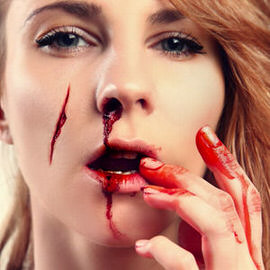
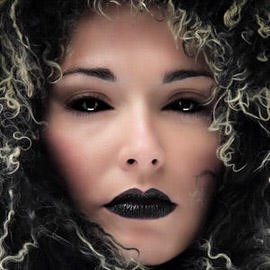
In our third Halloween Episode, we show you how to create realistic scars in Photoshop! Wow humans and zombies alike with this scary gash technique!
Explore artistic options and learn how quickly you can accomplish them with a simple Blending Mode change!
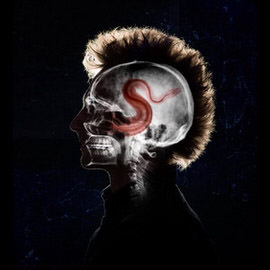
Making eyes all black is faster than you might think, and is definitely a terrifying effect to add to your images! Join us in the spirit of Halloween as we show you how to black out eyes in Photoshop!
We’ve been dabbling in the Time-lapse world here at Phlearn we decided to share with you some of our suggestions for gear & accessories based on what we’ve tried out, and their alternatives.
As long you you have an area in your image to sample, using the patch Tool should be very easy to do. In today’s episode, we’ll show you how to use the amazing Patch Tool in Photoshop!
Everyone wants a beautiful out of focus Background once in a while, but what if you can’t achieve the look in-camera? In today’s episode, we show you how to fake Depth of field in Photoshop!
Everyone wants a beautiful out of focus Background once in a while, but what if you can’t achieve the look in-camera? In today’s episode, we show you how to fake Depth of field in Photoshop!
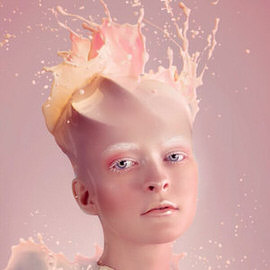
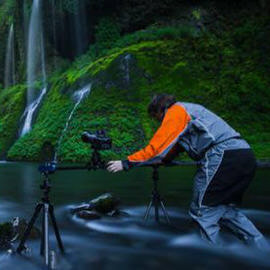
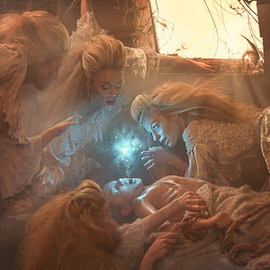
Come behind the scenes with Aaron Nace and the Phlearn team for our latest Pro Tutorial, “Liquid Portrait”. We discuss developing a concept, lighting, photographing splashes and much more!
Skin is one of the most delicate areas when it comes to photo retouching. Learn to shape features, dodge and burn, color correct, retouch makeup, and sharpen like a pro, and make subtle changes to highlight the subject’s natural beauty.
Photoshop | Retouching | Medium | 2.5 hours | 6 videos
1 Sample Image | 1 Photoshop Brush
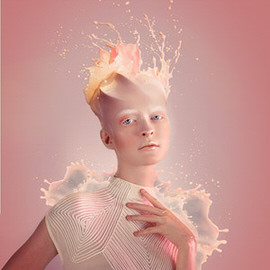
In this tutorial, you’ll learn how to do the photography and retouching necessary to add an amazing liquid splash effect to any portrait. Learn compositing, coloring, retouching, cutting subjects out, painting details, and dodging and burning.
Photoshop | Compositing | Advanced | 3.25 hours | 7 videos
10 Sample Images | 1 Photoshop Brush | 1 Photoshop Action
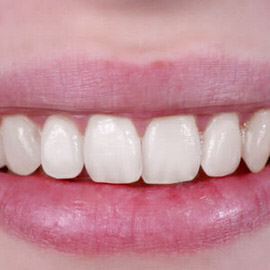
You’ve asked, we’ve answered! In today’s episode, learn how to whiten and straighten teeth in no time!
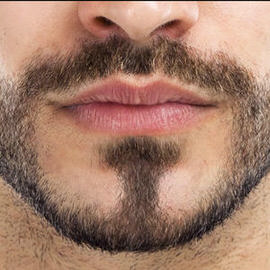
In today’s episode, we give you the gift of facial Hair! Whether for fun or for professional Retouching, creating Hair can always come in handy.
Have you ever seen a profile picture that is cropped to show just one subject, but the hands of someone else are awkwardly still there? In today’s episode we show you the Tools to remove your ex-boyfriend in Photoshop!

Use the Pen Tool to create custom shapes and accurately cut objects out of their backgrounds!
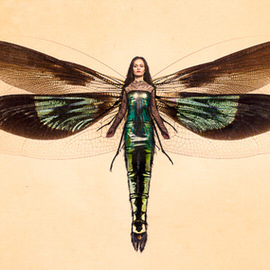
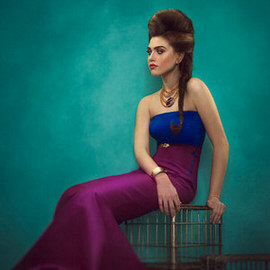
Create an extraordinary fantasy image in this in-depth tutorial. Learn to tell a story through images, build and shape lighting, dodge and burn, blend, and composite several images into a scene.
Photoshop | Compositing | Medium | 1.75 hours | 6 videos
6 Sample Images | 3 Photoshop Brushes
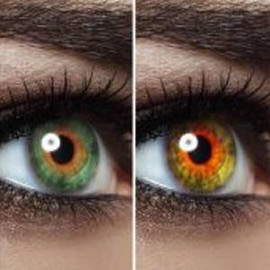
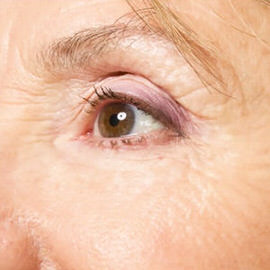
You’ve seen it everywhere, but how is it done?? Today we show you how to change the color of eyes in Photoshop!

Have you ever wondered if it is possible to create snow from scratch? In today’s episode, we show you that all you need is a custom Brush and some blurs to create your own winter wonderland!
Having trouble finding stock images? Look no further! Here are Aaron’s top 5 favorite free stock image websites.
Links Included
Gain the confidence to master product photography! Take an outside-the-box approach to product photos with this composite where you can learn to match highlights and shadows, retouch products, and make details selections.
Photoshop | Compositing | Medium | 2 hours | 5 videos
12 Sample Images | 1 Photoshop Brush
Speed up your workflow and learn to quickly identify what needs to be retouched in a photo and exactly how to do it. Shape the body, smooth skin, correct color, add texture, sharpen like the pros and much more!
Photoshop | Retouching | Easy | 1 hours | 1 video
11 Sample Images | 2 Photoshop Brushes
In this episode we show you how to select the green Color Range and define a Layer Mask with the selection. This technique will allow you to cut your subject out from the Background quickly and accurately.
Sample Images Included

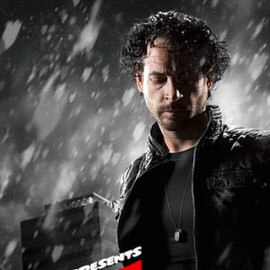
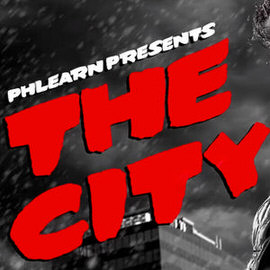
How to edit a sky photo to make it look more dramatic and how to add a city, altering the Light Levels to match it with the sky.
Sample Images Included
In this Photography tutorial we focus on three key elements necessary to produce this image. You will learn about lighting, Styling and props and shooting for a Composite.

Ditch the struggle to try and figure out perspective manually! In today’s episode, we show you how to use the Vanishing Point Filter to lay Text anywhere in a realistic way.
Photoshop is an amazing Tool that can help you with more than just Retouching photographs; it can be used to create illustrations as well! In today’s episode, we show you how to turn a photo into what looks like a hand-drawn illustration.
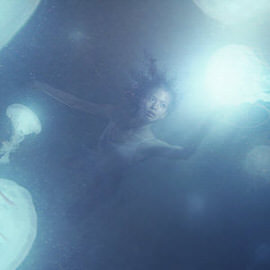
In this tutorial, you will learn the photography and Photoshop required to transform your images into an underwater world. Color correct highlights and shadows independently, create light rays, create flowing hair, and learn to light a subject.
Photoshop | Visual Effects | Advanced | 2.5 hours | 6 videos
30 Sample Images | 3 Photoshop Brushes