

Download Assets
This tutorial includes 11 sample images, 8 sample PSDs and 1 PDF guide. Downloads are free with a PHLEARN account.
- Download the sample images and PSDs from every free tutorial on PHLEARN
- New free tutorials published every week
- One free account — sign up once, then download anything
Free PDF Guide · Print It
This Tutorial as a Step-by-Step PDF
All 10 tips in order, with where to find each one, the steps and the shortcuts, on three printable pages. Keep it next to your keyboard.
description
These are the 10 tips I wish someone had shown me sooner, all demonstrated in Photoshop 2026. Some are new, some are old, and a few will save you generative credits. We’ll show you scrubby sliders, clipped adjustment layers, the Targeted Adjustment Tool, Bird’s-Eye View, cloud Select Subject, Apply Image, Blend If, Quick Compare and Camera Raw Lens Blur, with bonus shortcuts along the way. Free sample images and PSDs included.
Top 10 Tips
- 01 The Remove tool spends no credits
- 02 Scrubby sliders: drag the word
- 03 Clip an adjustment to one layer
- 04 Drag on the photo for Curves
- 05 Hold H for a bird’s-eye view
- 06 Select Subject on Cloud
- 07 Apply Image merges every layer
- 08 Blend If for a realistic sky
- 09 Before and after in one click
- 10 Lens Blur in Camera Raw
Enjoying This Free Tutorial?
We publish a new free tutorial every week, each one with sample images and PSDs you can download and follow along with. Sign up and they land straight in your inbox, along with early word on sales, events and subscriber-only offers.
Image Source
Photos by Quan Jing, Birmingham Museums Trust, Planet Volumes, Alina Chernovolova, Fellipe Ditadi, Tim Mossholder, Natalia Blauth, jo rhn, A. C., Katarzyna Korobczuk, and Deny Hill via Unsplash
The Photoshop 2026 Tips I Wish Someone Had Shown Me Years Ago
These are the Photoshop tips we wish someone had shown us when we were starting out, shown here in Photoshop 2026. Some are brand new, some have been hiding in Photoshop for years, and a few will save you generative credits you didn’t know you were about to spend.
None of these Photoshop tips is a big technique on its own. Each one removes a small, repeated annoyance: zooming out to find a transform handle, hunting for the slider you just ruined, wondering whether the Remove tool just cost you credits. Put together, they change how fast and how confidently you work.
Every tip below uses tools built into Photoshop 2026 and Camera Raw, with two exceptions called out clearly: Quick Compare is currently in the Photoshop beta, and Generative Expand spends credits (we’ll show you the free alternative). The sample images and PSDs are free to download so you can follow along on the same photos.
01 The Remove Tool Doesn’t Spend Generative Credits
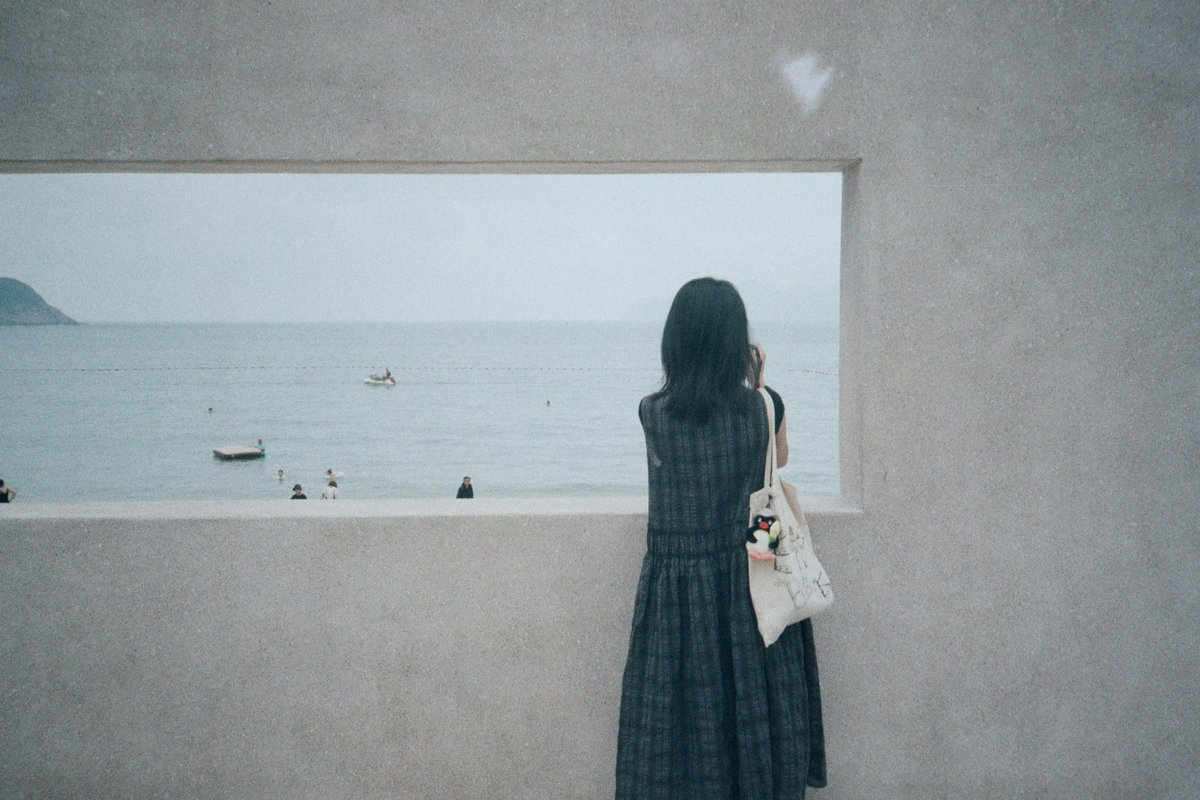
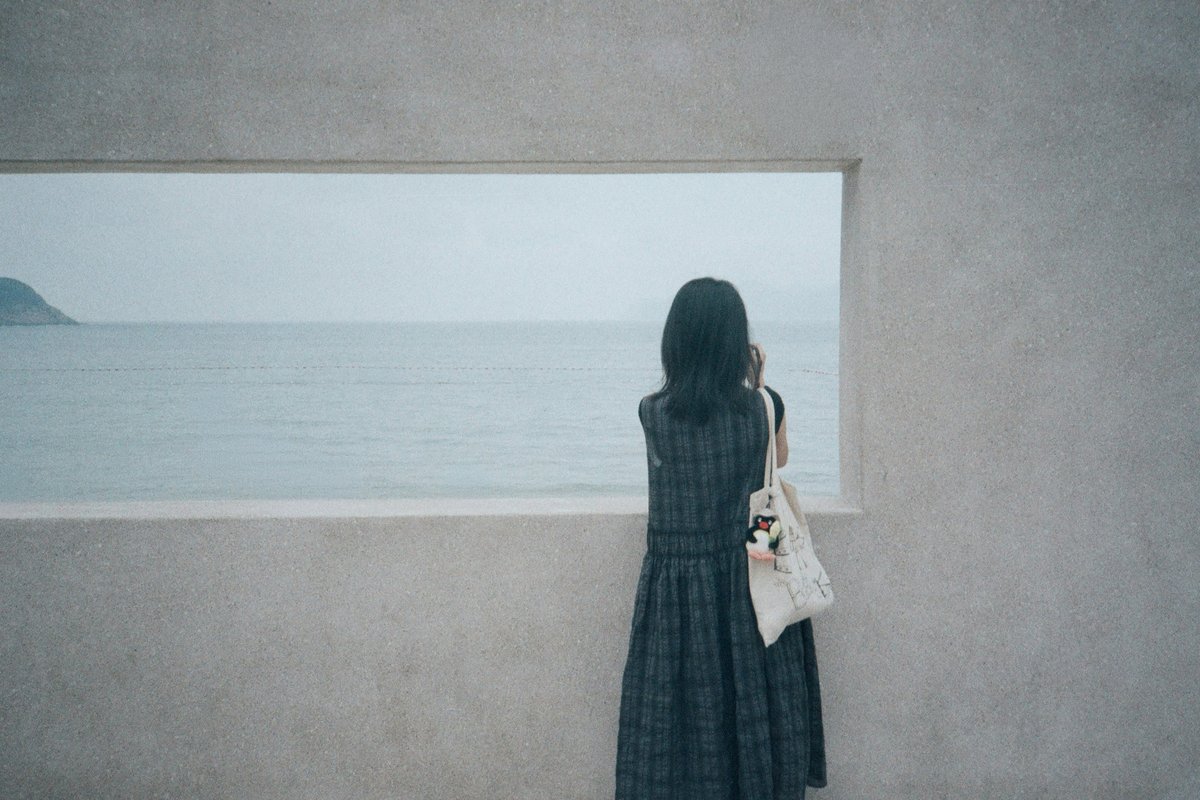
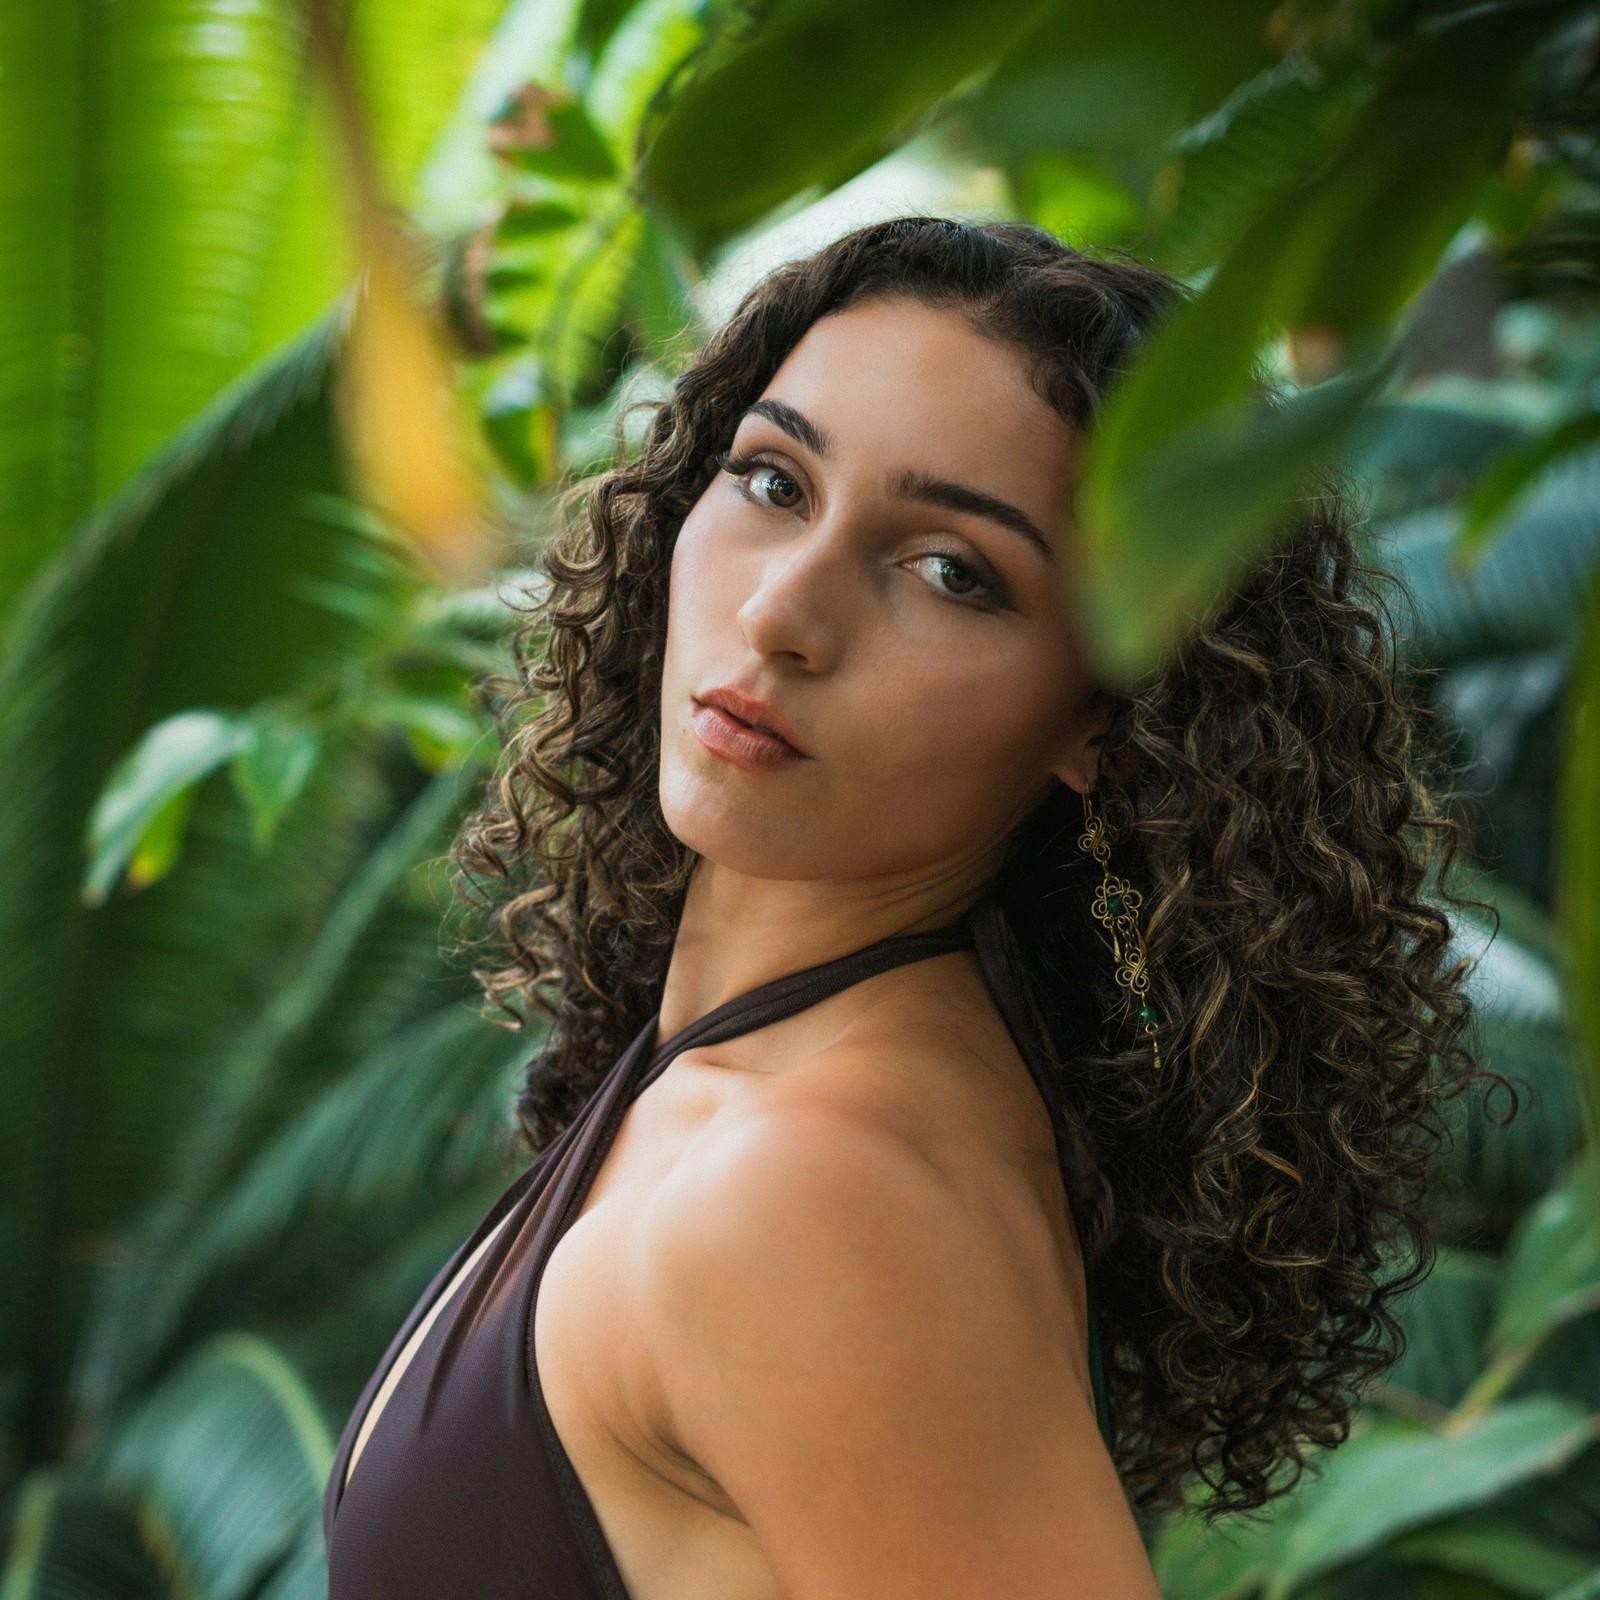
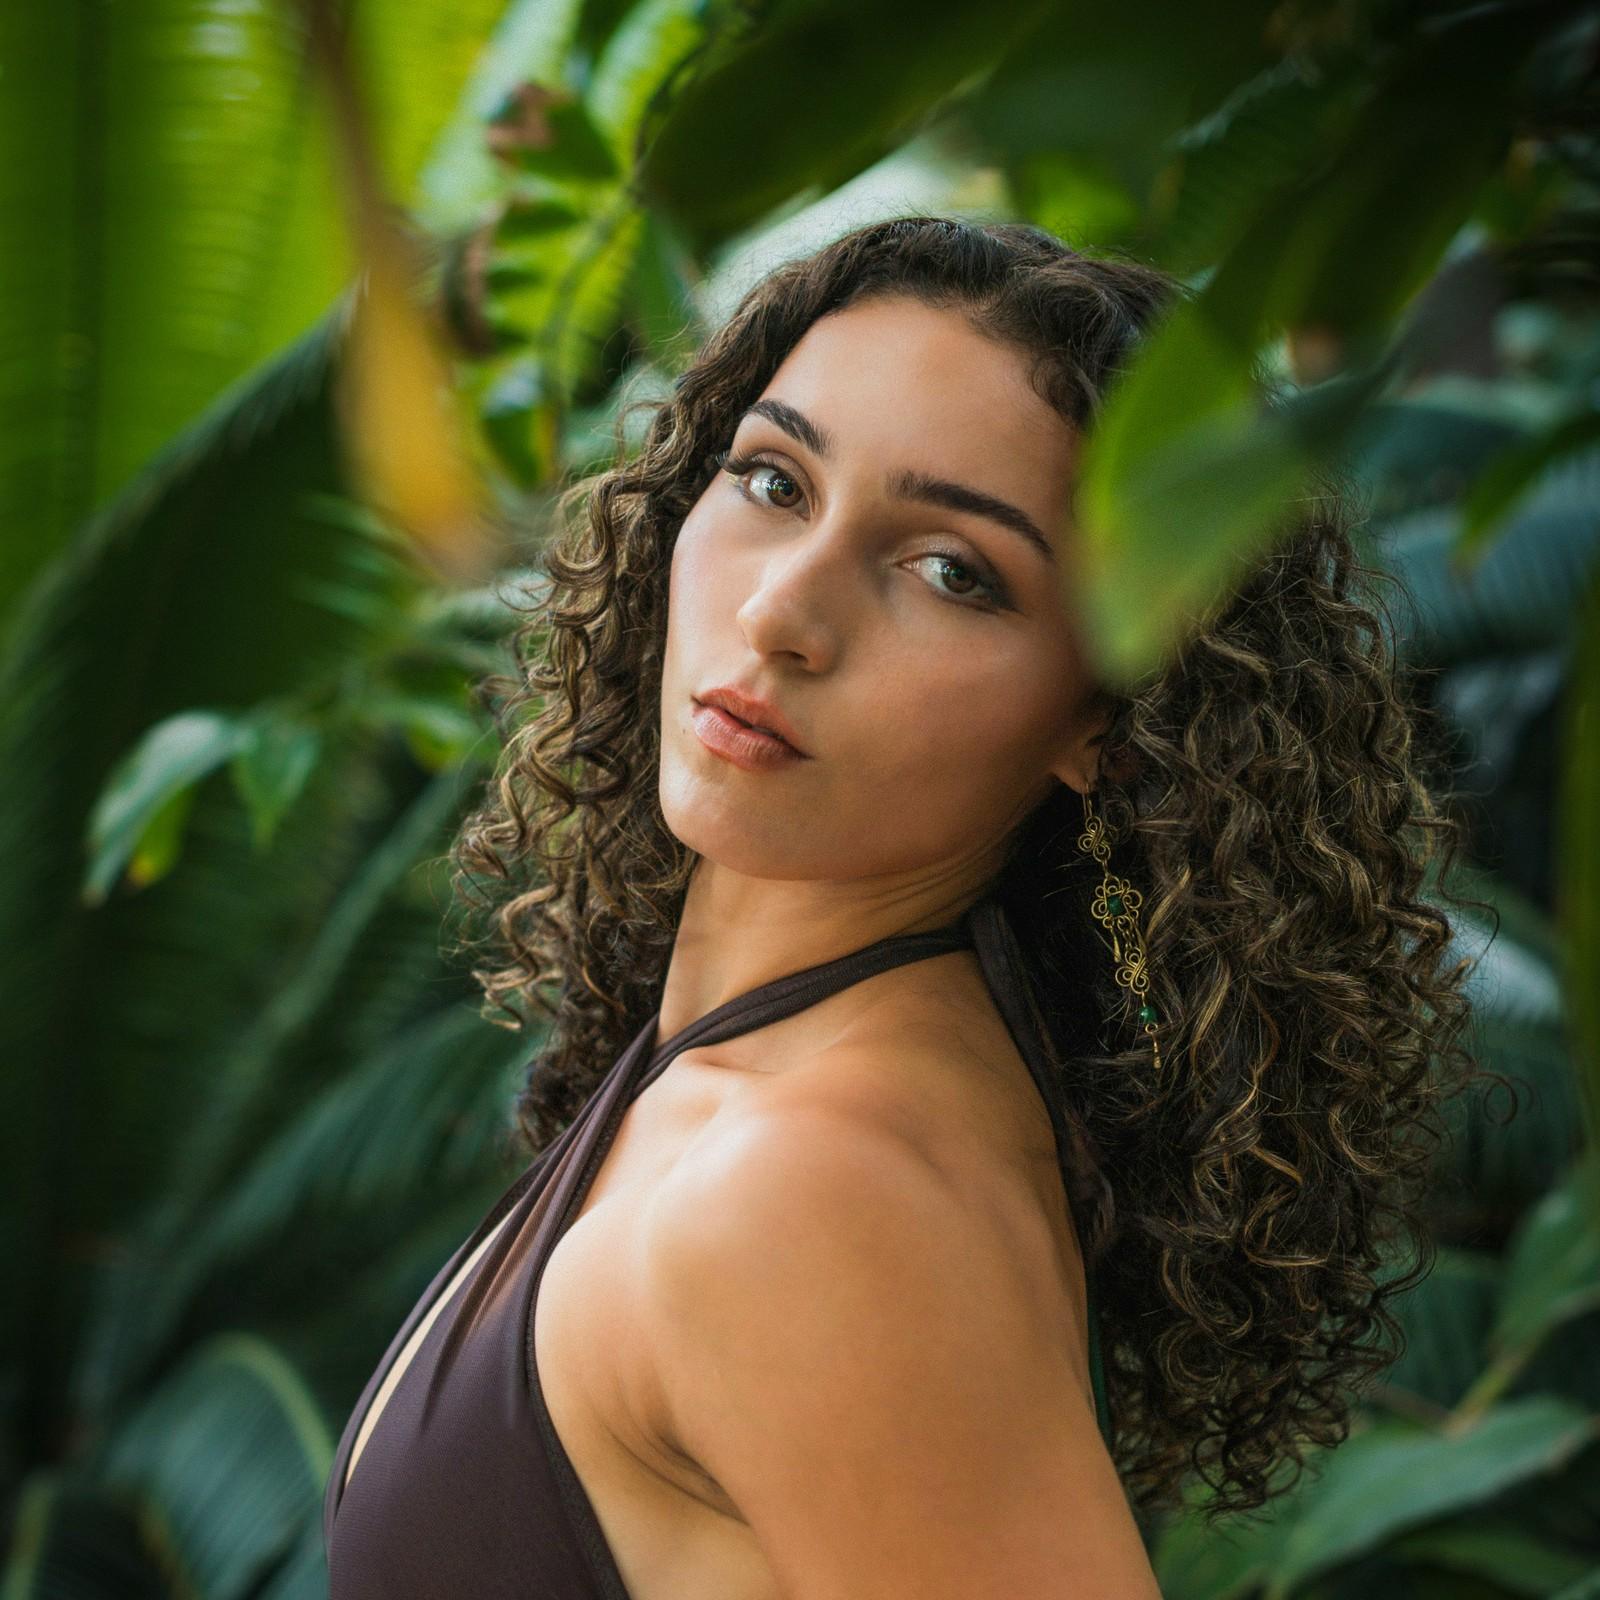
The Remove tool can run on Adobe’s generative AI, so it’s natural to assume it costs credits the way Generative Fill does. We checked on camera: the credit balance read 2,870 before the cleanup and 2,870 after, with Generative AI on and cloud processing.
-
Check your credit balance first.
Click the credits indicator at the very top right of Photoshop to see your generative credits usage for the month, so you have a number to compare against.
-
Select the Remove tool.
It looks like a bandage with sparkles.
-
Set the options bar.
Leave Generative AI on, check Sample All Layers, uncheck Remove After Each Stroke so you can paint everything first, and leave Create New Layer on so the cleanup lands on its own layer.
-
Paint over every distraction, then click Remove.
Use the bracket keys to make the brush larger or smaller. Paint over everything that distracts from the photo, even small things on the wall, then click Remove to apply it all in one go.
-
Compare and check the balance again.
Toggle the new layer off and on to see the before and after, then open the credits panel. The number hasn’t moved.
Bonus: Remove Distractions Offline
The Remove tool can also run on Device processing instead of the cloud, which is useful when you’re not connected to the internet. The first time, Photoshop downloads the AI model to your computer, which takes a couple of minutes, so switch it over before you go offline. Our guide to generative credits covers which tools do spend them.
02 Scrubby Sliders: Drag the Word, Not the Handle
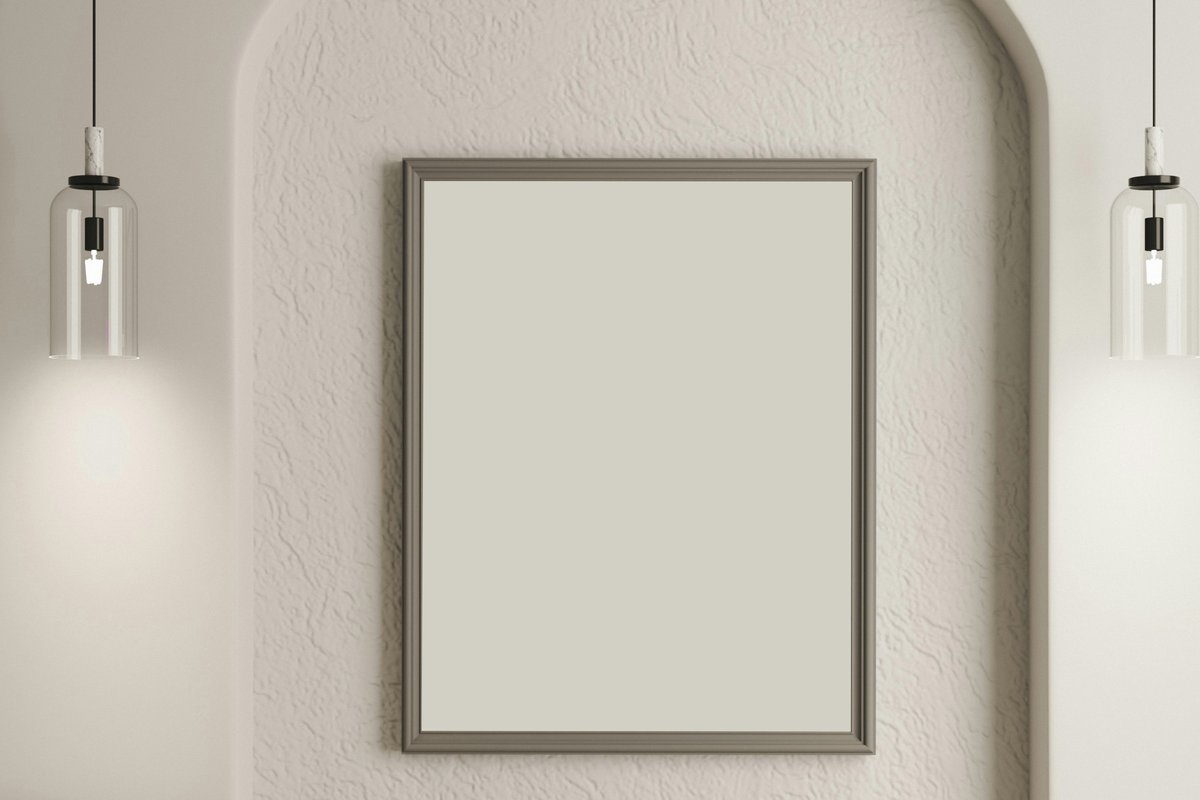

Tips 2–3 PSD + Images · 40.4 MB
Almost any labeled value in Photoshop is also a slider. Click and drag left or right on the word or letter next to a value, and it moves like a slider. These are called scrubby sliders, and they make transforming an image much less fiddly.
-
Place your image and stay zoomed in.
Drag the painting into the background photo. It comes in far too big, but instead of zooming out to find the transform handles, look at the options bar at the top.
-
Scrub W or H to resize.
Click on the W (width) or H (height) letter and drag left to shrink the image or right to enlarge it, without ever reaching for a corner handle.
-
Scrub X and Y to position it.
Drag on X to move the image sideways and Y to move it up and down until it sits inside the frame.
-
Scrub the Opacity label to see through the layer.
In the Layers panel, drag left on the word Opacity so you can see the frame underneath while you line things up. Hold Shift while you drag and the value moves in steps of 10, so 0 to 100 takes a flick of the wrist.
-
Commit, then mask the painting into the frame.
Press Enter, hide the painting, select the background layer and click inside the frame with the Magic Wand Tool. Select the painting again, click the Add Layer Mask icon and change the blend mode from Normal to Multiply.

Bonus: Resize the Image Inside Its Mask
Click the link icon between the layer thumbnail and the mask to unlink them, then click the layer thumbnail and press Ctrl+T (Windows) or Command+T (Mac). Scrub W and H again: the painting scales while the mask stays exactly where it is. For the rest of the transform options, see how to master the Transform tool.
03 Clip an Adjustment Layer to a Single Layer
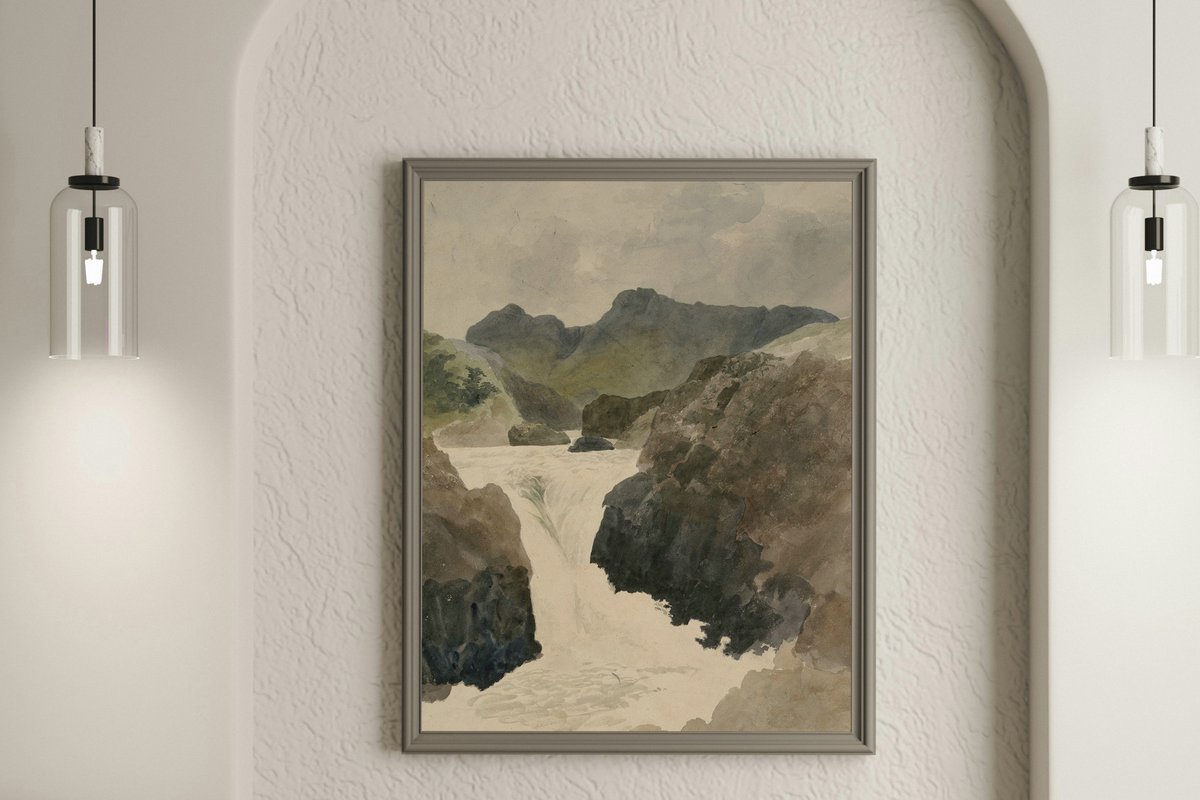
Tips 2–3 PSD + Images · 40.4 MB
An adjustment layer affects everything below it by default. Brighten the painting, and the wall around it brightens too. Clipping the adjustment limits it to the one layer directly underneath.
-
Add an adjustment above the layer you want to change.
With the painting selected, open the Adjustments panel, add a Light adjustment layer and raise Exposure. Notice that the whole image gets brighter.
-
Click the clipping icon in the Properties panel.
The adjustment now affects only the painting. In the Layers panel it shifts to the right with a small down arrow pointing at the layer it’s clipped to.
-
Clip and unclip from the Layers panel.
Hold Alt (Windows) or Option (Mac) and click on the line between the two layers to toggle the clip on and off.
-
Fine-tune the painting to fit the scene.
Back in the adjustment, lower the contrast a little, bring the shadows up and the highlights down until the painting sits naturally in the room.
Bonus: Reset a Slider Without Starting Over
Pushed one slider too far? Double-click the slider’s handle, or double-click its name, and that single slider snaps back to its default. To reset every slider in the adjustment, click the reset icon at the bottom of the Properties panel: once returns to the last state, twice returns everything to default. The slider names are scrubby sliders too, so you can drag on the word Exposure to change it. More on these in our clipping masks tutorial and the Light adjustment layer guide.
04 Drag on the Photo to Control Curves and Hue/Saturation
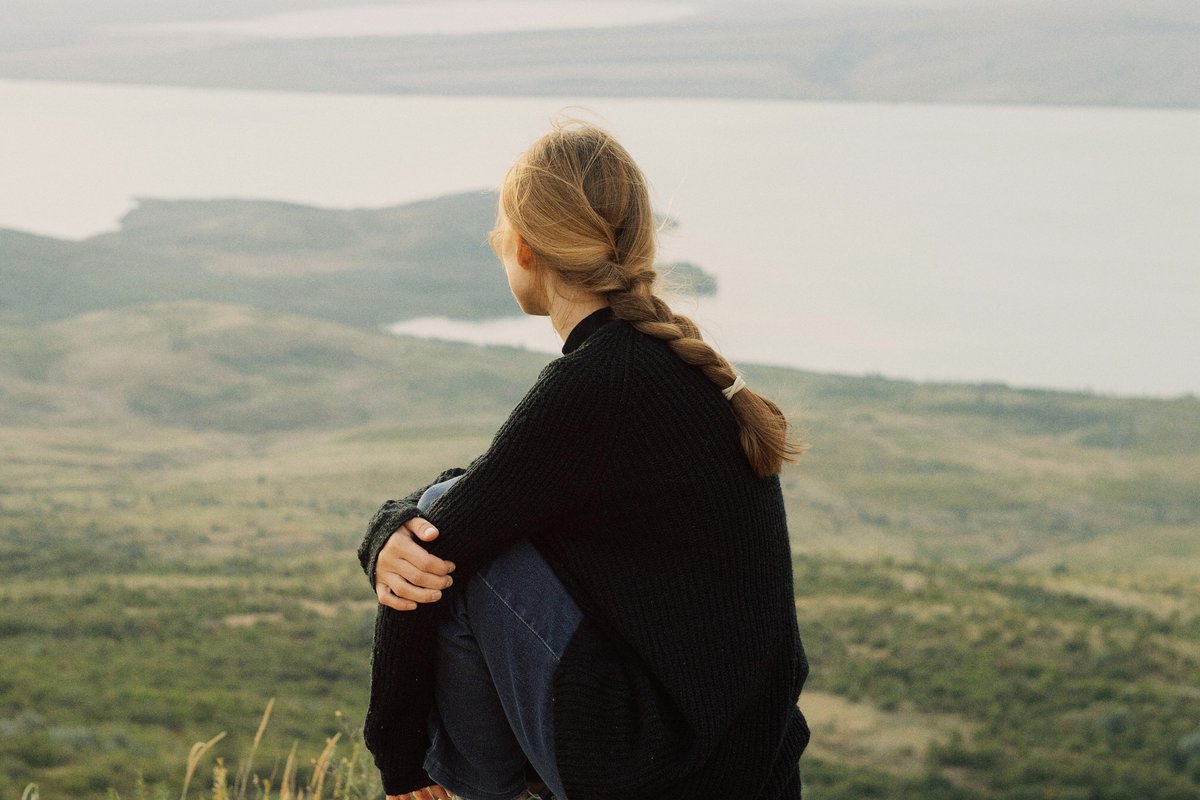

The Curves graph is powerful, but it’s abstract: you have to work out which part of the line matches which part of the photo. The Targeted Adjustment Tool lets you skip that and adjust by dragging directly on the image.
-
Add a Curves adjustment and pick the Targeted Adjustment Tool.
It’s the hand icon in the Properties panel. Reset any points you’ve already added first.
-
Drag up or down on the tones you want to change.
Click on the bright highlights and drag down to darken them, then drag up on the midtones and shadows to brighten them. Photoshop places the points on the curve for you, and you get a balanced exposure without touching the graph.
-
Add contrast the same way.
Drag up on any area you want brighter. Look at the curve afterward: it’s a shape that would be fiddly to build point by point.
-
Use the same tool in Hue/Saturation.
Add a Hue/Saturation adjustment, select the hand, and drag right on the foliage to saturate the greens. Drag left on her face and Photoshop picks the reds and lowers them; drag left on a yellow area and only the yellows drop. It finds the color range for you, even the blues in her jeans.
For everything the graph can do once you’re comfortable, see everything there is to know about Curves.
05 Hold H for a Bird’s-Eye View


This is the one Aaron only just learned. When you’re zoomed in on details, getting to another part of the photo usually means zooming out and back in again. Bird’s-Eye View does both in one move.
-
Zoom in to work on detail.
Zoom in as far as you need for the work you’re doing.
-
Hold H, then press and hold the mouse or trackpad.
Photoshop zooms out so you can see the whole image. Move to the area you want to work on next.
-
Let go to zoom straight back in.
Release and you’re zoomed back in at exactly the spot you chose.
Bonus: Zoom by Dragging
Hold the Spacebar first, then add Ctrl (Windows) or Command (Mac), and you get a magnifying glass. Drag right to zoom in and left to zoom out. It gets you anywhere in the photo very quickly.
Bonus: Straighten a Horizon Without Spending Credits
Press C for the Crop Tool, click the image and drag outside the crop box to rotate until the horizon is level. Rotating leaves empty corners to fill, and by default you’d probably expect that to use credits, as Generative Expand does. Instead, open the Fill menu in the options bar, choose Content-Aware Fill and click Done. If the background is simple enough, it fills the gaps without AI and without credits. There’s more in straighten a photo without losing the edges.
06 Switch Select Subject to Cloud Processing


Select Subject can run on your computer or in the cloud. Device processing is faster, but cloud processing makes noticeably better selections around difficult edges like curly hair. It needs an internet connection and takes a little longer, and it doesn’t spend generative credits.
-
Open the Image Processing settings.
Go to Photoshop > Settings > Image Processing on a Mac, or Edit > Preferences > Image Processing on Windows.
-
Set Select Subject and Remove Background to Cloud.
It may be set to Device by default. Click OK; the change applies the next time you start Photoshop.
-
Or choose per selection.
Select the Object Selection Tool. Next to Select Subject in the options bar, the drop-down arrow lets you pick Device or Cloud every time you make a selection.
-
Run Select Subject and check the mask.
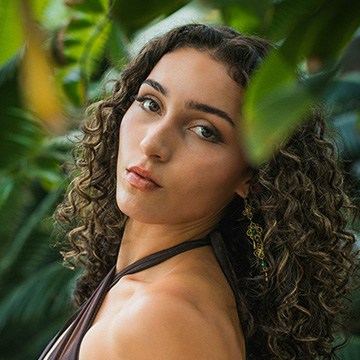
Click Select Subject, add a Light adjustment to brighten the subject, then Alt-click (Windows) or Option-click (Mac) the mask to inspect it. Even through the curls, the edges hold up.

We compared the two modes in detail in Select Subject cloud processing.
07 Merge Everything Onto One Layer With Apply Image


After a cleanup, your photo lives on two layers: the original and the Remove tool’s fixes. Color grade the original and the fixes don’t match; grade the fixes and the rest of the photo is left out. You need one layer that holds everything, without flattening your work.
-
Clean up the photo first.
Use the Remove tool with Create New Layer on to take out the boats in the background and the little distractions in the sand. As we saw in tip 1, it uses no credits.
-
Create a new empty layer at the top.
Click the New Layer icon at the bottom of the Layers panel.
-
Go to Image > Apply Image and click OK.
You don’t need to change any settings. The new layer now holds a merged copy of everything visible, and every layer underneath stays intact.
-
Convert it for Smart Filters.
Go to Filter > Convert for Smart Filters so any filter you add stays editable. We recommend this every time you use a filter.
-
Color grade in Camera Raw.
Go to Filter > Camera Raw Filter and open Color Grading. Click Shadows, Midtones and Highlights in turn and drag a little color into each, keeping it subtle and near the center. Click OK, and double-click the filter name later to change it.
Bonus: Stamp Visible
The keyboard shortcut for the same merge is called Stamp Visible. With a new layer selected, press Shift+Option+Command+E on a Mac or Shift+Alt+Ctrl+E on Windows. If you ever forget it, Apply Image is always waiting in the Image menu. Take the grade further with color grading with Camera Raw.
08 Blend If for a More Realistic Sky
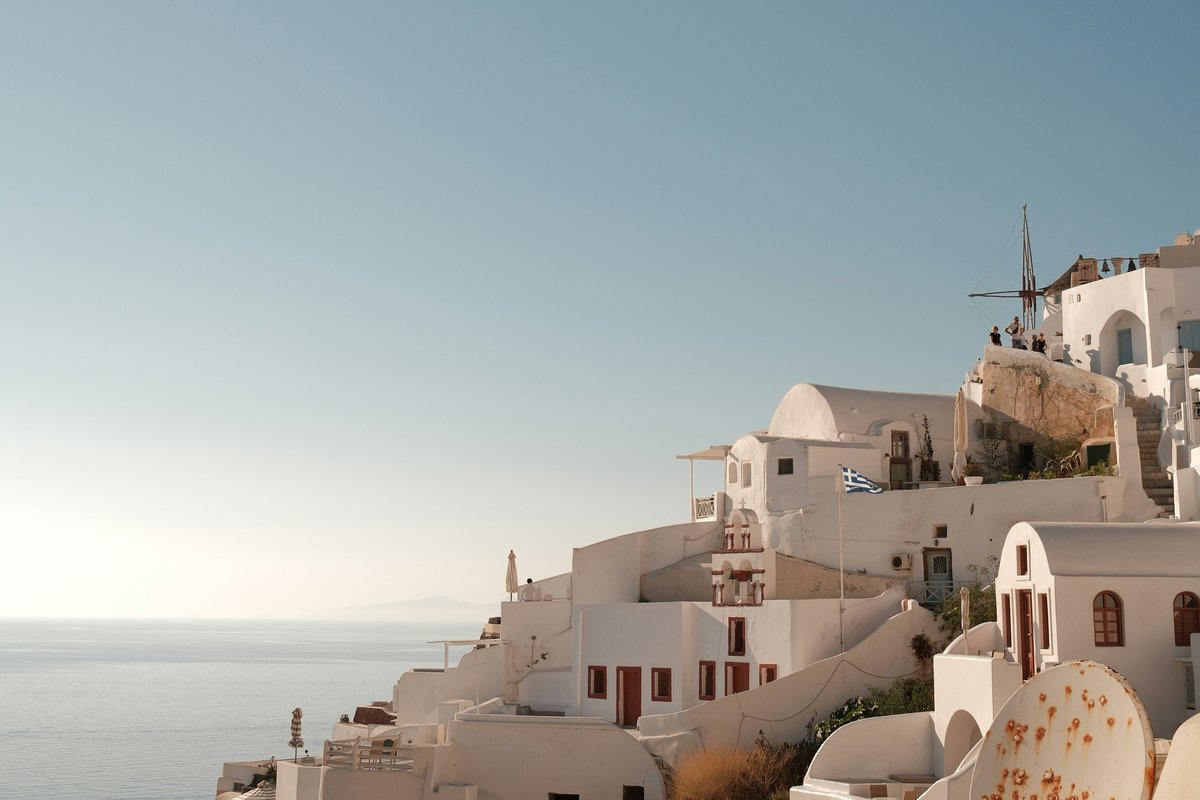

Masking a new sky in is only half the job. A straight replacement swaps in the new sky’s blue as well as its clouds, and that’s what makes it look pasted on. Blend If lets you keep the clouds and let the original sky show through.
-
Drag in the new sky and line it up with scrubby sliders.
Scrub W or H to size it, Y to move it, and Opacity to see the horizon underneath. Hold Shift to move faster. Press Enter when the horizons align.
-
Mask the sky.
Hide the new sky, select the background layer and go to Select > Sky. Select the new sky layer, click Add Layer Mask and scrub Opacity back up to 100%.
-
Open Blending Options.
Double-click the layer, or choose fx > Blending Options. Blend If sits at the bottom of the Layer Style dialog, set to Gray.
-
Drag the Current Layer shadow slider to the right.
The darker parts of the new sky, its blue, start to disappear, leaving the clouds behind.
-
Split the slider for a soft transition.
Hold Alt (Windows) or Option (Mac) and drag one half of the slider. It breaks into two, and the area between them fades smoothly instead of cutting off hard.
-
Change the blend mode to Screen.
The clouds now brighten the original sky rather than replacing it.
-
Brighten the clouds with a clipped Levels layer.
Add a Levels adjustment, clip it to the sky layer as in tip 3, and make the whites a little whiter.
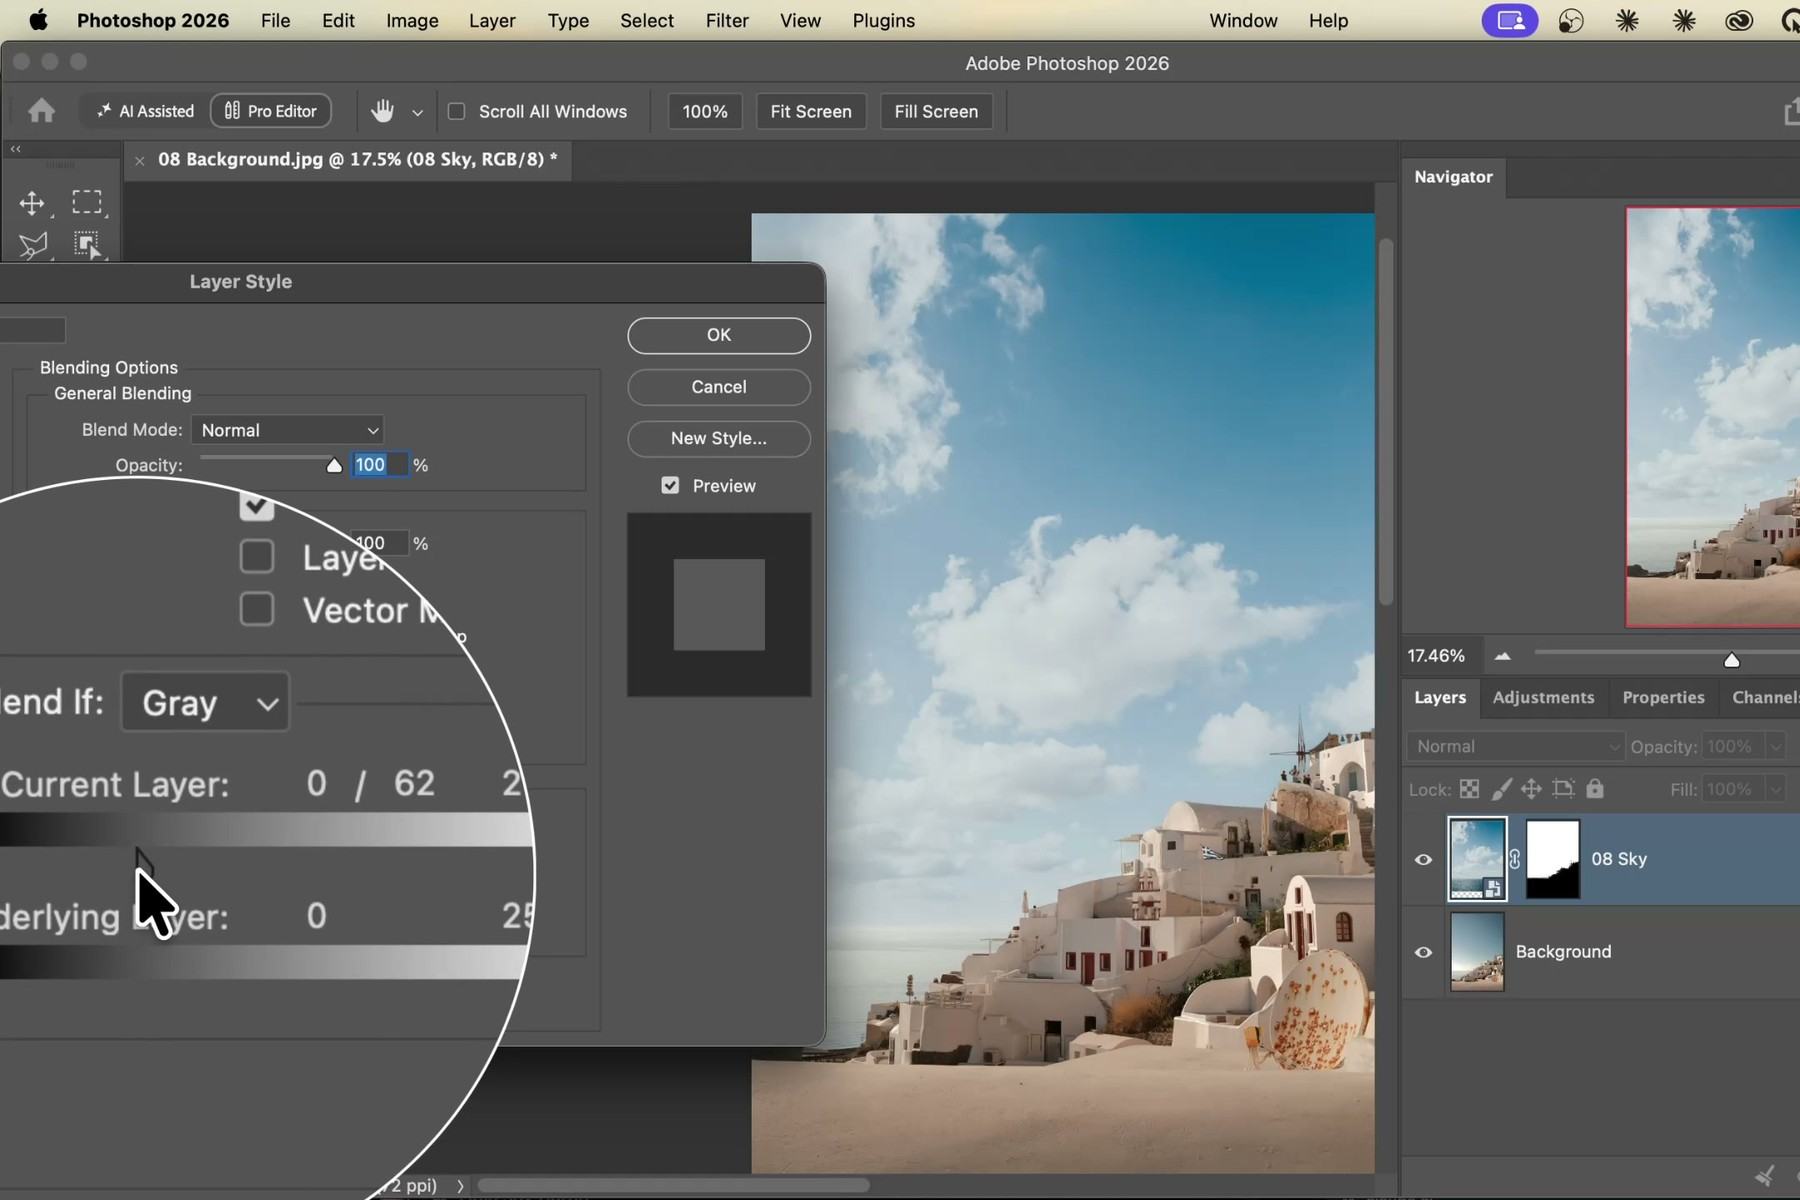
There are more uses in three ways to use Blend If.
09 See the Before and After With One Click


Aaron uses this one all the time. Once a photo has four or five adjustment layers, turning them off one by one to see the original gets old fast. There are two quicker ways, one of them brand new.
-
Solo the background layer.
Hold Alt (Windows) or Option (Mac) and click the eye icon on the background layer. Every other layer turns off and you see the original. Alt-click or Option-click again to bring them all back.
-
Open Quick Compare in the Photoshop beta.
Go to View > Quick Compare. No selection needed. A divider appears across the image; drag it left and right to compare before and after, even zoomed in.
-
Pick the comparison layout.
In the options bar, choose Left/Right Split View, a top-and-bottom split, or go back to a single view of the original.
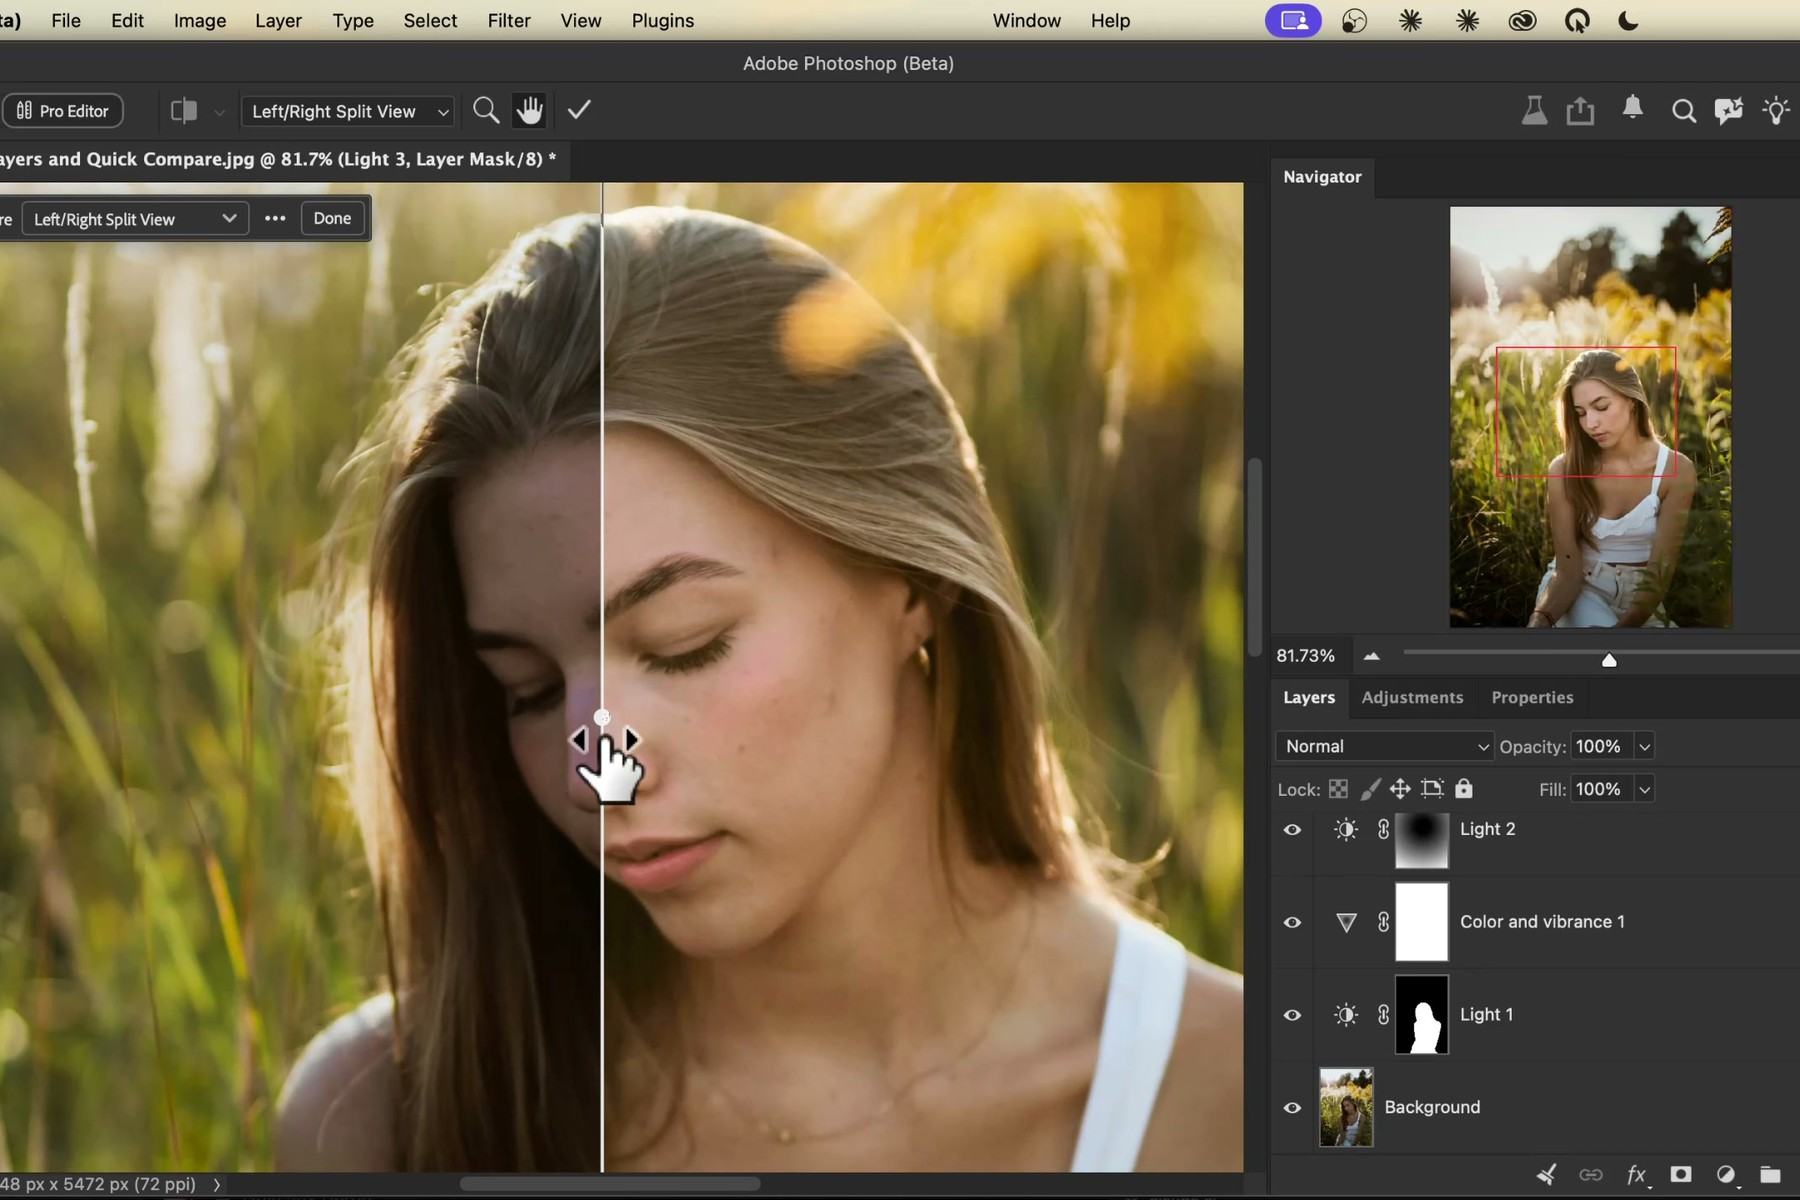
Quick Compare is in the Photoshop beta at the time of writing, so it may change before it reaches the full release.
10 Add Realistic Lens Blur in Camera Raw
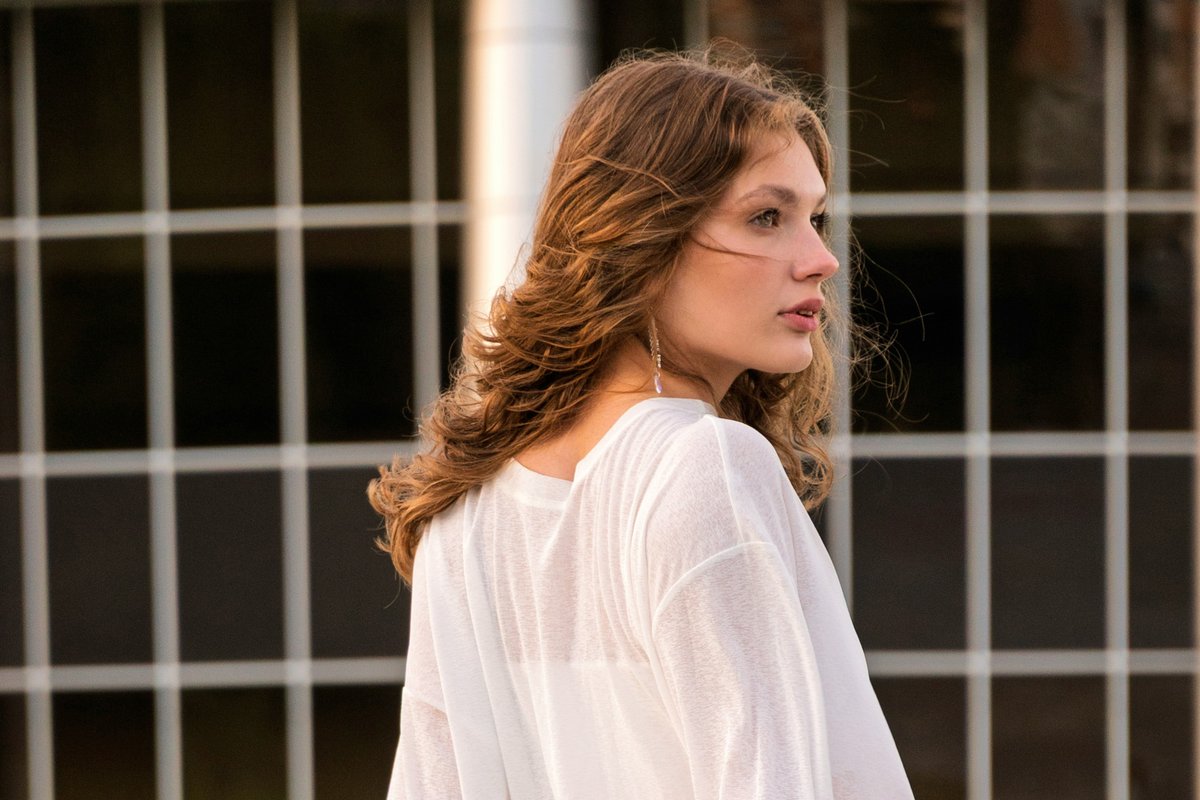
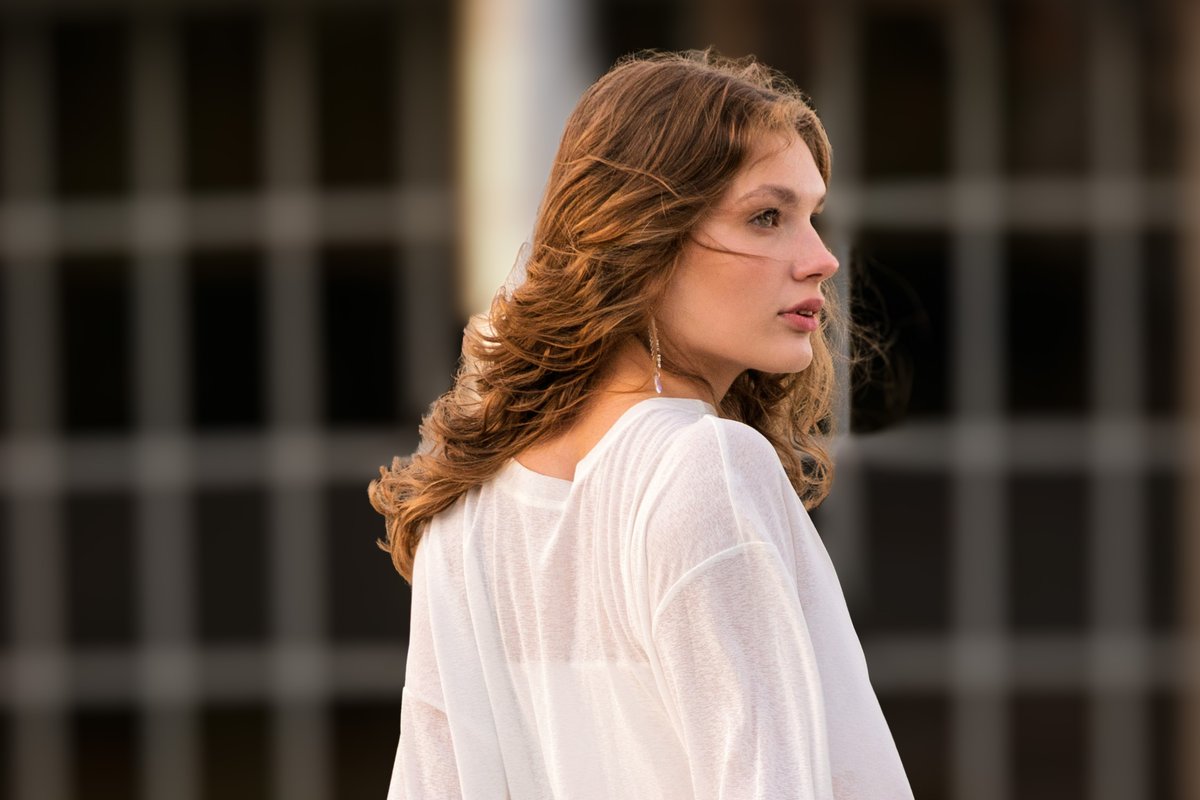
Aaron’s favorite of these Photoshop tips. Camera Raw is built right into Photoshop as a filter, and its Lens Blur turns a busy background into a believable shallow depth of field. It uses AI, but it doesn’t spend generative credits.
-
Convert the layer for Smart Filters and open Camera Raw.
Go to Filter > Convert for Smart Filters, then Filter > Camera Raw Filter.
-
Apply Lens Blur.
Open the Lens Blur panel on the right and click Apply.
-
Set the focus on your subject and raise the blur.
Under Focus Range, use the targeted focus tool and click and drag on your subject, then increase the Blur Amount until the background falls away.
-
Darken the background with a mask.
Open Masking, choose Background, and drag left on the word Exposure. Two adjustments, and the subject stands out. Click OK to return to Photoshop.
For more control over the blur, see realistic background blur with Lens Blur.
Quick Reference: Keys, Menus and Settings
- Brush size[ ]
- Free TransformCmd/Ctrl + T
- Scrubby slider, steps of 10Shift + drag the label
- Bird’s-Eye ViewHold H, click and hold
- Drag to zoomSpace, then Cmd/Ctrl + drag
- Crop toolC
- Stamp VisibleShift Option Cmd E
Shift Alt Ctrl E - Solo a layer, clip or unclipOption/Alt-click
- View a maskOption/Alt-click the mask
Mac first, then Windows where they differ.

Free Downloads
Follow Along on the Same Photos
11 sample images, 8 layered PSDs and the 3-page PDF guide with every tip and shortcut. Free with a PHLEARN account.
Photoshop 2026 Tips: Common Questions
Does the Remove tool use generative credits?
No. Even with Generative AI turned on and cloud processing, the credit balance read 2,870 before the cleanup and 2,870 after. Tip 1 shows the test, step by step.
Can I use the Remove tool without an internet connection?
Yes. Switch the Remove tool to Device processing. The first time, Photoshop downloads the AI model to your computer, which takes a couple of minutes, so do it while you’re still online.
How do I resize an image without zooming out to find the handles?
Use scrubby sliders. While transforming, click and drag on the W or H letter in the options bar to resize, and on X or Y to move. Hold Shift to change the value in steps of 10. Tip 2 covers it.
How do I make an adjustment layer affect only one layer?
Clip it. Click the clipping icon in the Properties panel, or hold Alt (Windows) or Option (Mac) and click between the two layers in the Layers panel. Tip 3 shows how.
How do I reset a slider in an adjustment layer?
Double-click the slider’s handle, or its name, and that one slider goes back to its default. To reset every slider, click the reset icon at the bottom of the Properties panel: once returns to the last state, twice returns everything to default.
How do I move around a zoomed-in image quickly?
Hold H, then press and hold the mouse or trackpad. Photoshop zooms out so you can see the whole image; move to the spot you want and let go, and you’re zoomed back in right there. Tip 5 also shows a second way to zoom by dragging.
How do I straighten a horizon without using generative credits?
Rotate with the Crop tool, then choose Content-Aware Fill instead of Generative Expand in the Fill menu of the options bar. If the background is simple enough, it fills the empty corners without AI and without credits.
Should Select Subject use Device or Cloud processing?
Cloud gives more accurate selections, especially around hair. It needs an internet connection and takes a little longer, and it doesn’t spend generative credits. Set it in Photoshop’s Image Processing settings, or per selection from the drop-down next to Select Subject. Tip 6 covers both.
What is the shortcut for Stamp Visible in Photoshop?
Shift+Option+Command+E on a Mac, or Shift+Alt+Ctrl+E on Windows, with a new empty layer selected. If you forget it, Image > Apply Image does the same merge. Tip 7 explains when you need it.
Where is Quick Compare in Photoshop?
In the Photoshop beta, under View > Quick Compare. Drag the divider to compare before and after, even zoomed in, and pick a left/right or top/bottom split. It’s a beta feature, so it may change before the full release.
Does Lens Blur in Camera Raw use generative credits?
No. Lens Blur uses AI, but it doesn’t spend credits. Tip 10 shows how to apply it, set the focus on your subject and darken the background with a mask.
Are the sample images and PSDs free?
Yes, with a free PHLEARN account. You get all 11 sample images, the 8 layered PSDs in three packs, and the 3-page PDF guide, so you can follow along on the same photos.
New Free Tutorials View All »






Enjoying This Free Tutorial? Go Further with PRO.
200+ PRO courses. 1,000+ practice files. One membership.

Unlimited access to every PRO course
New PRO courses every month
Layered PSDs and RAW files to follow along
100+ Lightroom Presets, LUTs, Actions and Brushes
Stream in up to 4K, with captions and chapters
Watch on any device: desktop, tablet or phone
4.93 average from 3,900+ reviews · 2M+ students